The Caldera Forms Authorize.net add-on version 2 can be used to create recurring payment plans or one time credit payments or eCheck payments. This document covers accepting one time payments. You can combine multiple payment types into one form if you wish, using conditional logic.
Before beginning, make sure you have both the Caldera Forms 1.4 or later and Caldera Forms Authorize.net 2.0 or later plugins activated.
In addition, make sure you have your API keys handy. Finding your API keys is covered in the getting started guide. Also, keep in mind that production and sandbox API keys are not interchangeable.
Setting Up The Authorize.net Payment Processor
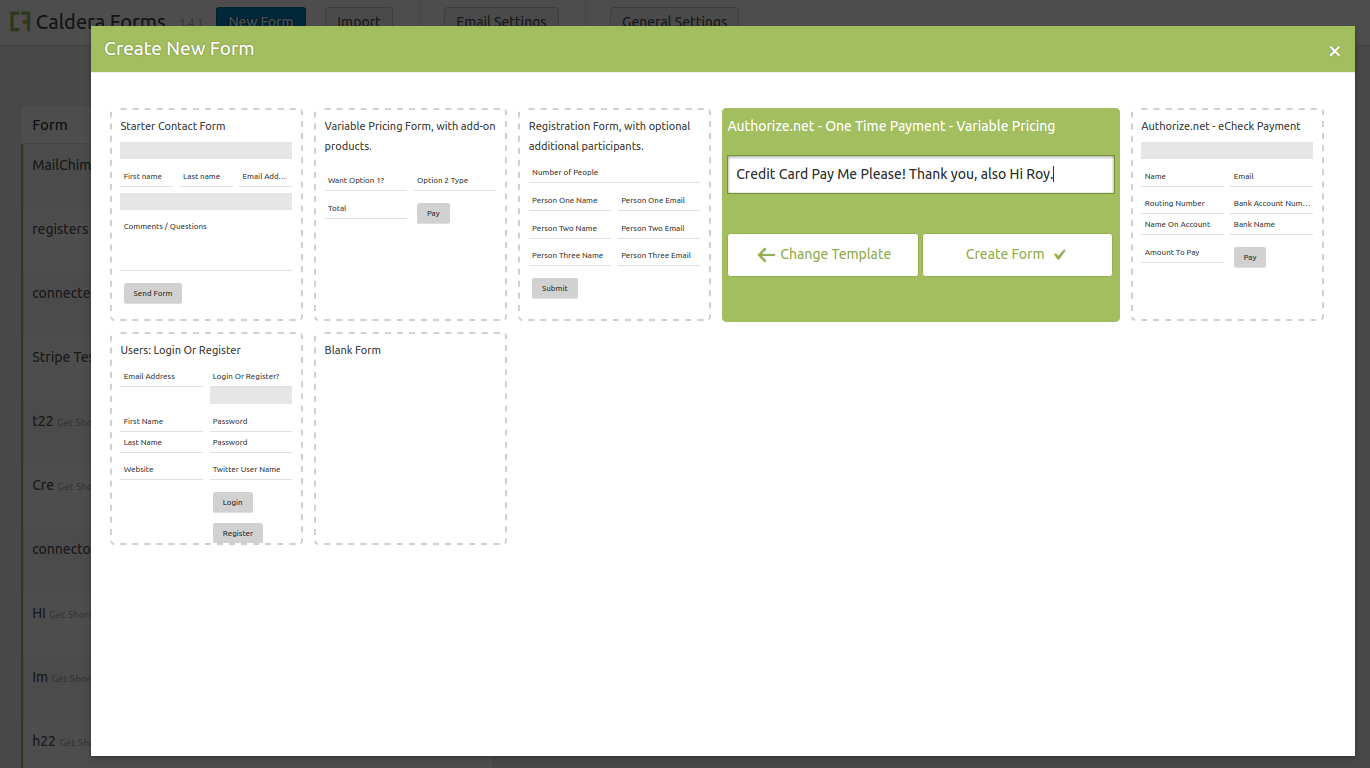 When you have the Authorize.net for Caldera Forms payment processor plugin installed and activated, you will see two new form templates when creating a new form. The first provides an example where both the price, and quantity are variable. The second template is a simpler example, using a fixed price.
It is recommend, but optional, to start with one of these form templates. When you used these templates, the processor will already be added to the form, and the field bindings done for you. It will only be necessary to update your API information in order to make the form work.
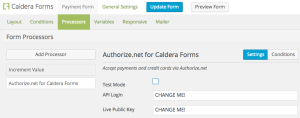 If you are adding the Authorize.net payment processor to a new form or an existing form, you will need to go to the “Processors” tab of the Caldera Forms editor, and click “Add Processor.” If you do not see the Authroize.net payment processor there, then you either need to activate the plugin, or you need to upgrade to Caldera Forms 1.3 or later.
Once the processor is added, you will need to set your API login and Live Public key. You can use the “Test Mode” setting to process payments against the Authorize.net sandbox. Be sure to disable this before going live.
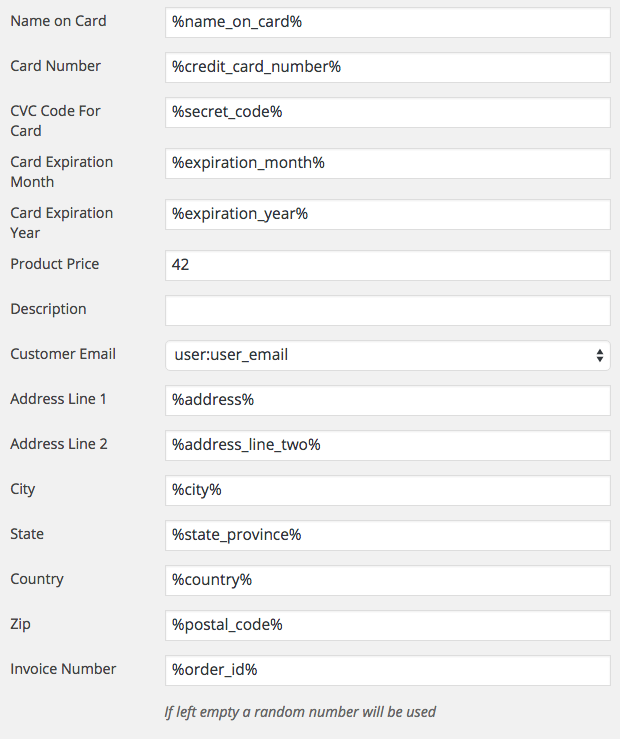 The form itself will require quite a few fields, hence why we recommend starting from a template form. You must have a field for the name on the card, card number, card secret code, card expiration month, and card expiration year.
In the example form, input masking is used for the expiration fields to ensure that only numbers can be entered into these fields. It is recommended that you do the same.
The invoice number field is optional. Keep in mind that leaving it blank will result in a random number being used for invoice number. You can also bind that to a form field, or use an incremental value processor to create a sequential order number.