In this getting started guide you will learn how to easily connect Caldera Forms to Zapier by creating a WordPress to Facebook page “zap.” Zapier automates tasks such as pushing users’ data into a CRM, posting a status to Facebook or even capturing data directly into Google Sheets, as well as many other services.
If you do not have a Zapier account already and wish to use Zapier, you may sign up on zapier.com. There is a free plan available.
Create A Caldera Form To Post A Status To Facebook
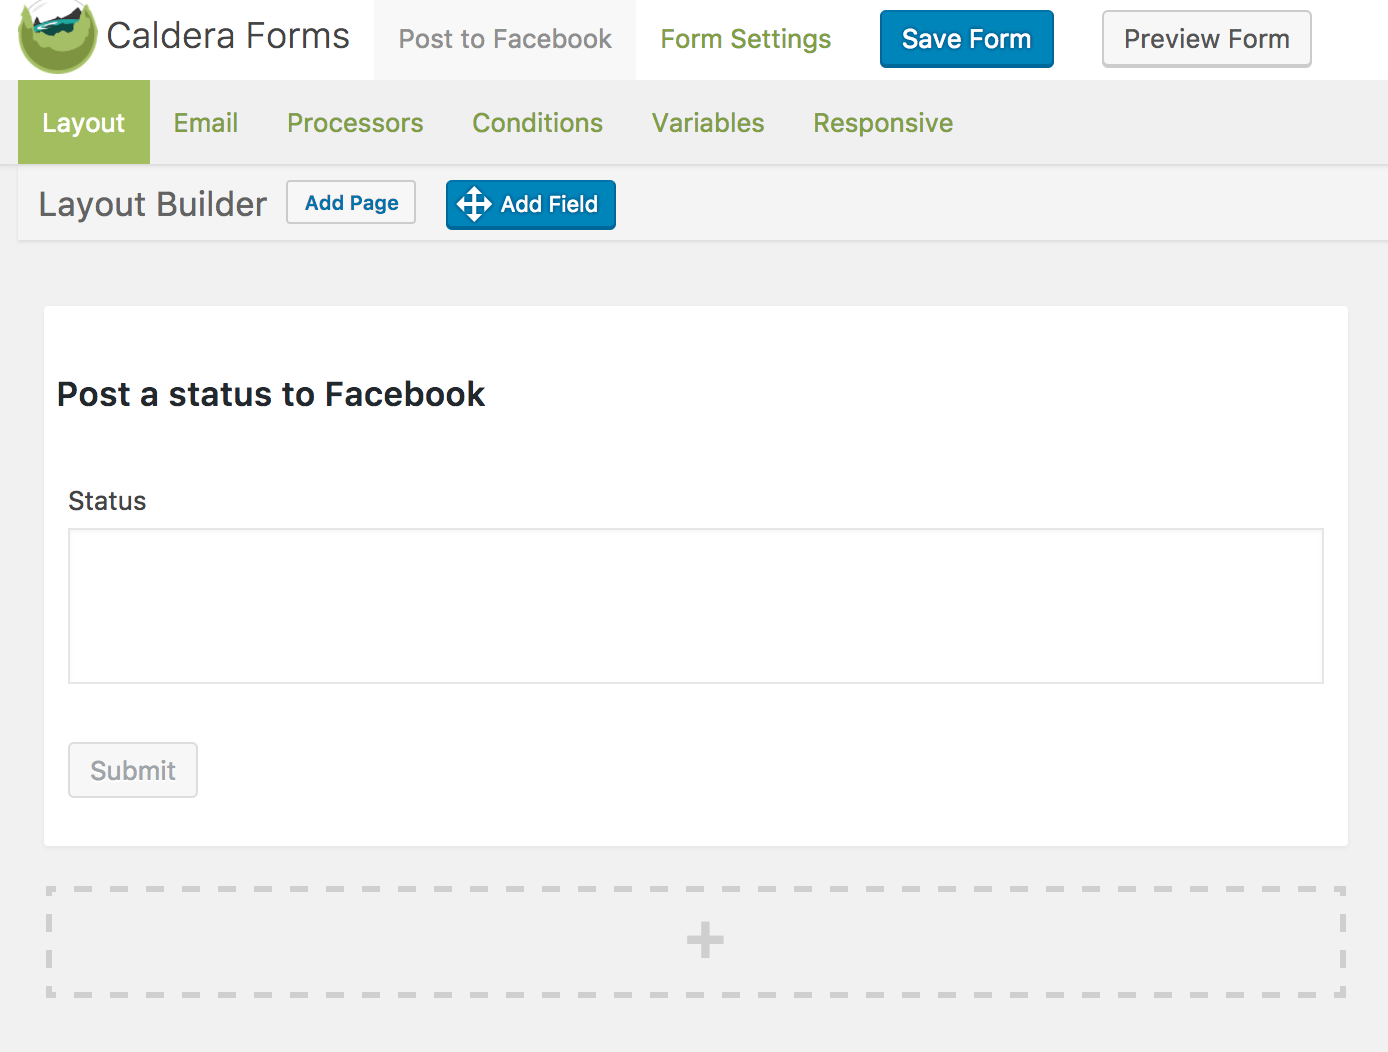
Firstly we will need to create a form using Caldera Forms. We will be creating a simple form that allows users to write a status and it will post to the Caldera Forms Facebook page.
Our form will consist of a paragraph text field and a submit button. That is all we need to pass to Facebook to create a new status for Facebook.
If you have never created a Caldera Form before, I would recommend checking out our Getting Started: Create A New Form guide for a more detailed look.
When you have created your form it should look similar to the image on the left. This will be a good point to save your form.
Adding The Zapier Processor
Once the form is set up, you are able to add the Zapier processor. This will handle the communication between Caldera Forms and Zapier.
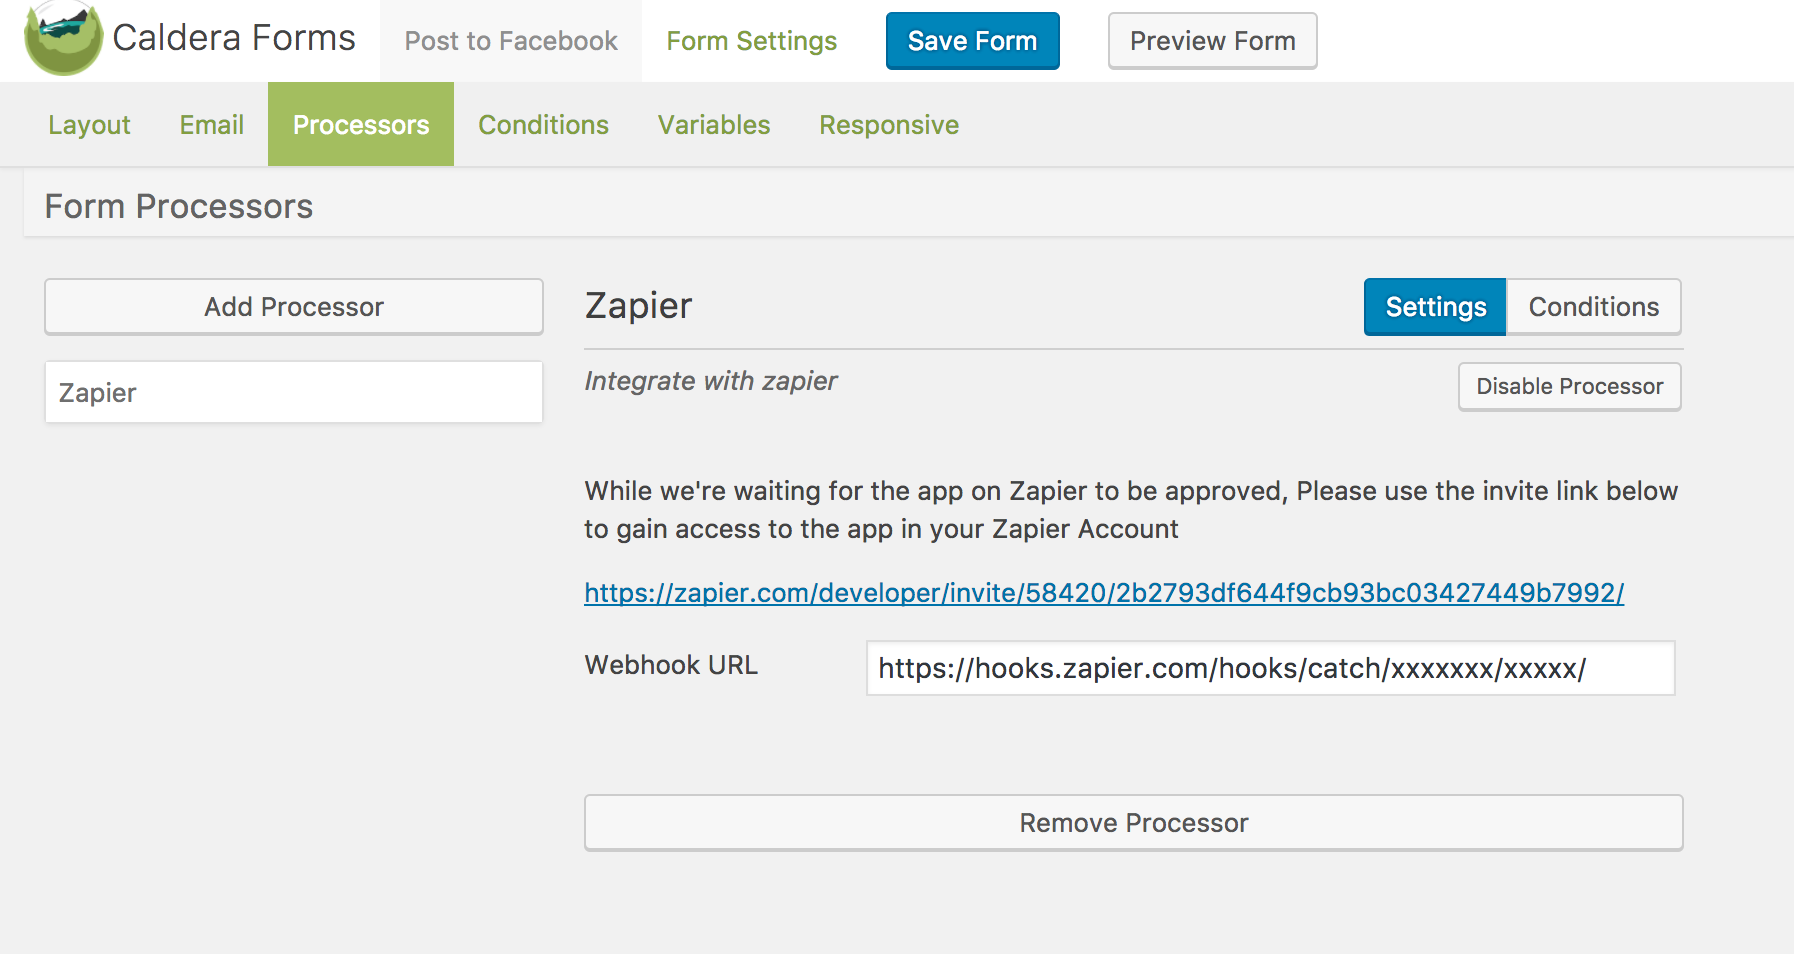
Inside your form editor, select the Processors tab. This will bring up the Processors Settings Page where you will need to Add a Processor. Once selected a list of processors will be available, select the Zapier Processor and click Add Processor.
Inside this processor it takes only one option: the webhook. This is how Caldera Forms communicates with your Zapier account. Once we have setup the webhook in Zapier the next step you will be to insert your webhook URL in the processor and start automating form entries.
Let’s Get Zapping!
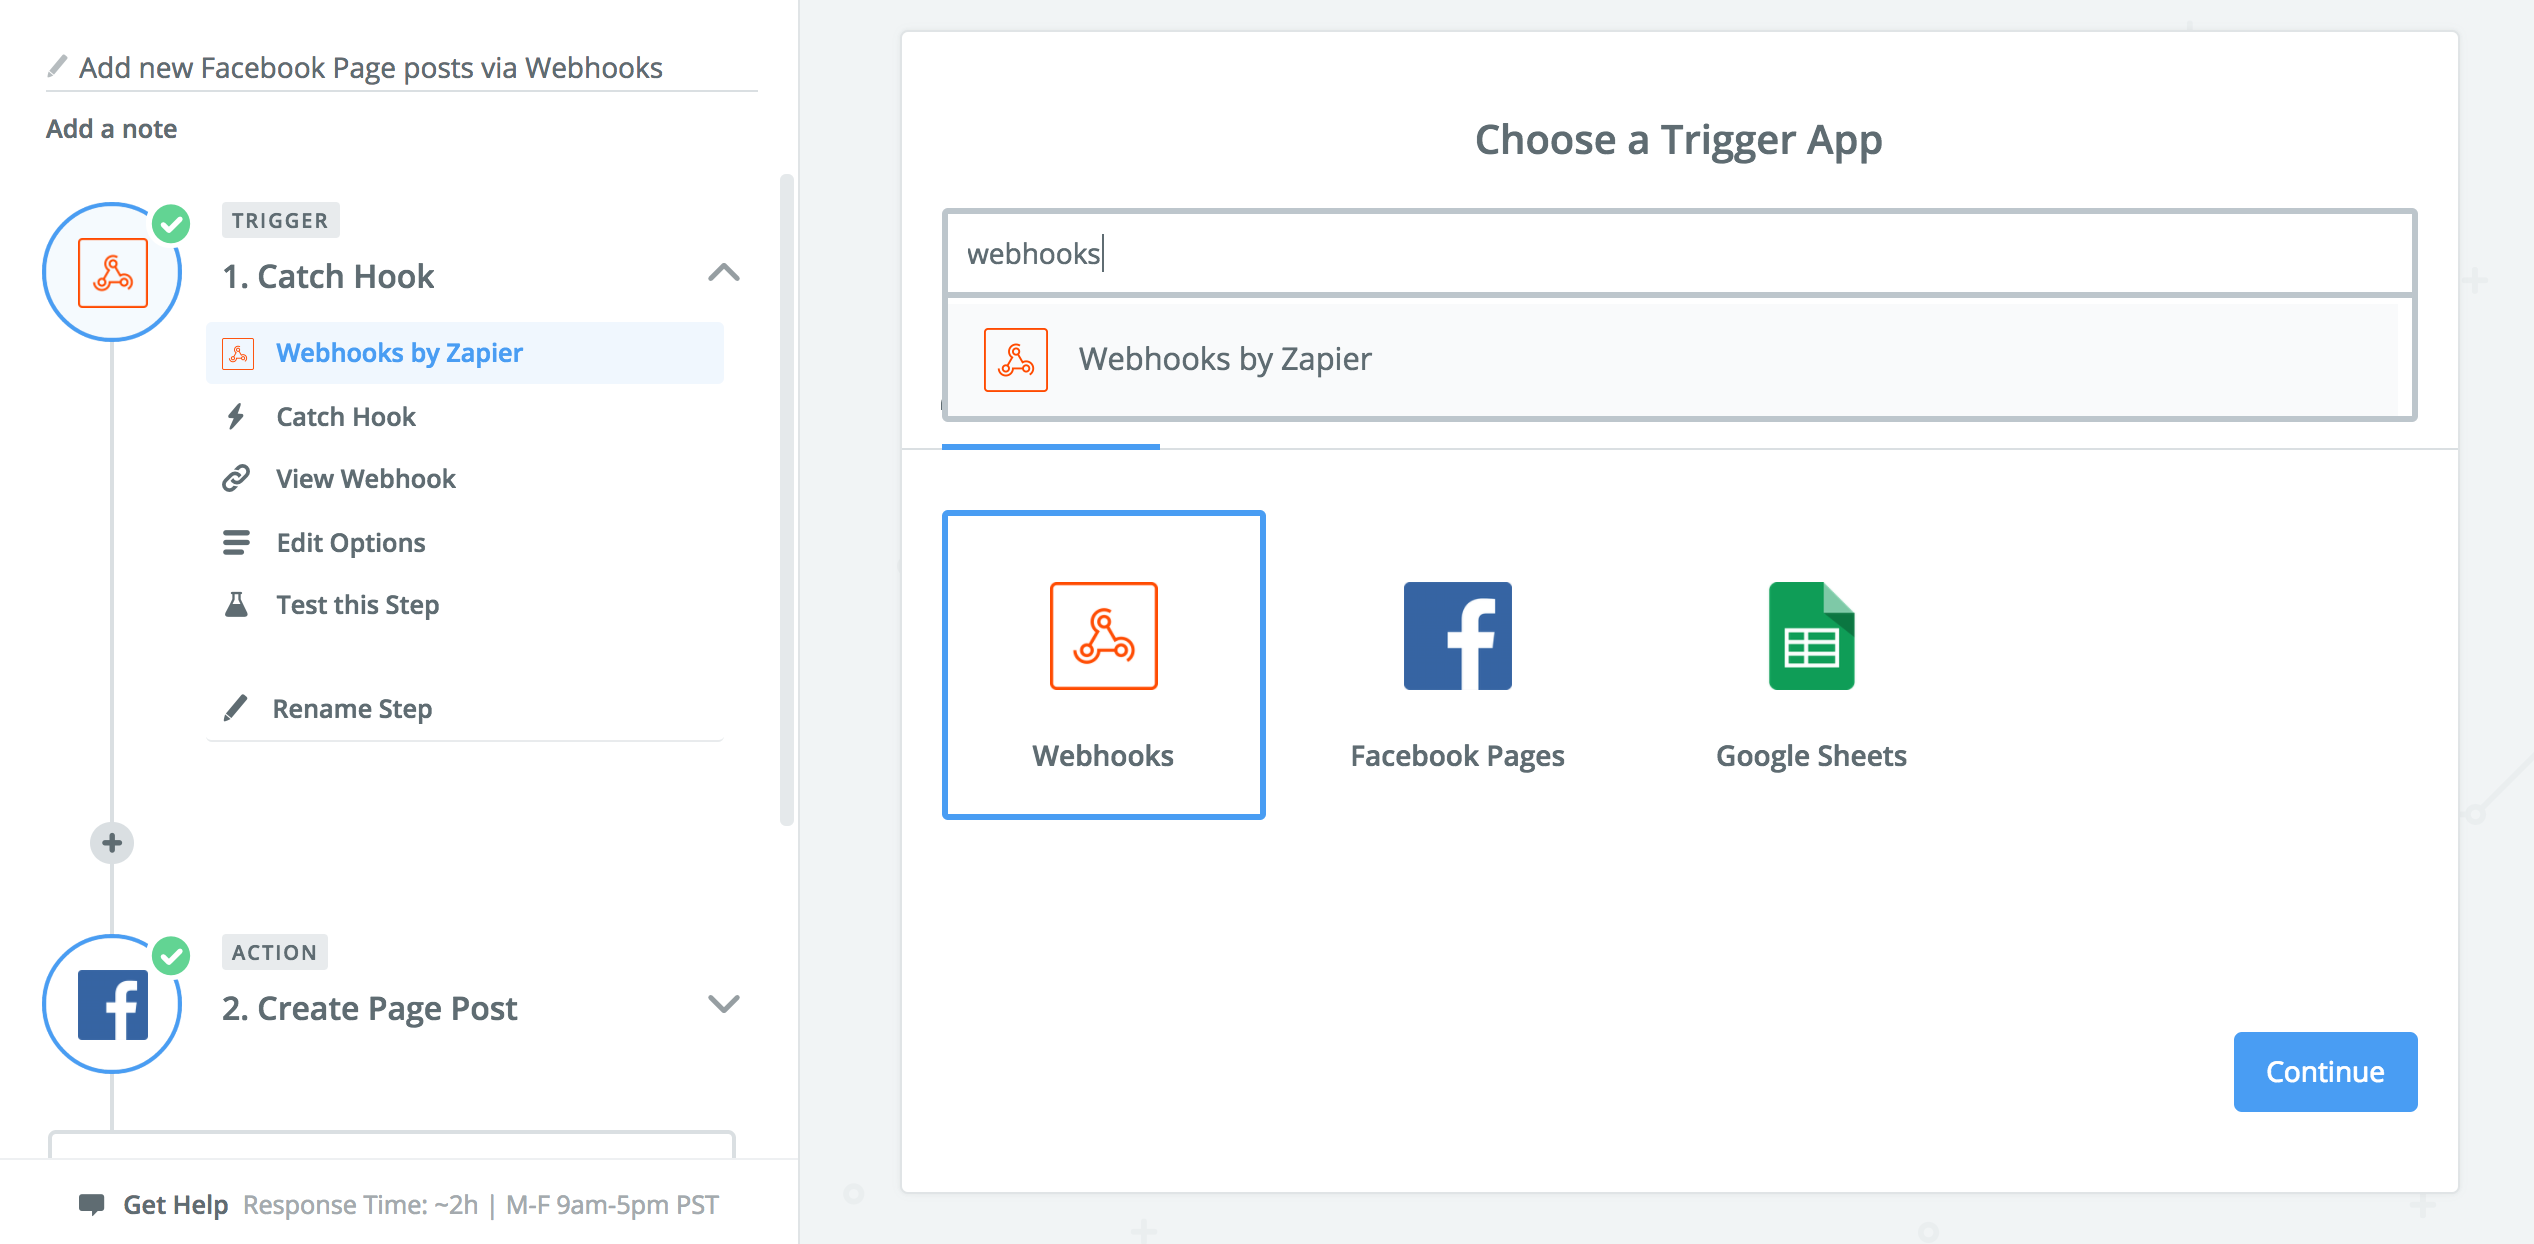
Zapier uses something called “Zaps.” A Zap is a trigger with an event. In our case, the trigger will be a webhook (which the Zapier processor will handle for us) and the event is to post a status to a Facebook page. This is why we are calling it the WordPress to Facebook page zap. We are going to start by creating a new Zap inside the Zapier dashboard by selecting the Make A Zap button.
Step 1: Selecting a trigger in Zapier
We will be selecting Webhook as our trigger for our Zap. You should see a search field where you can search Webhook and select Webhooks for Zapier. Click Continue to proceed to the next step.
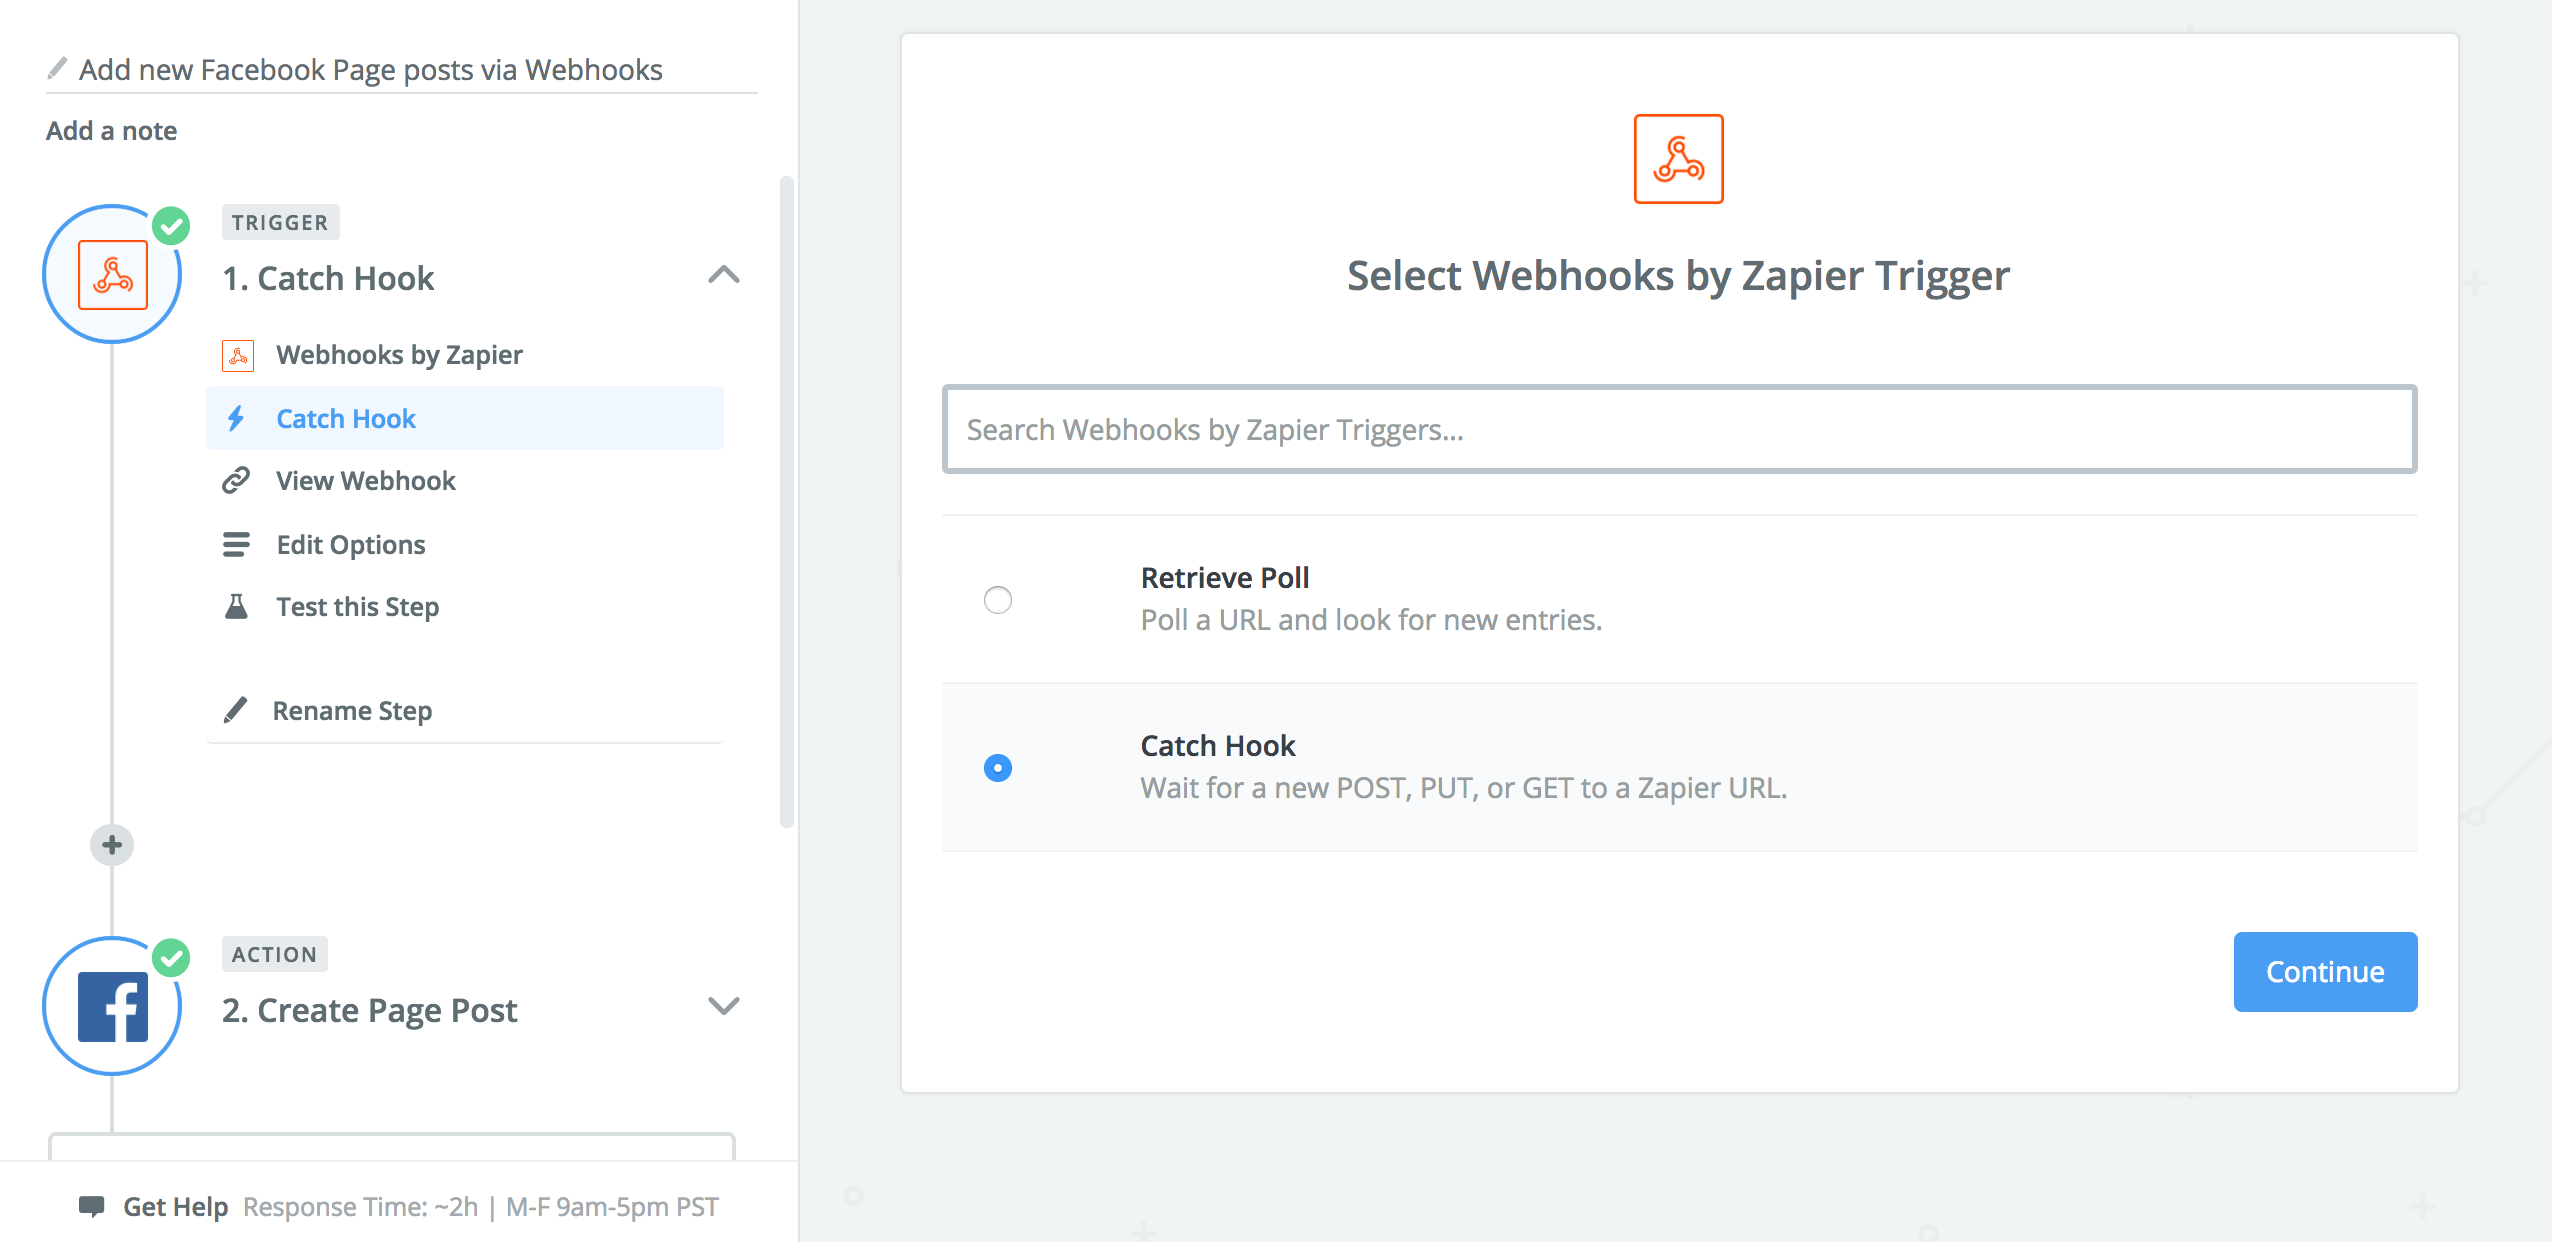
Step 2: Catch The Request
Now you will need to tell Zapier how to get the data. In our case we will use the Catch Hook option. This will be used whenever a POST, PUT or GET request is sent to Zapier. Click Continue to proceed to the next step.cal
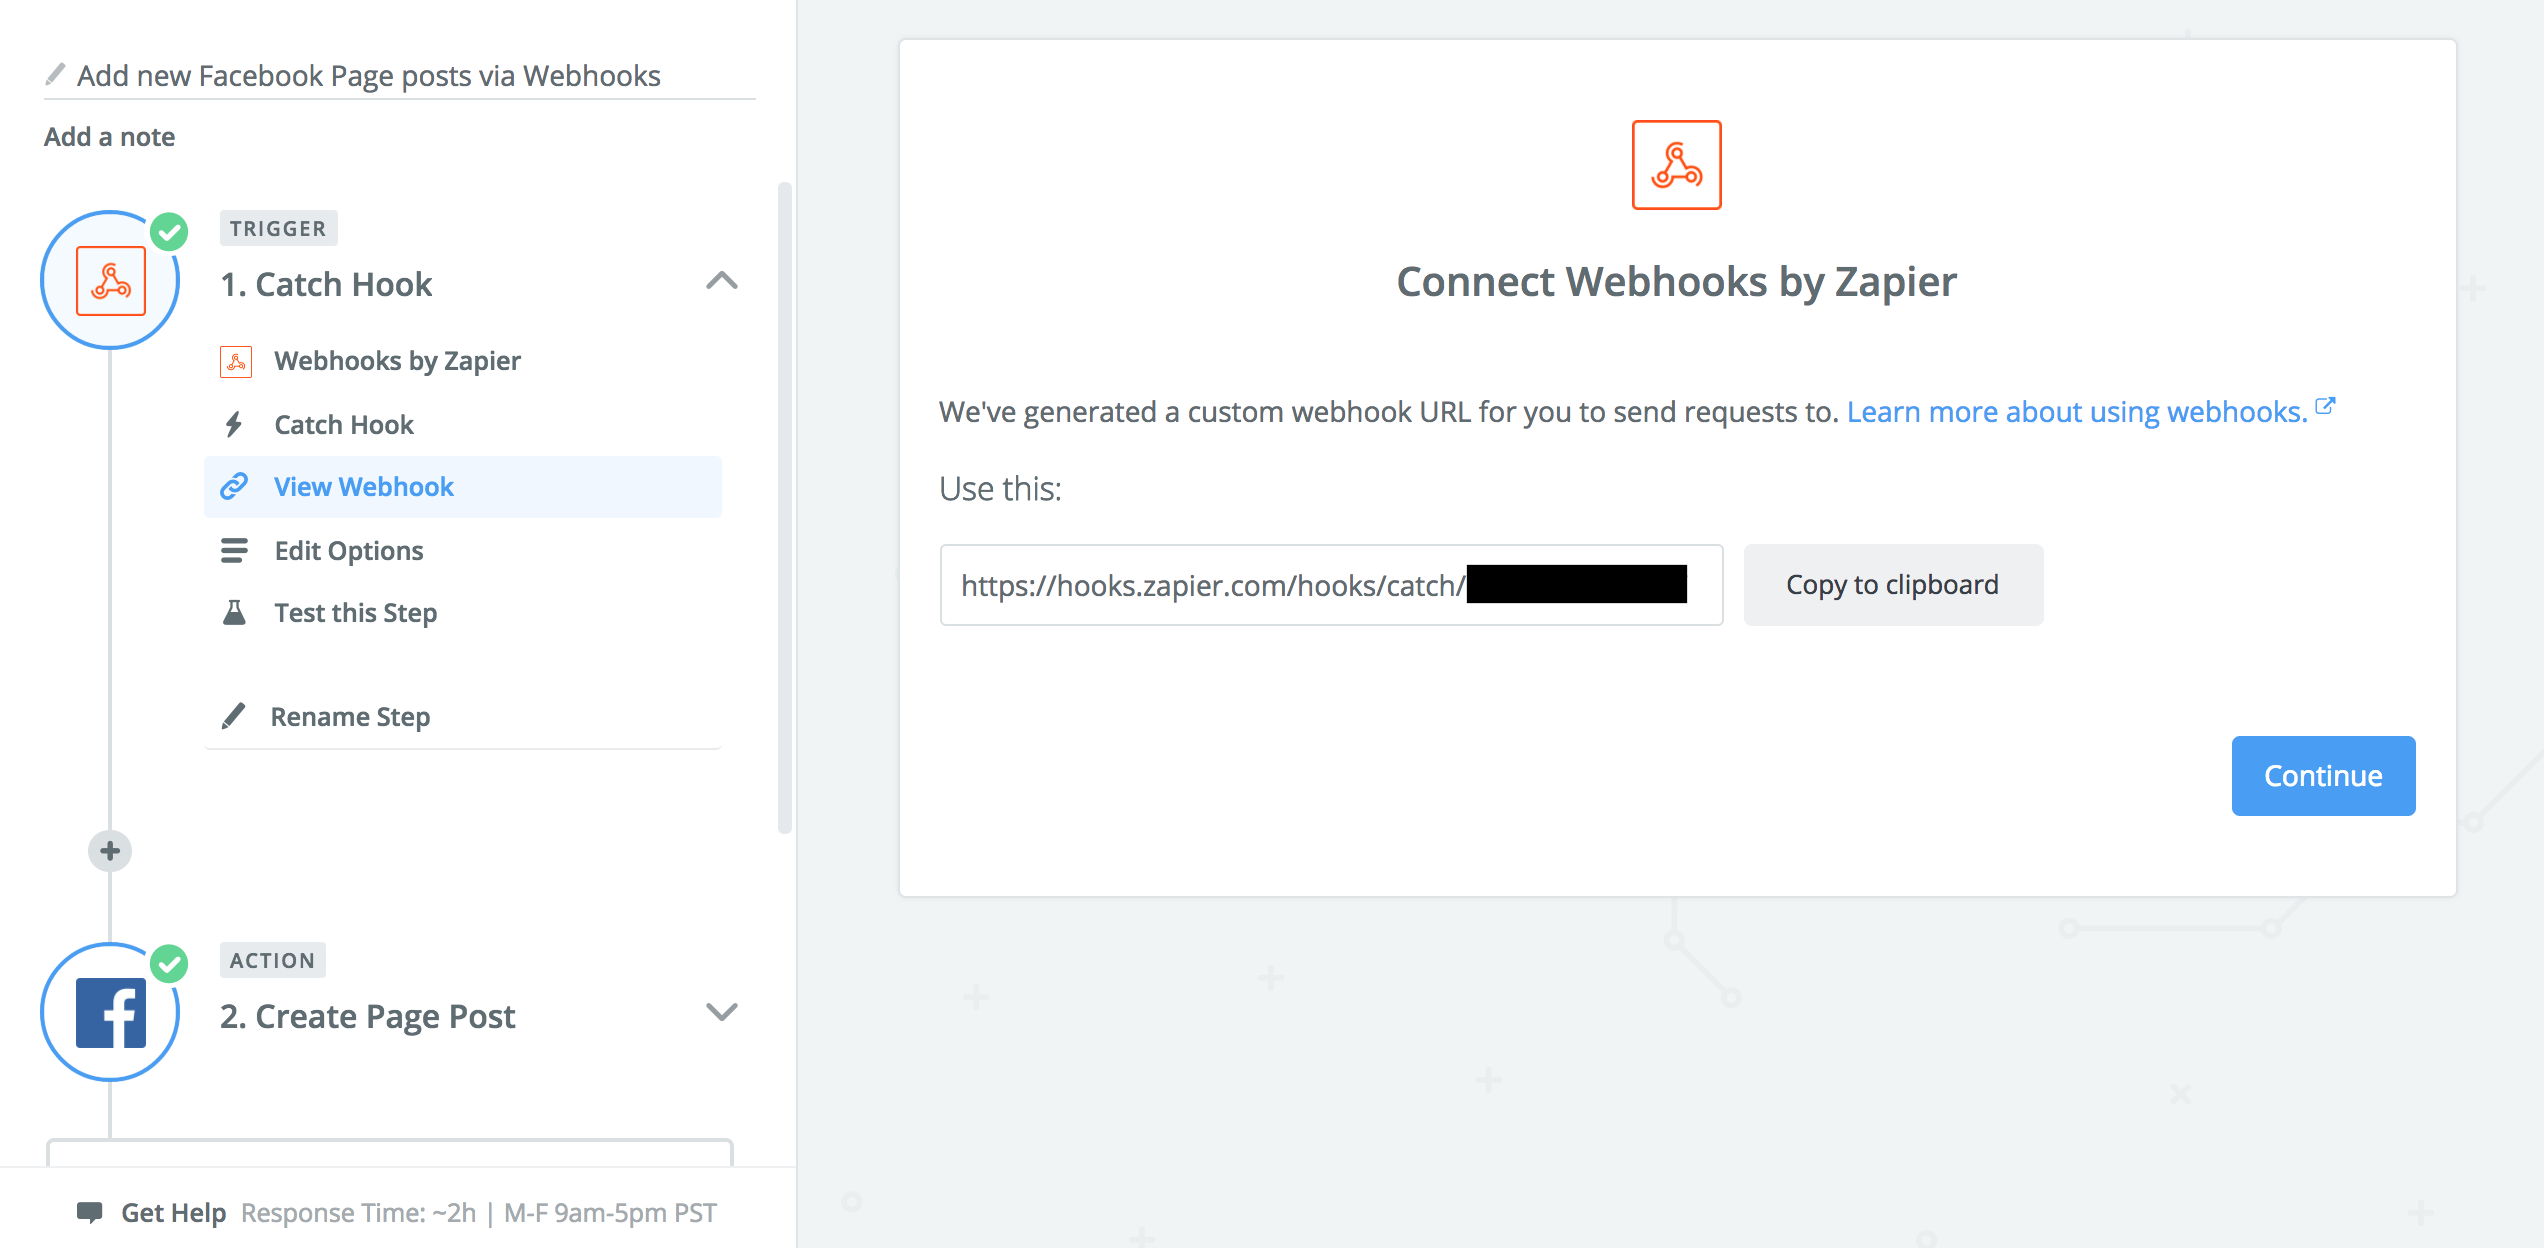
Step 3: View The Webhook
This step is important: this is where you will receive your webhook. Be sure to copy this to your clipboard and head over to your Zapier processor in your other tab in your browser and paste it into the webhook setting and save your form.
Now preview your form, fill it out and submit the form. This will not complete the WordPress to Facebook page zap just yet, but we will be able to check to see if Zapier is retrieving the webhook trigger correctly in the steps to follow.
Go back to the Zapier dashboard and click Continue.
OPTIONAL: Your Caldera Forms Zapier Processor will have a special invitational link for existing Zapier and Caldera Forms users. You can click on this link and open Zapier to the setting up a Zap step inside Zapier, creating a shortcut through the steps above.
Simply click on the invitational link inside the processor. Be sure to open it in a new window as we will need to come back to the processor after setting up the webhook in Zapier. If you follow the invitational link, you should be in the Zap dashboard waiting to setup a new Zap.
If not, you are able to create it normally as outlined above.
Step 4: Edit Options and Testing
In this case we do not need to Edit Options inside Zapier, by default all field data is sent through. You are able to run the trigger for this Webhook should you wish to only fire when certain data is received. We will not be covering this step in detail. Click Continue to proceed to the last step of the trigger.
If you have not sent through a form submission yet, do so. We will need to ensure that the webhook received the data from Caldera Forms. If everything is setup correctly, you will see a successful message which will look similar to the following:

If you do not see this success message, there might be a misconfiguration and you will need to go back to previous steps and ensure that data was posted to the webhook by submitting at least once with your form. If there is no submission, it might show an error. You can read the error to find out how to fix the problem.
Step 5: Selecting An Action
As mentioned in the beginning of this post, Zapier offers an array of services to automate with. In this case we will be creating a WordPress to Facebook page zap. Similar to step 1, we will add an action and search for Facebook Pages. You may select a different service if you are following this guide to connect to a different service.
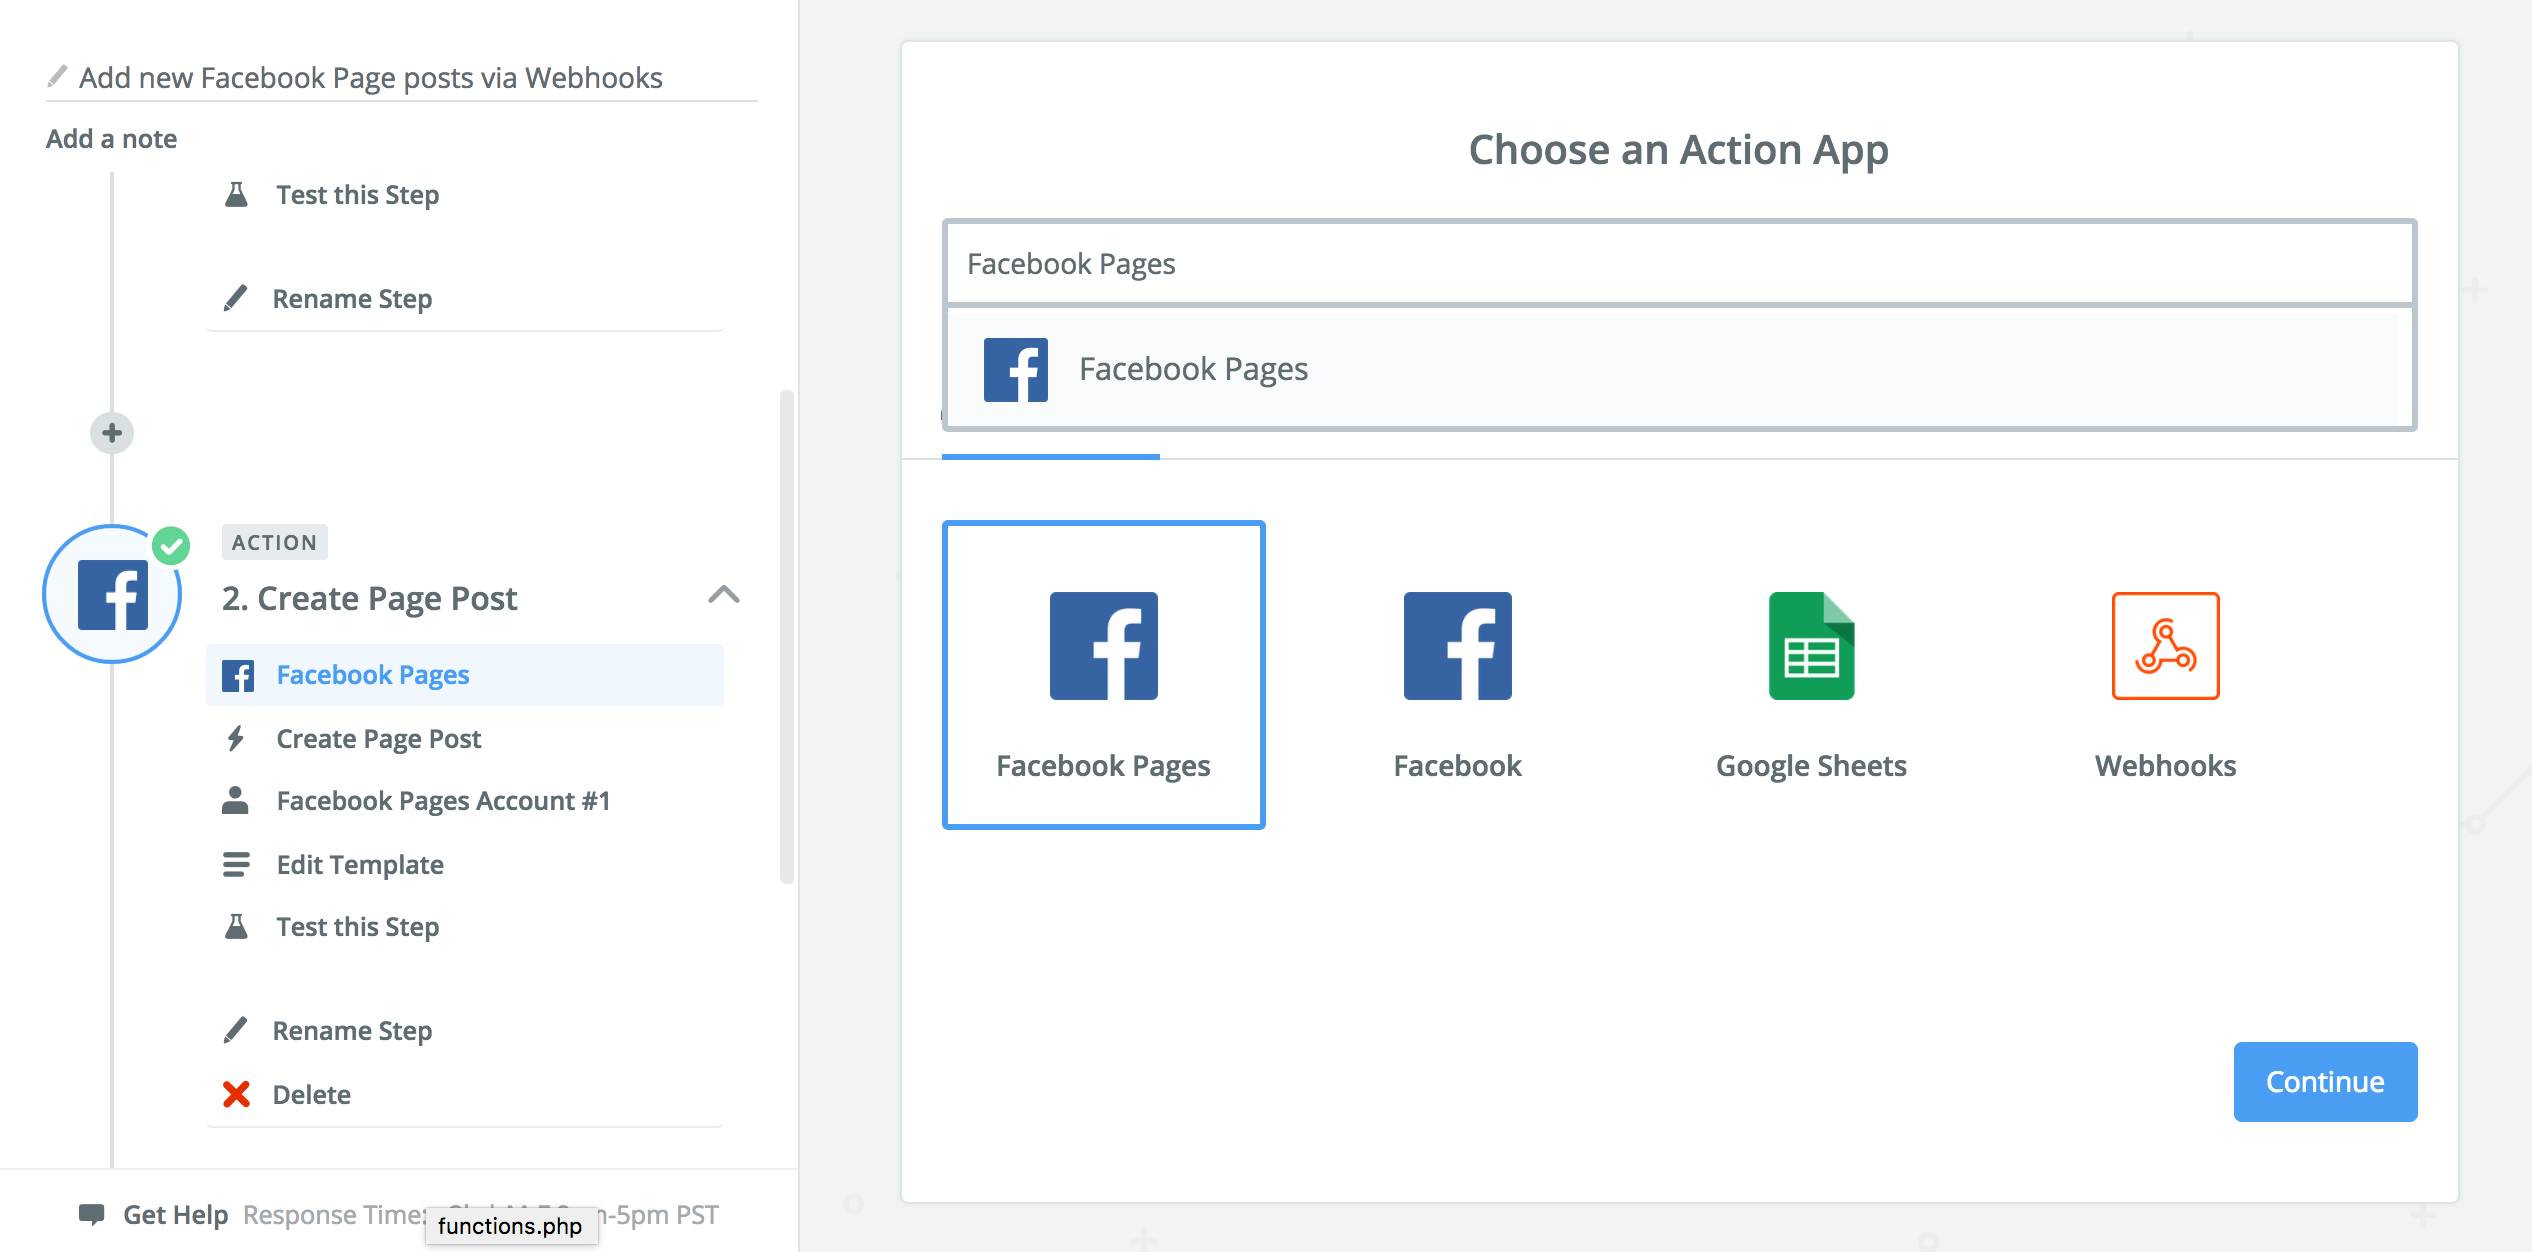
Click Continue to proceed to the next step.
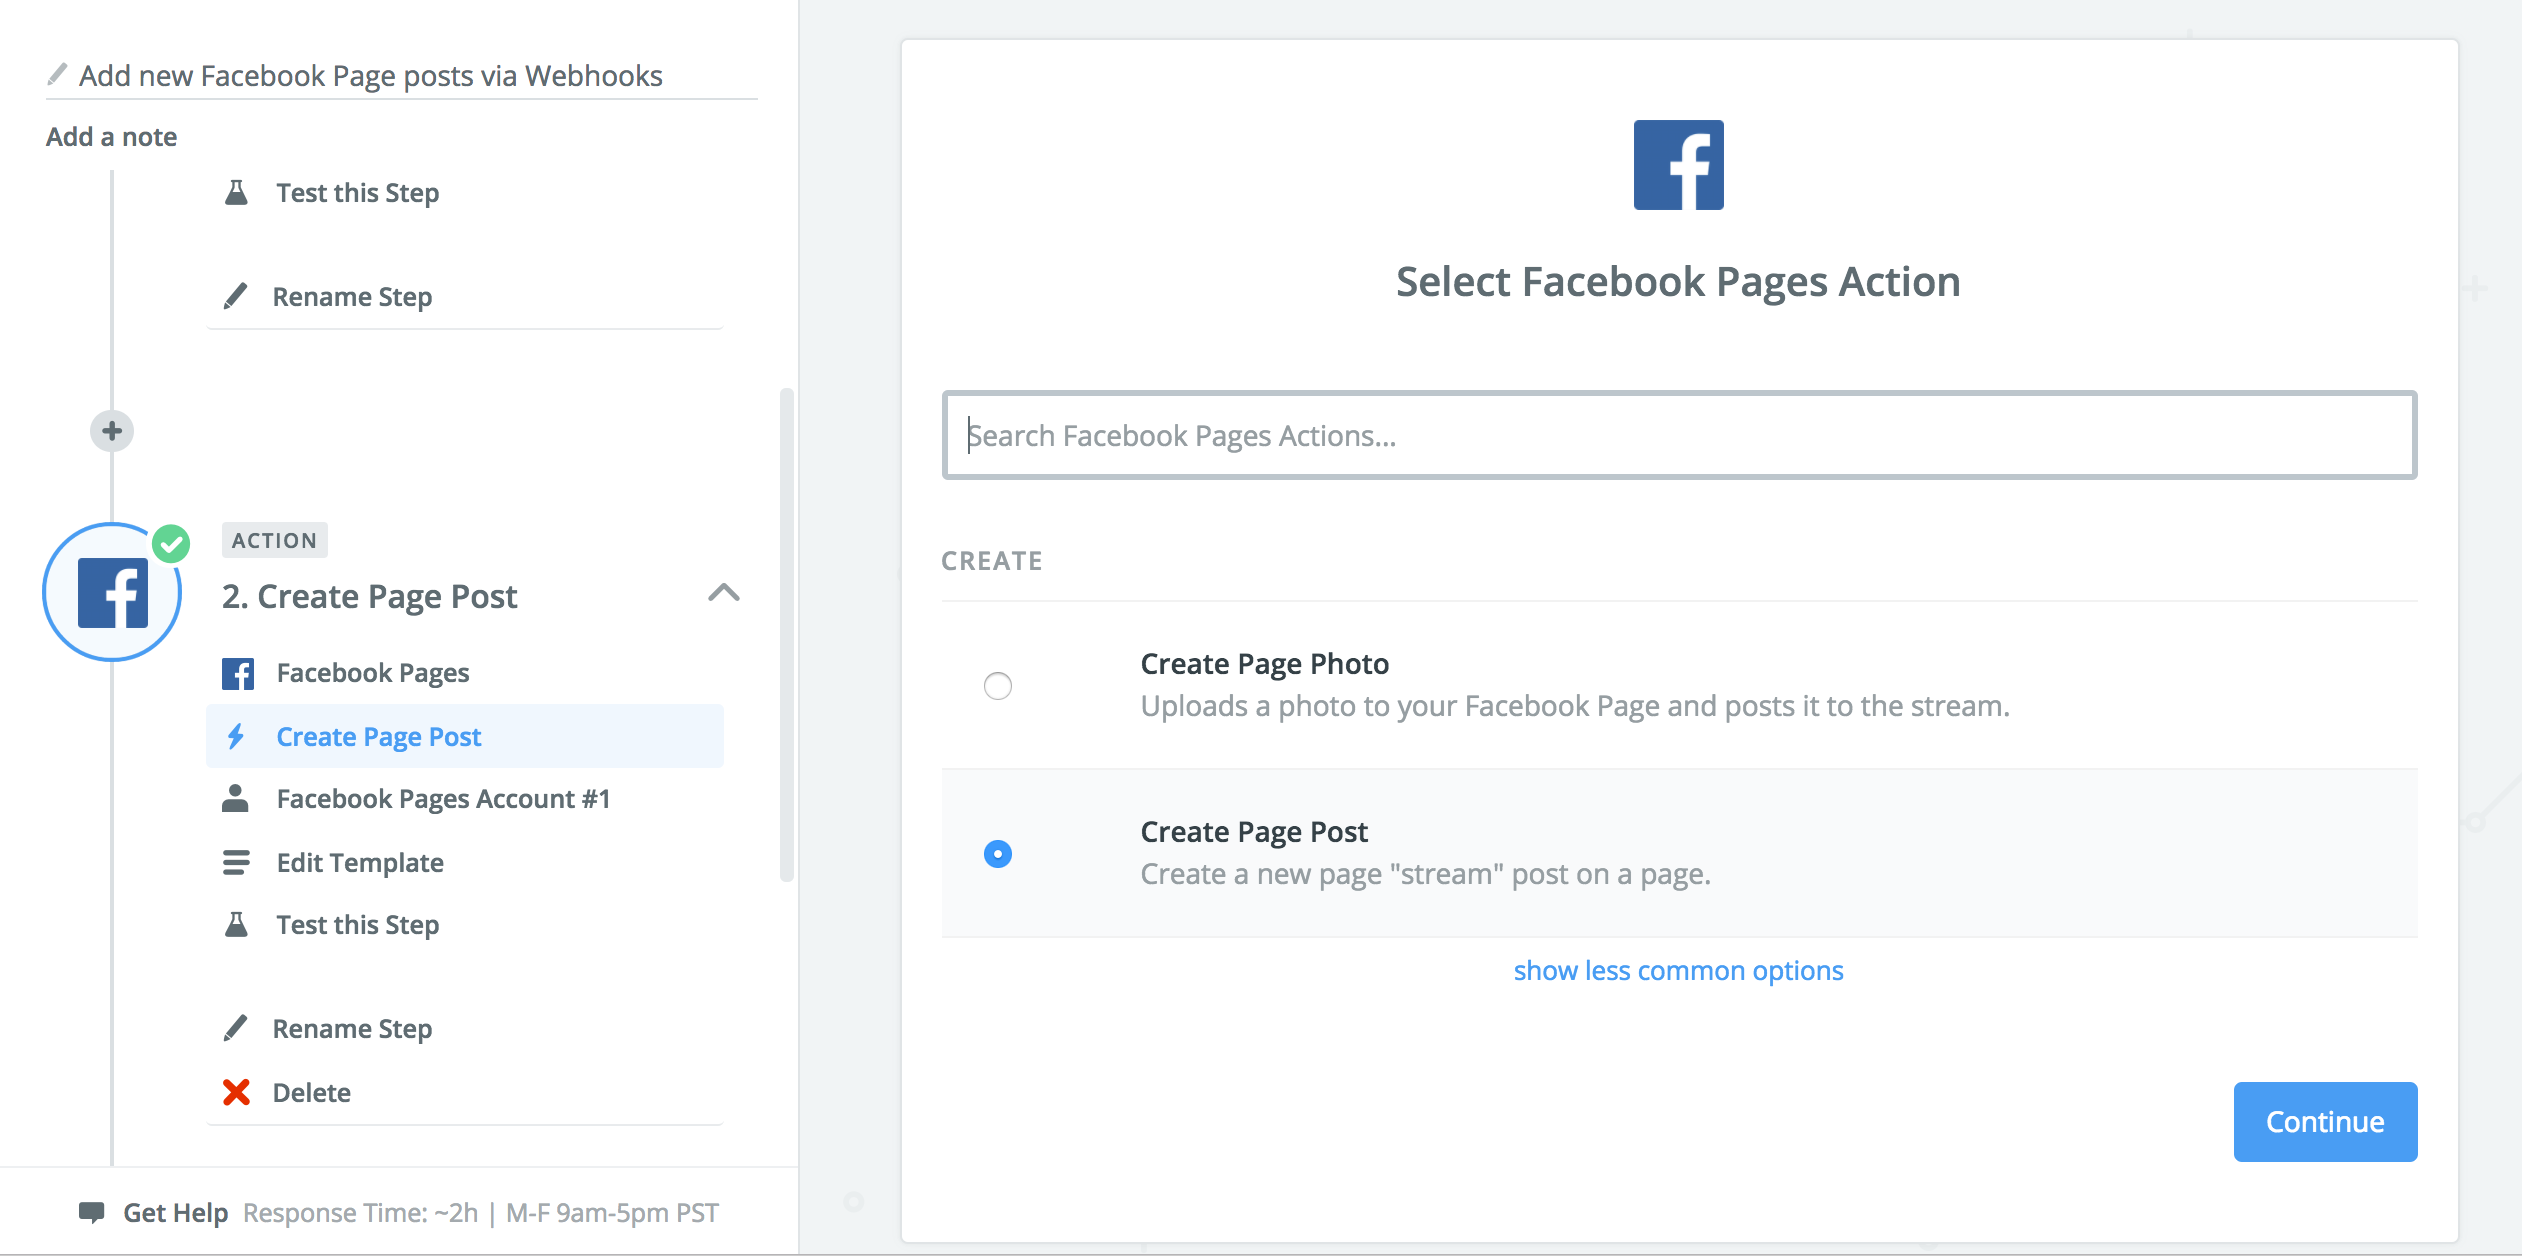
Step 6: Select What You Would Like To Do From WordPress to Facebook Page
In this case, we will create a new page post every time the trigger is actioned. Other services that are not Facebook will have specific options relating to the service you choose.
Be sure to select Create a page post and click Continue to proceed to the next prompt screen. Be sure to authenticate and allow access to Zapier for your Facebook account. Once authenticated, you will be able to select which Facebook page this applies to. Click Continue to proceed until you reach the Edit Template prompt screen.
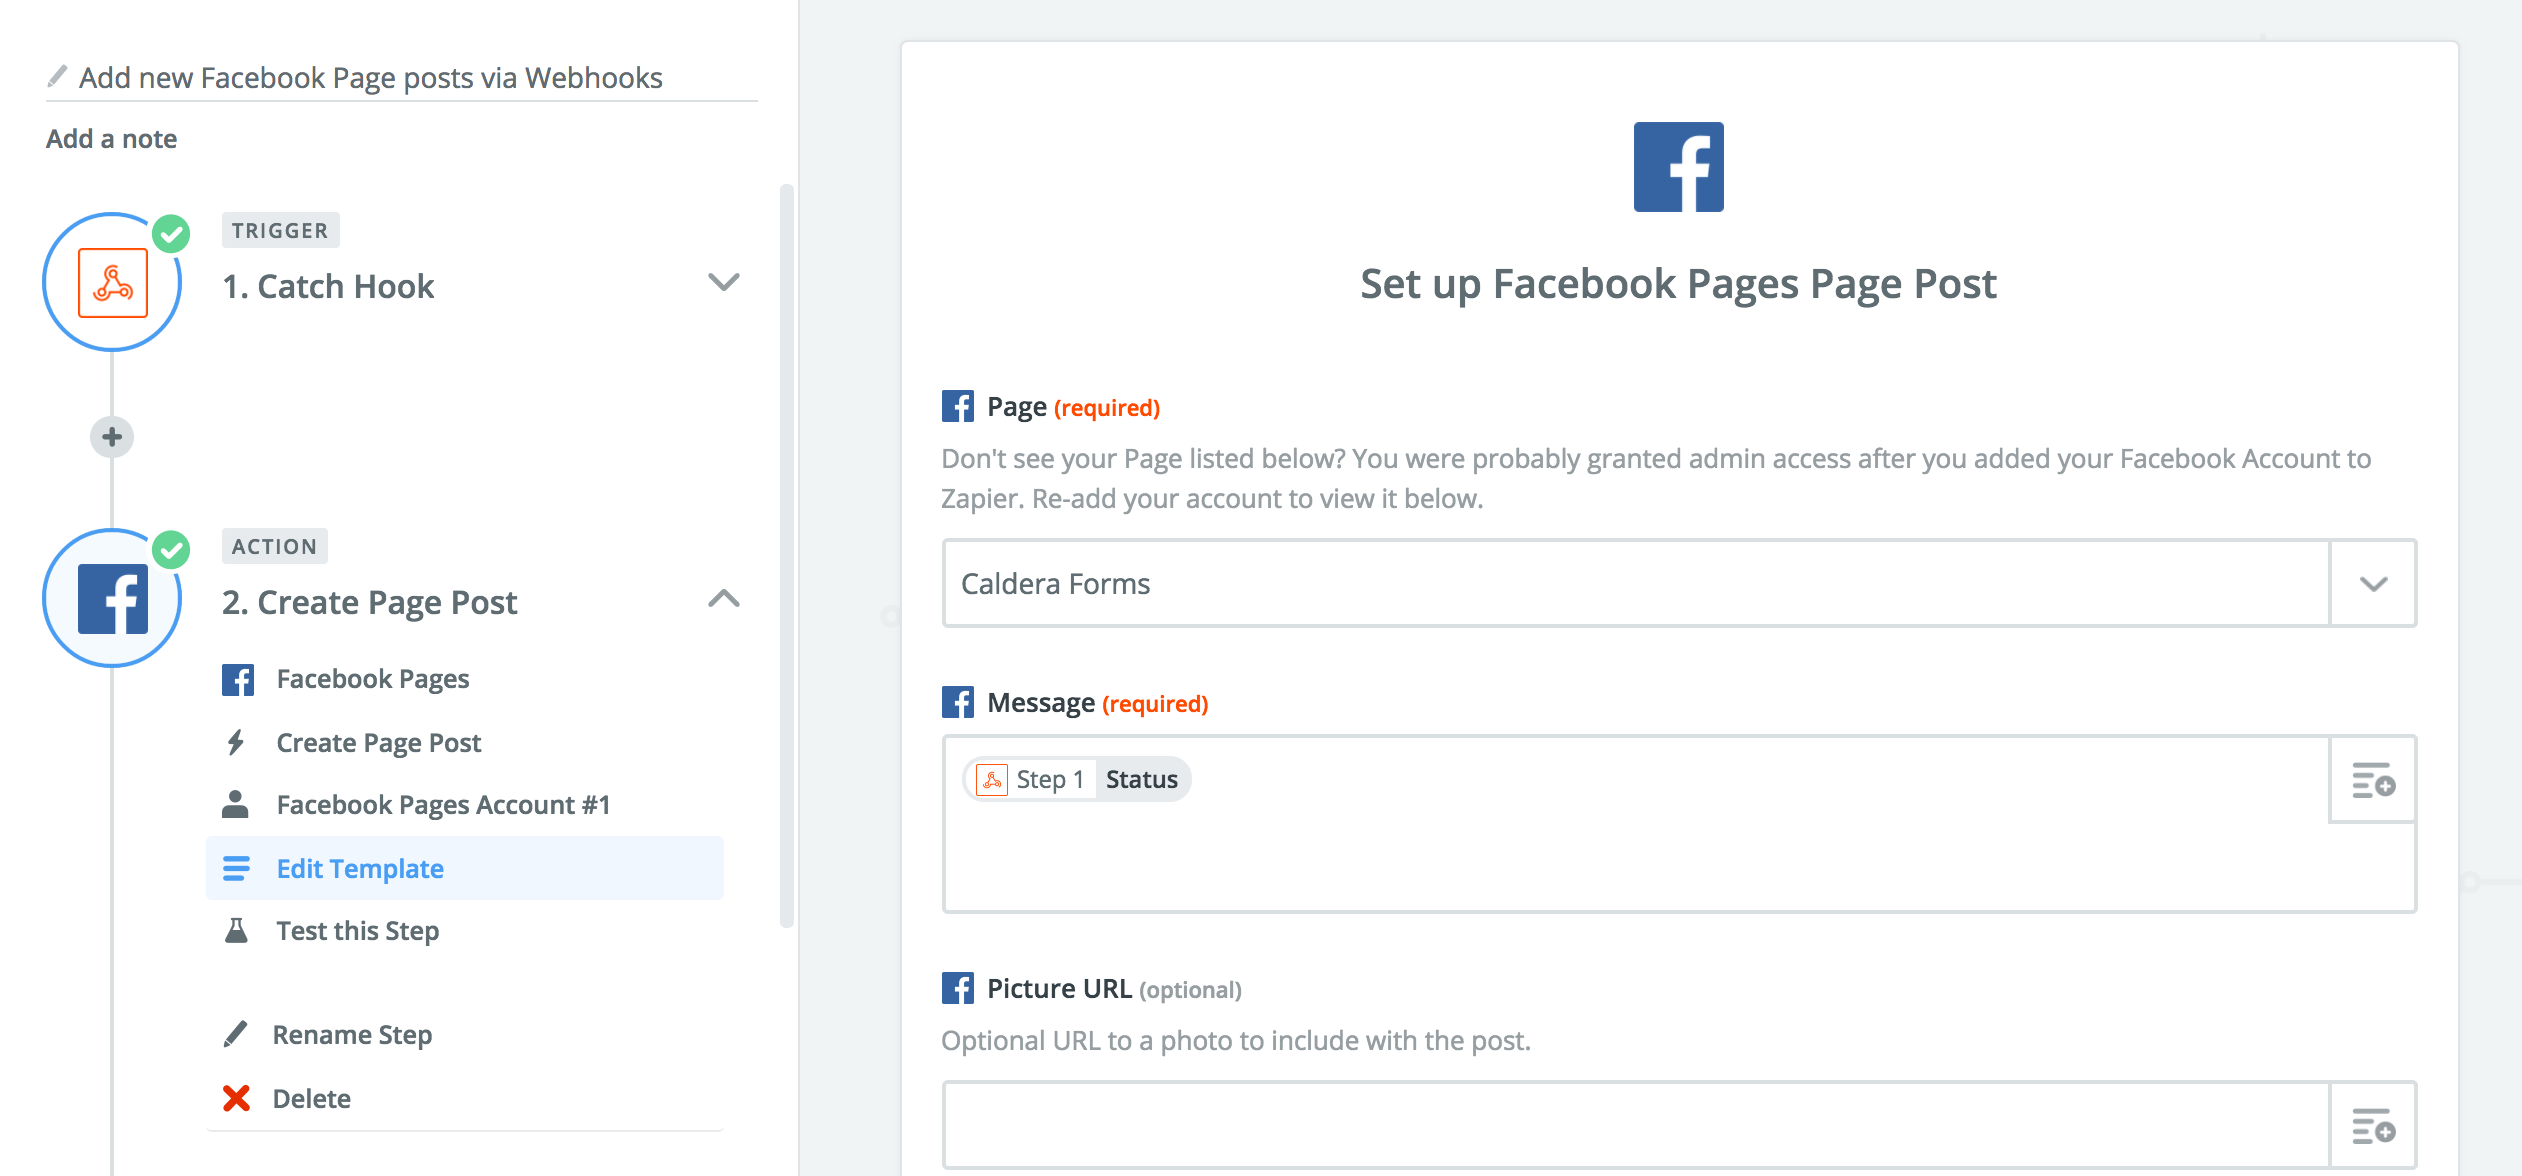
Step 7: Link The Webhook To The Trigger
In the Edit Template prompt screen this is where you will set what the submitted data from Caldera Forms will turn into, in this case a status WordPress to Facebook page.
There will be a dropdown to select the Facebook page you would like Zapier to post on behalf of.
Click on the options button for the message, this will be used for the status of Facebook. Select Catch Hook and Status, where Status is the field of our Caldera Form which will be used to capture the status information.
If you would like to set static details to any field settings of this Facebook message you are able to type in the details. By selecting the Catch Hook – Status we will be updating the information dynamically with the input of the Caldera Form.
Click Continue and be sure to test this action in the next step and you’re done! You’ve created a WordPress to Facebook page zap.
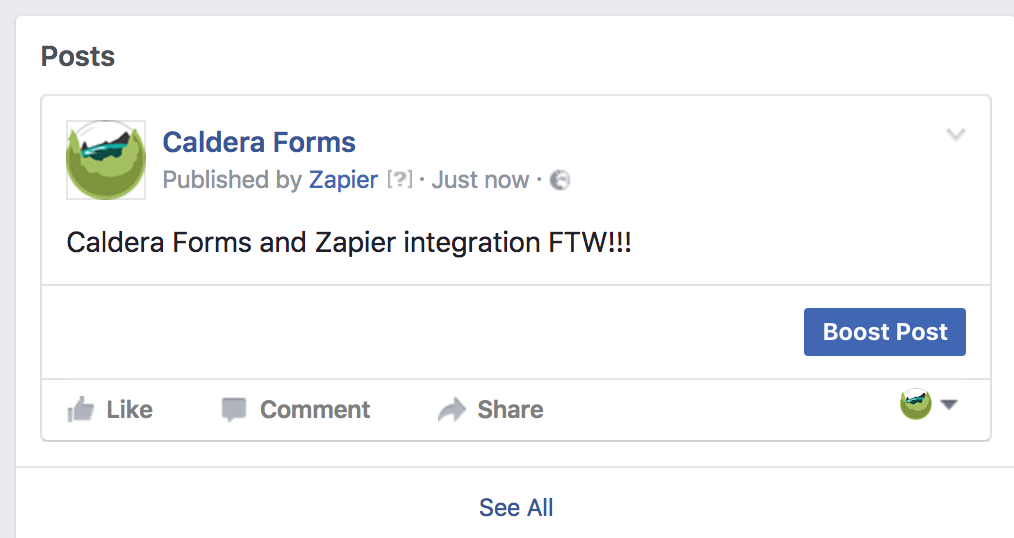
Step 8: Create A Status Using Caldera Forms
Now that Zapier is setup and our form is setup and saved we can test this. Simply preview your form, write a status and click Submit.
Have Fun With It
Zapier is a really cool service and now that the Caldera Forms Zapier add-on is available, the possibilities are endless. This WordPress to Facebook page zap is only an example. You are able to use what you’ve learnt in this guide to automate your CRM data, Facebook posts, Slack notifications, export data to CSV directly, and any other service Zapier has to offer.