
The Caldera Forms Authorize.net add-on version 2 can be used to create recurring payment plans. Before beginning, make sure you have both the Caldera Forms 1.4 or later and Caldera Forms Authorize.net 2.0 or later plugins activated.
In addition, make sure you have your API keys handy. Finding your API keys is covered in the getting started guide. Also, keep in mind that production and sandbox API keys are not interchangeable.
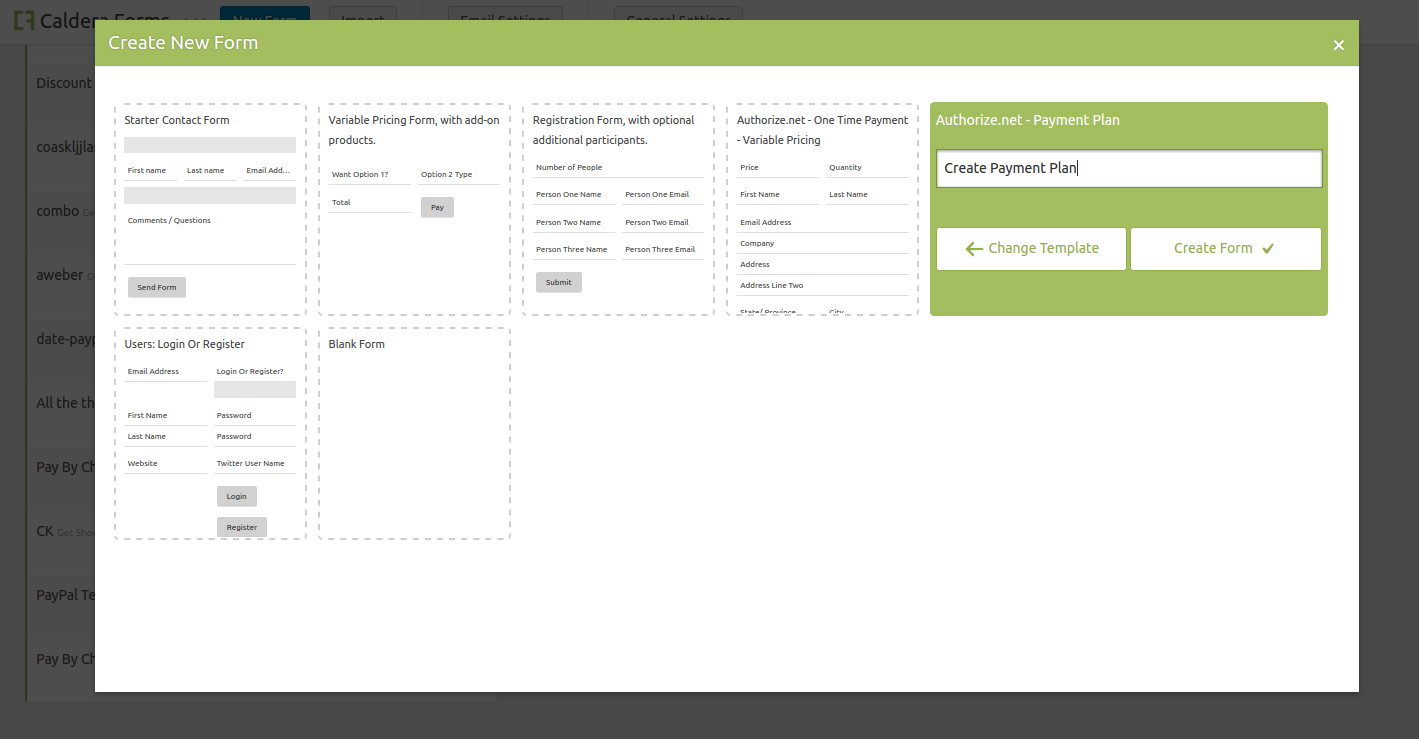 To begin, create a new form by clicking the New Form button at the top of the main Caldera Forms admin page. In the new form modal, select the Authorize.net – Payment Plan template. Give your form a name and then click the Create Form button.
Setting Up The Form
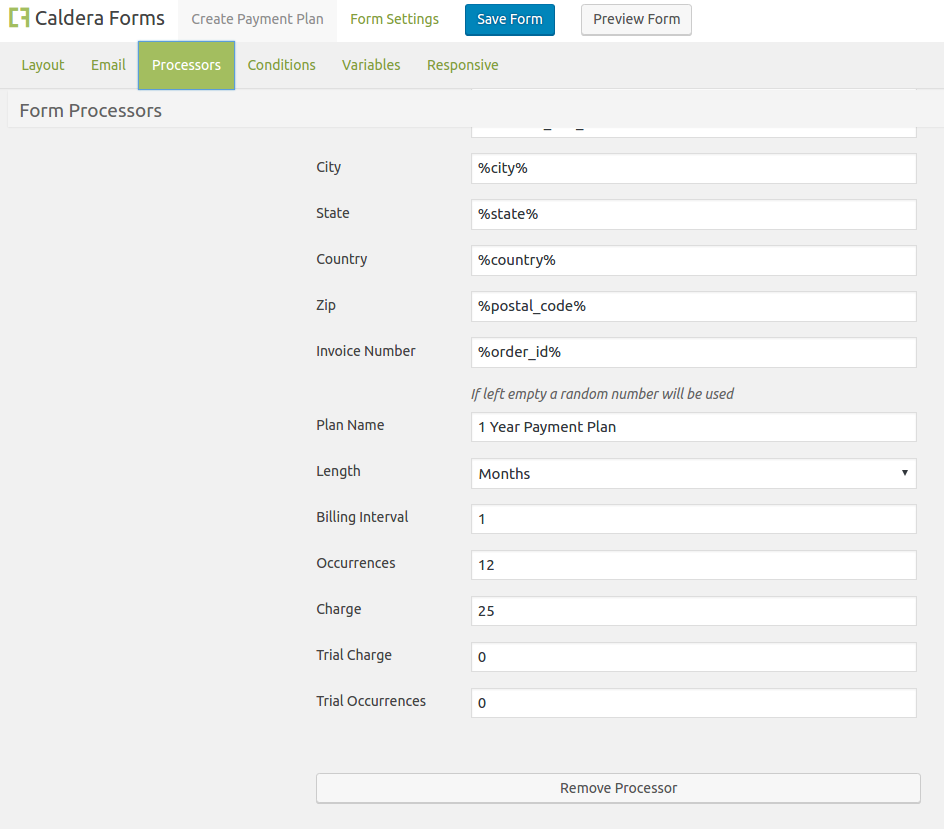
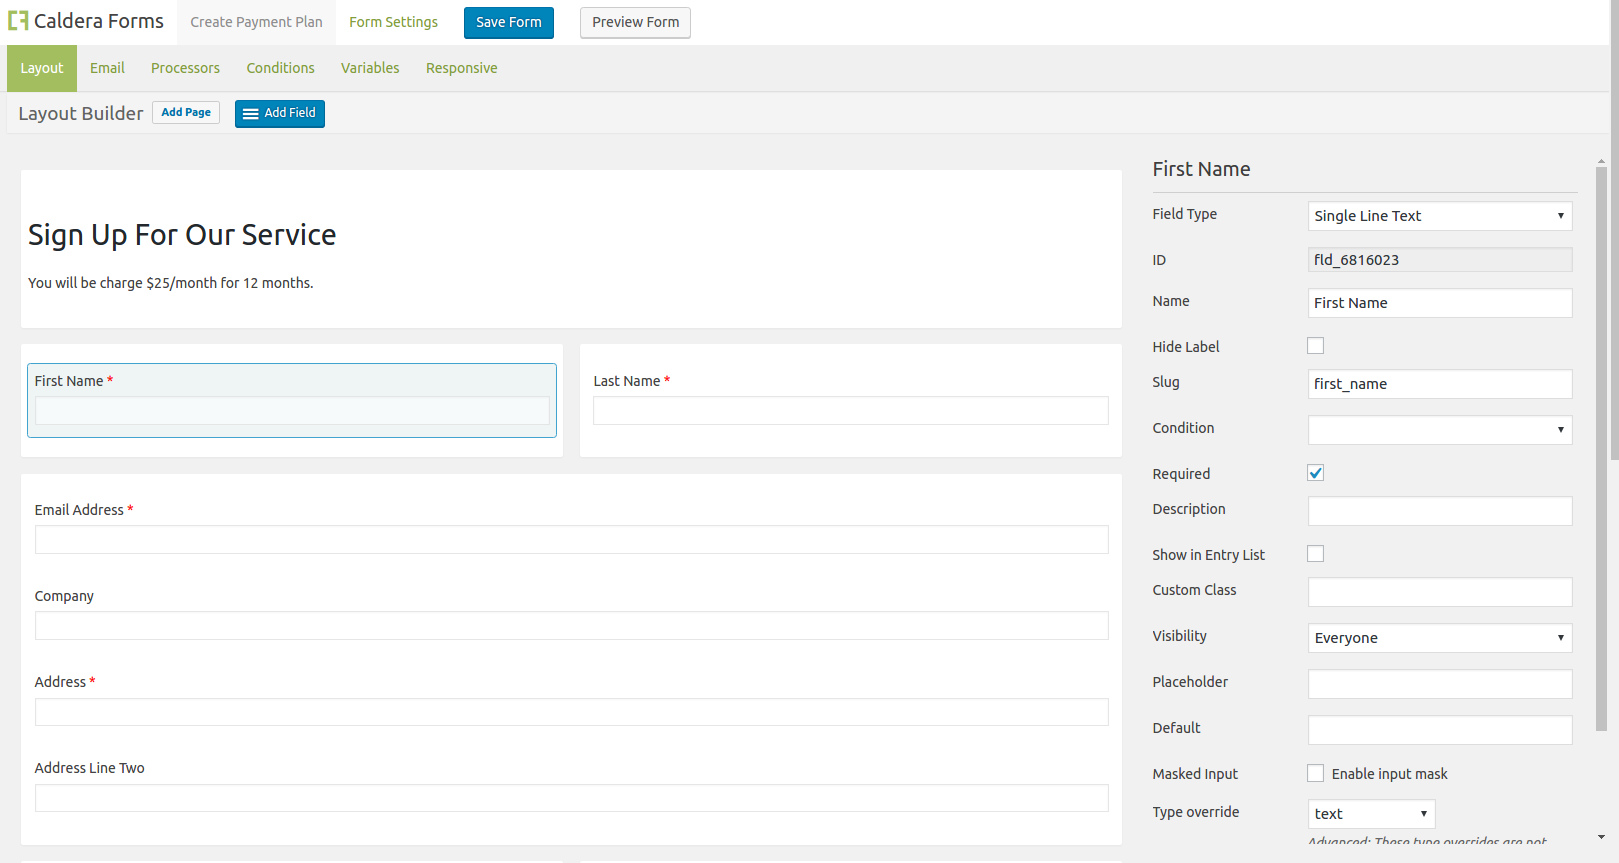 This template gives you everything you need for your form. In this template, the charge is $25 a month for 12 months. You can easily change that in the processor settings. Make sure you like the layout and then click on the processors tab. You should see that the Authorize.net Payment plan processor and the incremental value processors are set. Click on the Authorize.net Payment plan processor settings.
 The first settings is for engaging test mode. You should use this checkbox when using Sandbox API keys. If not, do not check it. The next two fields are API Login and Transaction Key. You must change these from the defaults with your own API keys.
There are many fields for mapping everything from customer name to the credit card names. These are pre-mapped to the form fields created by the template settings. Very easy, such time savings.
The last 7 settings are very important as they define your payment plan. First, give your plan a name in the Plan Name setting. Then in the Length field, choose if you want to bill every day, month, or year.
The next field Billing Inteveral defines how many times a day, month or year the customer will be billed. Then in the Occurrences field set how many days, months, years you want the plan to last for. In the Charge field, you set how much to charge each time.
To bill once $100, once a month, for six months, you would select “Month” for length, 1 for interval and 100 for charge.
The last two fields are Trial Charge and Trial Occurrences. These fields can be used to create trial periods that are free or reduced rates. You must have a trial period, or the plan will not be created. A work around for this is to create a 1 time trial that is the same price as a regular interval and then shorten the plan by 1 interval. This is annoying, but is a limitation of their API that we can’t work around 🙁