Any site that sells products is an eCommerce site, but that doesn’t always mean you need a complete eCommerce plugin. If you are collecting payments for services or selling one product, often a WordPress one page checkout is suitable.
If you’ve got a ton of products, then a good eCommerce plugin is great — we use Easy Digital Downloads for this site, and love it. But if you don’t, Caldera Forms Pro has all you need to create a sales form. We don’t just give you the tools to collect money via PayPal or credit cards.
Our add-on plugins help you grow your platform by giving you the tools to make relationships ongoing, too. Don’t just sell stuff, grow a following.


Learn How To Make WordPress One Page Checkout Cart
If you want you can download the form I created for this tutorial here. I have removed my Stripe and MailChimp API keys for obvious reasons. Be sure to add in your own before saving the form.
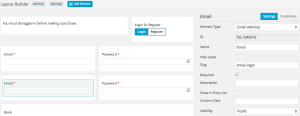
Here is what the field looks like in the editor:
Click the image to see it full-sized, in a lightbox.
What We’re Going To Cover
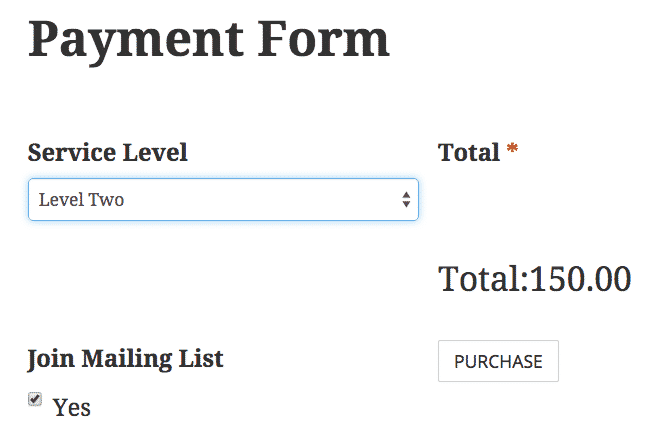
In this tutorial I’m going to show you how to build a simple WordPress one page checkout payment form that lets users purchase one of three levels, and pay via Stripe. You will also require users to be logged in to make a payment.

This functionality shows how to use the “Visibility” option in Caldera Forms to control access to form fields. This form displays very differently for logged in vs non-logged in users.
In addition it has a MailChimp optin to add customers to your mailing list. In my basic example only name and email addresses are sent to MailChimp, but if your mailing list requires more fields, just add the inputs you need to your Caldera Form and you can easily map them to your MailChimp list.
That’s the real beauty of doing it this way: total control.
Setting Up The Login & Registration Fields
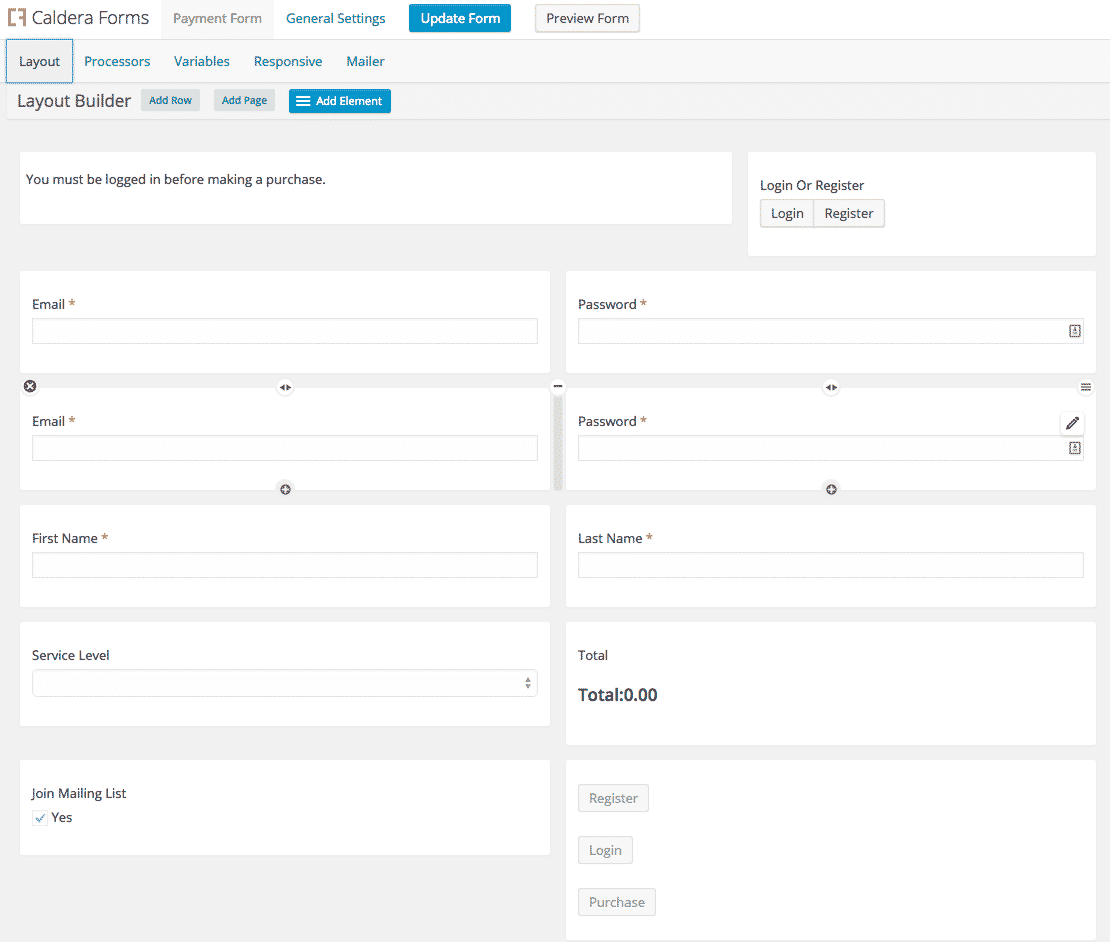
 The first three rows of my WordPress one page checkout are only shown to non-logged in users. For each of the fields in these rows, I used the “Visibility” control and set the option to “Public.” That will make the field only visible to non-logged in users. The “Registered Users” option does the opposite, while the default “Everyone” value makes the field visible to logged in and logged out users alike.
In the first row I have two fields, one is an HTML field, which shows a simple “You Must Log In Message” while the other field is a login or register toggle switch. The toggle has two options, which are used to determine which set of username/ password fields are shown in the next two rows.
 The next two rows both have a pair of email and password fields. They look they same, and have the same labels, but I prefixed their slugs. That means I have fields called “email_register” and “email_login” as well as “password_register” and “password_login.” This becomes important when mapping the fields int he login and register processors, which I discuss below.
Once I added both sets of fields, I used the conditional logic to hide the register fields when the toggle switch is on register and hide the login fields when the toggle switch is on register.

Setting Up The Login and Register Processors
The Registration Processor
The Users add-on includes two processors, one for logging in users and one for registering users. This form uses both. In Caldera Forms, there is a “Processors” tab. On the left side of it is an “Add Processor” button. When you click that, if you have the Users plugin installed, you will see both User Registration and User Login as options when you click that button.
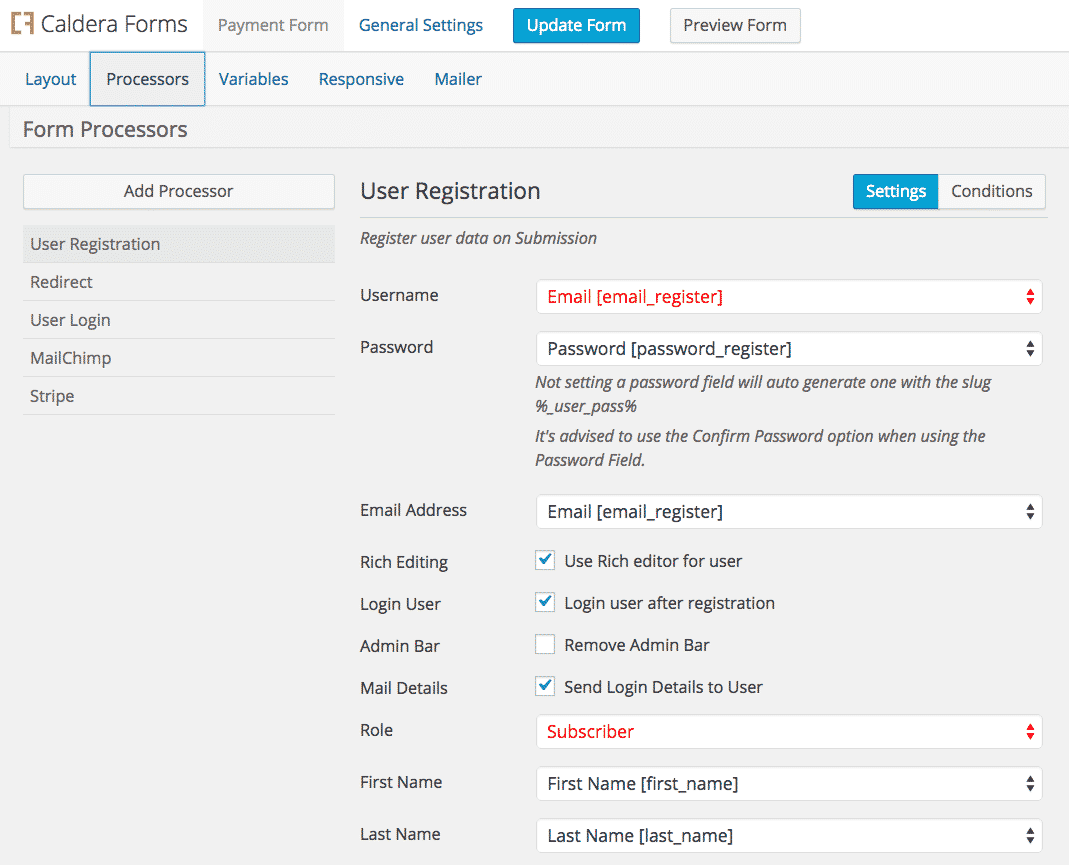 In my user registration processor, I mapped my “email_register” input to the “username” field and the “Email Address” field. I could have used a separate user name field, but I think that it is easier for users to log in with their email addresses. I also mapped the “password_register” field to the “password” setting.
The user registration processor allows you to set both user table fields, and user meta fields. In my form, I just mapped first name and last name, but you will see that their are optional settings for all of those fields.
In addition, you can add any field to the user meta section. This will save the value into a user meta field with the same name as the field in your form. This is really helpful if your business needs additional details about your customers that you need to collect when making a sale.
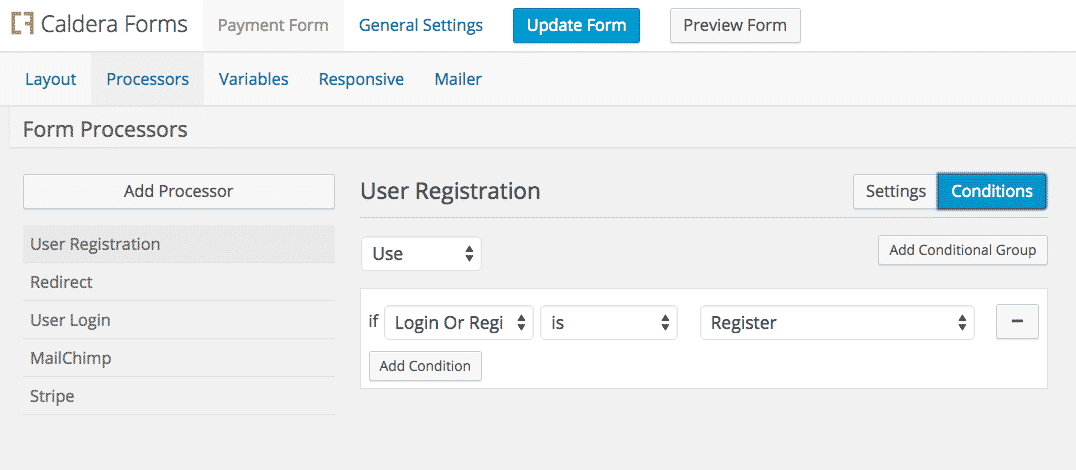 The last step in that processor’s setup is to set the conditionals so this processor is only used when the toggle switch is set to register.
When someone uses the form to register, they will be automatically signed in. For this form I needed to refresh the page, so the form will regenerate as the order form. To do this I added another processor, the redirect processor, using the same conditionals. For the URL to redirect to I used “/{embed_post:post_name},” which presuming standard permalinks, takes me back to the same page.

The Login Processor
 This processor, the one used for logins, is added the same way as the registration processor, but is simpler to setup. I mapped the “email_login” field to the username field, and the “password_login” field to the password field.
This processor has a redirect field in its settings. I used the same “/{embed_post:post_name}” as with the registration step redirect to refresh the page.
For the user processor, I used a similar conditional as with the registration form based on the toggle switch.
The Purchase
The actual purchasing part of the form is actually the simplest part in my example for this WordPress one page checkout, though it has 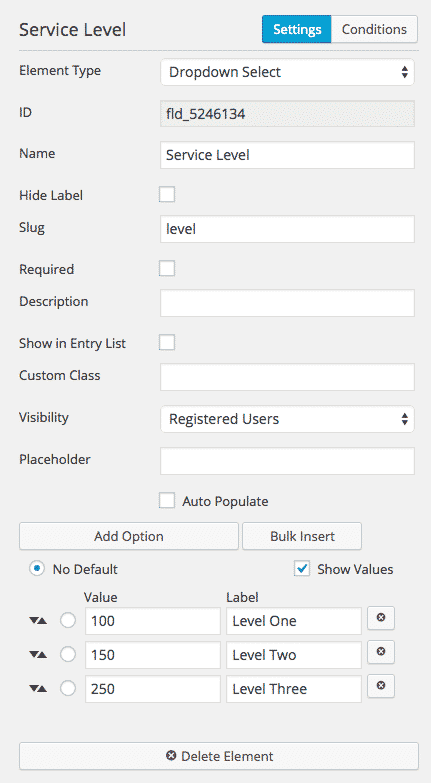 the most opportunity to expand from my basic form. I just set up a drop-down called “level of service. You can use a similar drop-down for different products you offer. The important part is that while the labels for each option in the drop-down, the values are the costs of that product.
The other field is a calculation field that shows the total. Its calculation is very simple, it just shows the value of the dropdown field. If you charge tax, shipping, or service fees, you can add those values in hidden forms and include them in the calculation. The calculation field will live update showing the total.
To process the payment, my form uses the Stripe processor. You can find detailed documentation on setting up the Stripe Processor here. For this form, I just inserted my Stripe API keys, and set the calculation field for the order total. Keep in mind that the Stripe processor can be used for one time payments and creating subscription plans. Stripe subscription plans are a great way to handle recurring revenue for businesses that sell things like coaching services or maintenance plans.
Email Listing Building In Your WordPress One Page Checkout
If you look around this site, you will see that there are opportunities to join our mailing list all over the place. Email marketing is one of the most affordable and most powerful forms of marketing. The MailChimp add-on for Caldera Forms makes adding this opt-in easy.
In this form, I added a checkbox that lets people optin to your mailing list, which I do with pretty much any form I make. There is detailed instructions for the MailChimp processor here.
There are two very important things to keep in mind when using the MailChimp processor this way. The first is to use conditional logic make sure it doesn’t run during the login or register steps. I used the value of the toggle switch to prevent it from running when login or register is selected. Neither will be set when that field is hidden.
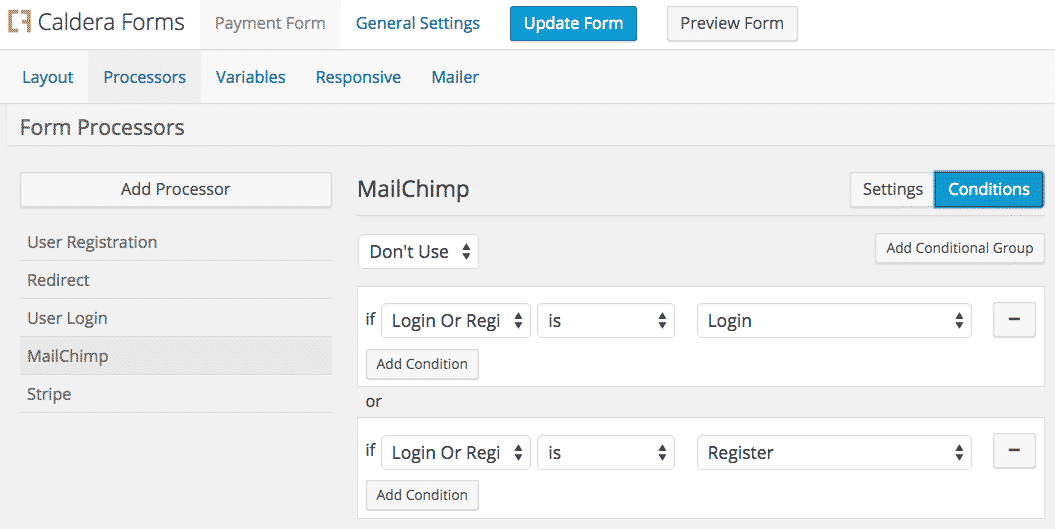
You also need to make sure that it only runs when the form is not used for login or registration and it always has an email address. Since this only runs when users are logged in, I used the system tag “{user:user_email}” to use the email address they have saved in their profile.
The Submit Button(s)
You could get away with just one generic submit button, but I wanted to change its value based on use. For this reason I created 3 buttons. Non-logged in users see “Register” and “Login,” as well as the toggle switch to change which one is shown. When users are logged in, the “purchase” button is shown.
Little customizations like that help your visitors make sense of your form. The less time they spend figuring out the form, the merrier.
Taking It Further
What I’ve shown you is a basic, but totally working WordPress one page checkout. With this foundation, you can take it a lot further.
For example, you can use the verify email add-on to confirm that email addresses are valid. Creative use of the entry limiter add-on can let you limit the times a product can be sold, or adapt this into a room or equipment rental form. With the download add-on, coming very soon, you can even sell downloadable content like eBooks, or tickets. Also, the geolocation add-on is great for ensuring you get accurate addresses from your clients if you need to ship something to them.
Get Caldera Forms Pro
Are you ready to create a highly-customizable, and easy to use WordPress one page checkout form for your WordPress site? Whether you need to sell an eBook or charge for services, we can help. Let Caldera Forms’ intuitive user interface make your life easier, and its great UI help your customers make purchases.