PublishPress is a very useful plugin for WordPress teams to get efficient and organized.
PublishPress gives you the tools to set up a custom publishing workflow. Here are just a few of the key features:
- You can see all your scheduled posts in a single calendar view.
- Inside WordPress, you can have collaborative discussions about each post.
- Your team can choose custom post statuses, and get beyond simply “Draft” and “Pending Review”.
- You can set requirements that must be met for content to published.
PublishPress can be particularly useful if you’re taking accepting posts submissions from users. As a Caldera Forms user, did you know that you can use Caldera Forms to accept posts? This tutorial shows you how it’s done.
Some Background on PublishPress
There are many WordPress sites with a single author who is happy to click “Publish” whenever they’re ready. But, teams need a more collaborative process.
In addition to writing software, we run a training company: OSTraining. That work enables us to sit down with teams from a lot of large organizations.
Those teams all had custom requirements, but they also all had two fundamental needs:
- A smooth development / testing / live workflow.
- A publishing workflow to handle multiple users.
Many of those teams chose Drupal for their sites, simply because it offers a powerful set of publishing tools.
We looked around the WordPress world, to see what options were available. There are some great hosting companies that provide development workflows, but there were very limited choices to publishing workflows. If WordPress wants to be adopted by these organizations, it’s vital to have team publishing tools.
So, we decided to build our own, based on everything we’d learned. We choose the EditFlow plugin as a base for PublishPress. It’s a remarkably solid plugin, but we wanted to take development in a very different direction. PublishPress is a fork of Edit Flow, but you might not recognize it at this point, after all the changes.
Getting Started With PublishPress
If you want a quick-start guide to PublishPress, try this video:
In this guide, I’m going to show you the basics of using PublishPress for your manage your posts. We’ll focus on two key features in PublishPress:
These two features will instantly increase efficiency and productivity of your publishing team.
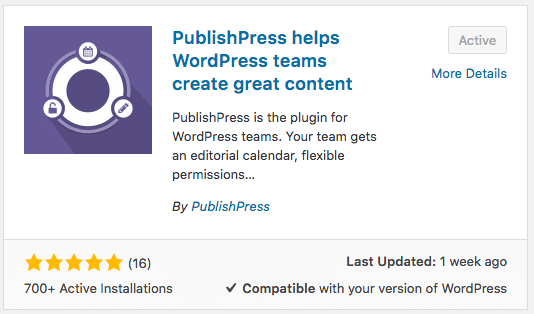
To get started, install PublishPress. It’s available for free on WordPress.org:
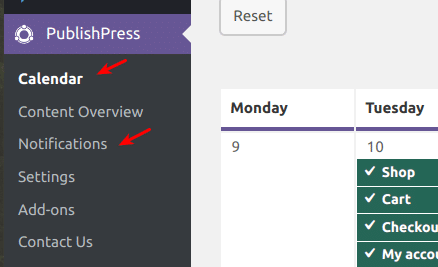
After installing PublishPress, look for these two links in your WordPress admin:
The PublishPress Editorial Calendar
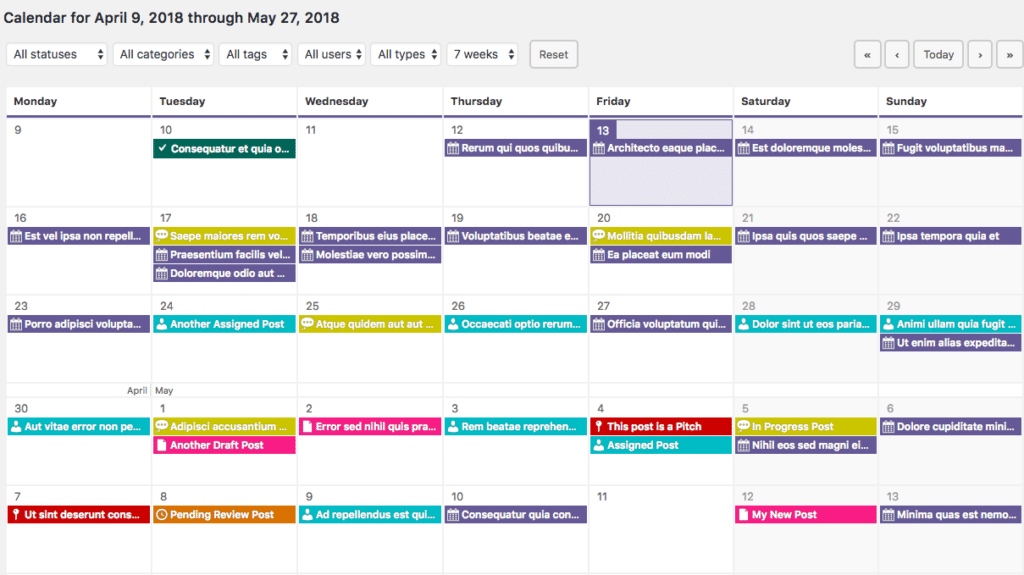
Using the PublishPress editorial calendar, you can easily see when content is planned, and when it was published. Each different status is marked with a different color and icon. For example, all your “Published” posts are marked in green and have a checkmark icon. All your “Draft” posts are marked in blue and have a pencil icon.
Out-of-the-box, you will instantly see all the content that you are planning to publish in the next few weeks.
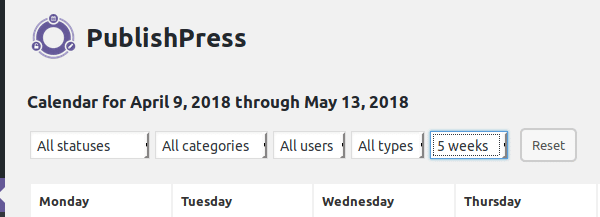
If you wish to refine what you see, you have a choice of a few filters. You can filter your calendar by following criteria:
- By statuses
- By categories
- By users
- By types
- By weeks
You can drag-and-drop an unpublished post from one date to another if you need to change its publication date.
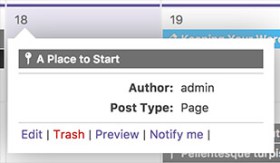
Click on a content title to see a pop-up with the content item details. Use the links underneath to efficiently administer this content item: Edit, Trash, Preview, Notify me.
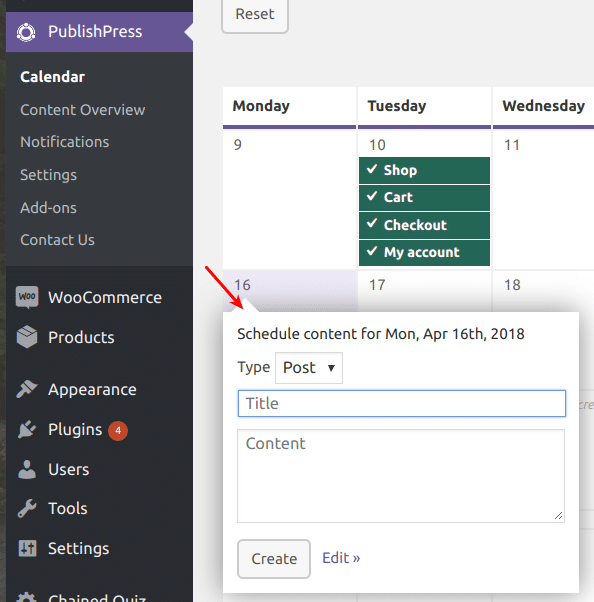
You can also use the Calendar to quickly create new content. Click on any date directly on the Calendar and you will see a pop-up to enter your content:
The Calendar is very useful to any WordPress publishing team seaking to increase their productivity.
Visit the PublishPress Calendar documentation page for more information. Or take the PublishPress for a free demo test-drive.
This video explains more about the PublishPress calendar:
PublishPress Notifications
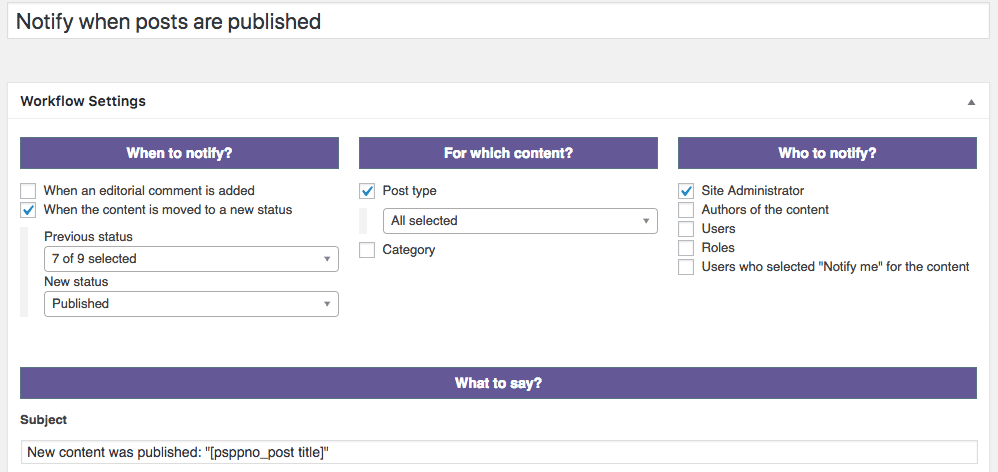
PublishPress Notifications allow your publishing team to alway stay on top of content changes on your WordPress site. The image below shows how notification are set up:
Each notification workflow can be customized in 4 different ways:
- When to notify? Do emails get sent when a new editorial comment is added, or when the status changes?
- For which content? You can choose which types of content trigger the notifications.
- Who to notify? Here you can choose which users or user roles will get the notifications.
- What to say? This area allows you to customize the message in the notification, using different shortcodes.
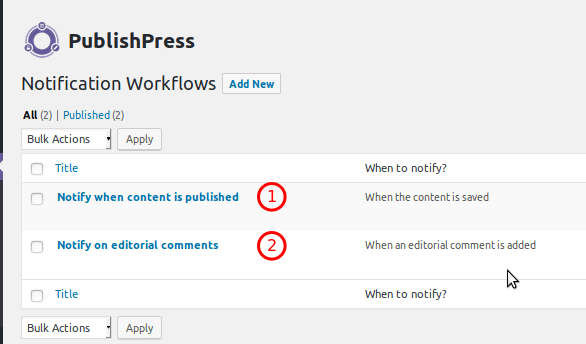
By default, your PublishPress install has two different notifications workflows, as you can see in the image below:
- This is a notification sent out every time posts are saved.
- This is a notification sent every time an editorial comment is added (PublishPress also allows you to leave editorial comments on content).
Watch the video below to learn about publishing workflow notifications with PublishPress.
Find Out More About PublishPress
If you are interested in finding out more, test-drive PublishPress with a free demo.
Or purchase the premium version of PublishPress and instantly improve your WordPress publishing team’s productivity and efficiency.
Still have questions? Please, visit the PublishPress FAQ page and hopefully you will find your question answered. Or contact the developers via help@publishpress.com.
