The contact form on our site was built using Caldera Forms, and the mailing list opt-in uses the Caldera Forms Mailchimp add-on. I walk you through the process in this tutorial.
You can download an import file for the form I created here. If you use that file make sure to set your email address in the mailer, and add your own Mailchimp key. You can also check out how we styled our contact form in our theme’s Github repo.
Using the Mailchimp add-on for Caldera Forms requires a free Mailchimp account and a Mailchimp API key. Make sure you have your keys before you follow this tutorial. This Mailchimp documentation details how to find and generate API keys.
Creating The Form
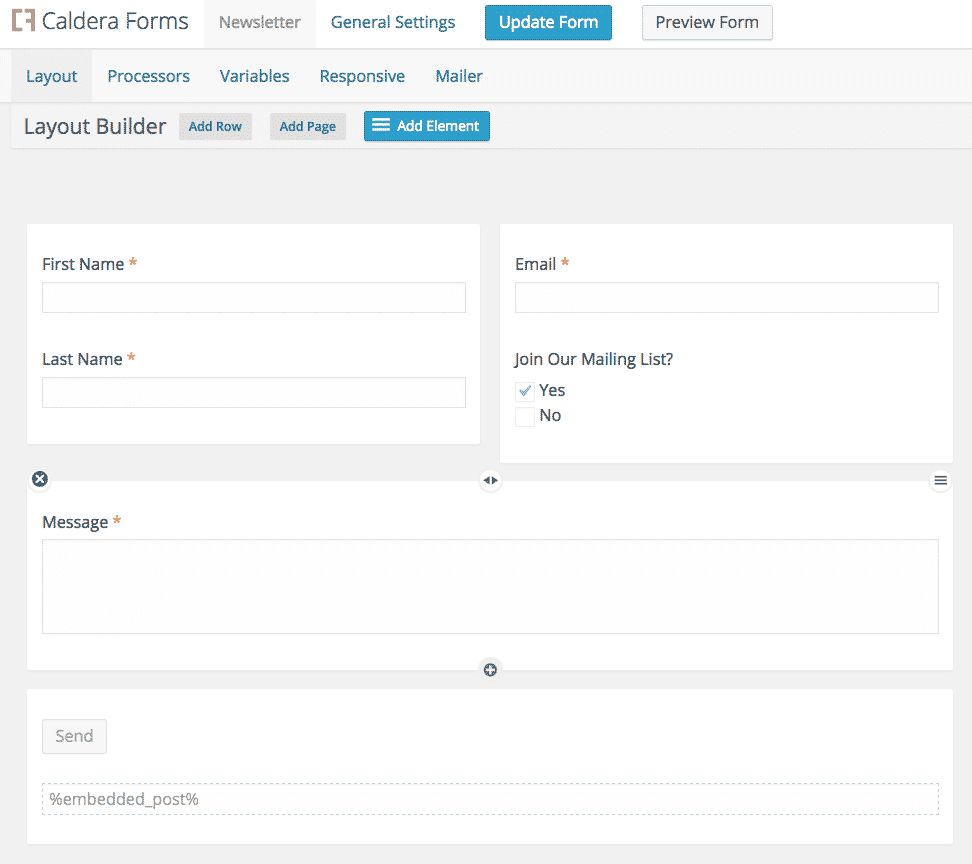 To work with the Mailchimp processor, your form will need an email field and one field for every field that your Mailchimp list requires. In our case, that simply means email, first name and last name.
You will also want a field for the message, and a checkbox for visitors to choose whether or not they wish to join your newsletter.
It’s important that you create your form layout first, before adding the Mailchimp processor, and have all of the required fields. If you do not, you will not be able to complete the Mailchimp setup.
Adding The Mailchimp Processor
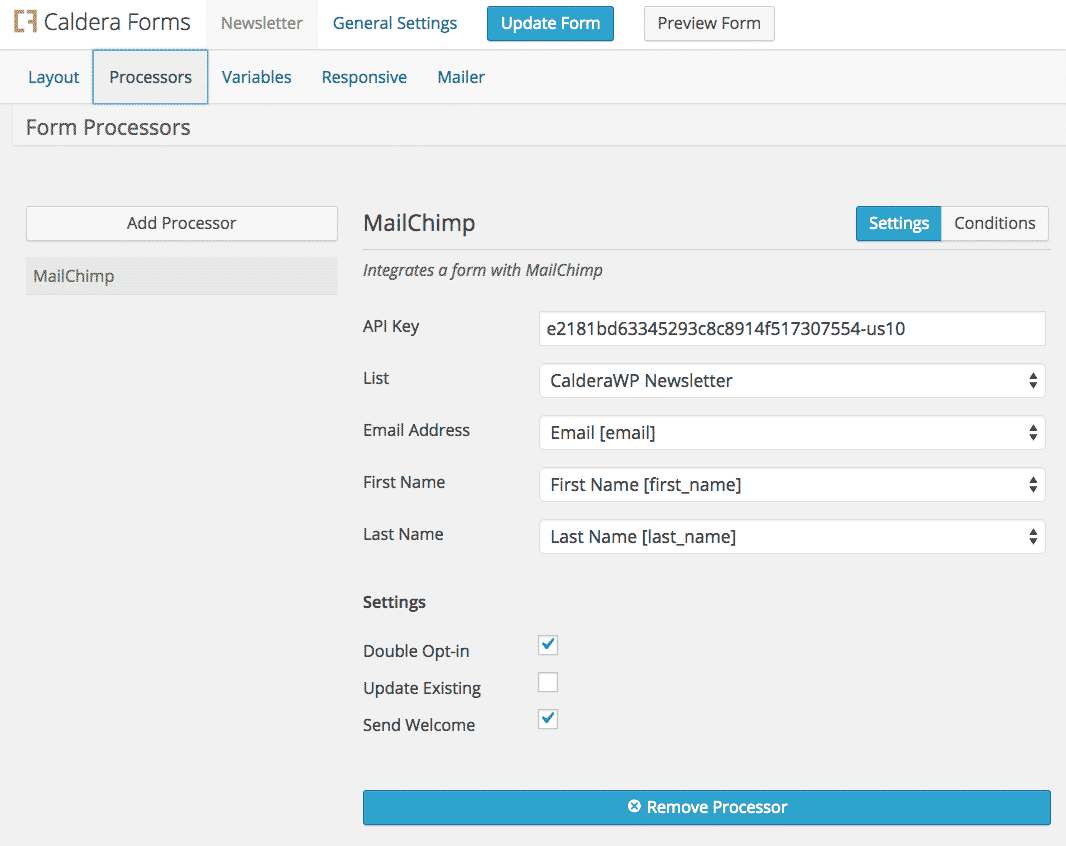
When you click on the “Processors” tab on the top left of the Caldera Forms editor, you will be taken to the processors panel. From there, on the left side you will see a gray “Add Processor” button, if you click that, you can select any installed processor–including the Mailchimp processor. You should also see a link to it under the button.
If it’s not in any of those places, make sure you have uploaded the plugin, and activated your license in the “CalderaWP Licenses” submenu of the Caldera Forms menu.
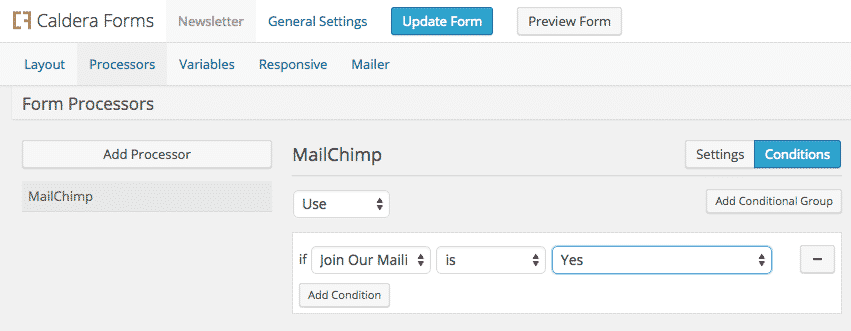
Once you have added the processor, the first thing you should do is set its condition for the processor to be used. You can access its conditions using the blue “Conditionals” button in the top right hand corner of the Mailchimp processor’s tab.
In the conditional settings, select “Use” for your type of conditional, and then click the “Add Conditional Group” button on the right side. Then, select the checkbox field you created to ask visitors if they wanted to join your list, and then use “is” for the second field, and the affirmative choice in the third field.
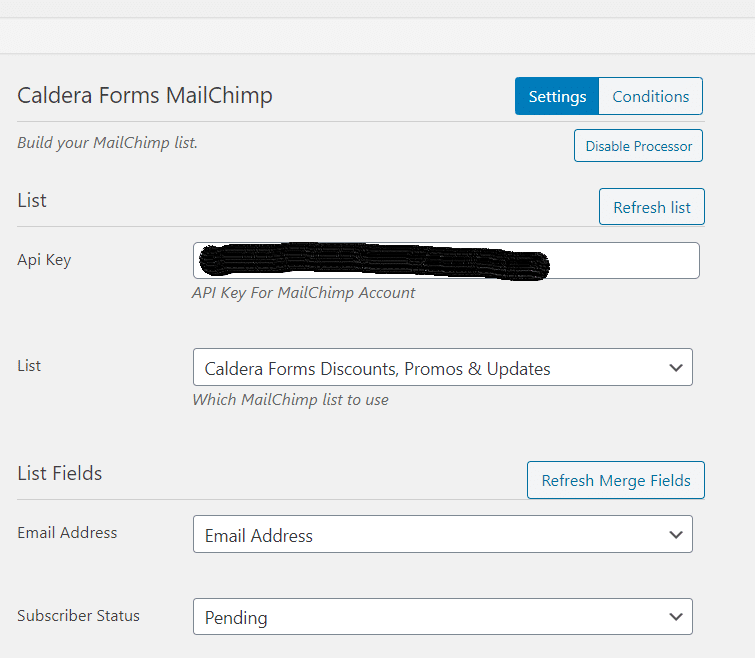 Now that you have the conditional setup, you need to setup the actual processor. The first step is to add your Mailchimp API key. Once you have done so, you can select one of your existing Mailchimp lists.
The next step is to map fields from your Caldera Form to the fields required by the list you have selected. For each Mailchimp field, there is a drop-down with possible fields from your form to use. Note that the email address field must bound to an email types Caldera Form field.
Once you have connected the field form your form to your Mailchimp fields, you can set the Subscriber Status. Those options cover whether or not to require double option, to send your welcome email and whether to allow updating existing users.
Taking It Further
That’s all you need to create the form, but that’s not all you can do. Keep in mind that you can add multiple processors to a form, of the same type and multiple types. This opens up a lot of possibilities.
For example, as long as you are getting a visitor’s name and email, why not register them for your site with our user registration processor?
You could also use a second select field to choose what Mailchimp list to add users to. Just add one processor for list, and use the conditional panel to choose which one to add the visitors to.