
This guide will tell you how to use the Conditional Fail add-on. Make sure you already have the add-on by downloading it here.
The Conditional Fail add-on is a processor that allows you to set up certain conditions that will make a submission fail or succeed.
Creating The Form
To use the add-on, you have to set up at least one field in the form builder.
Learn how to create a new form here.
Adding The Processor
- Click the ‘Processors’ tab that’s located at the top of the screen.
- Click the ‘Add Processor’ button. If the add-on is properly installed, you will see the ‘Conditional Fail’ processor.
- Click the ‘Use Processor’ button.

This will add the processor to your form and give you settings for this processor.
Working With The Processor
Setting The Fail Message
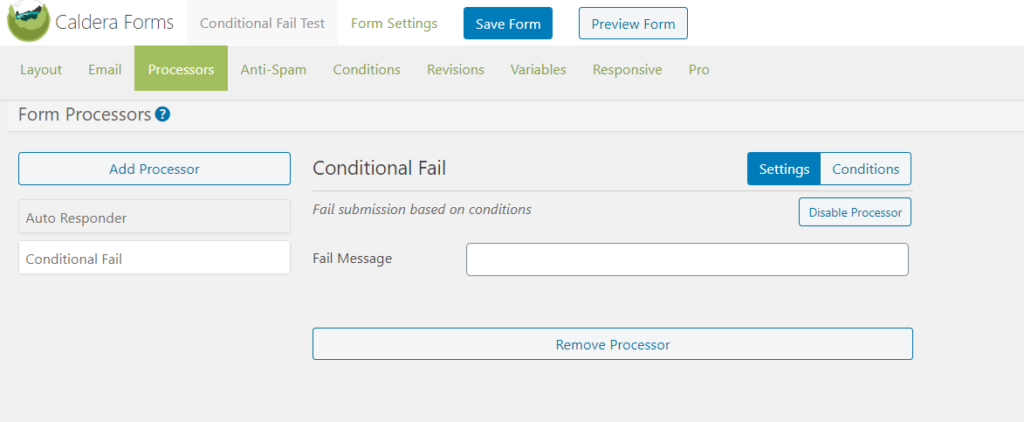
In this ‘Settings’ tab, you can set the Fail Message. Magic tags can also be used here to customize your message. This message will be shown to the submitter if the conditions are met and the submission fails.
Setting The Conditions
In order for the processor to work, you have to set at least one condition in the ‘Conditions’ tab.
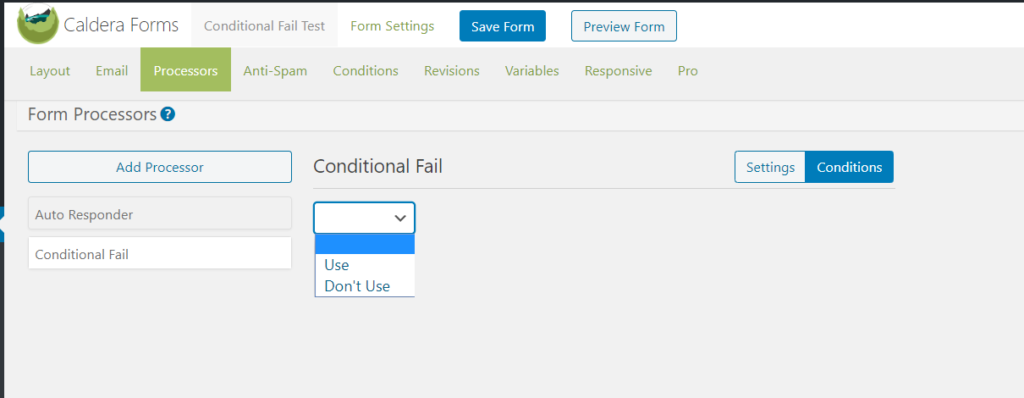
- Choose ‘Use’ to activate the condition.
- Fill in the condition with the conditions that you want. As an example, below is how you would fill the condition if you don’t want to accept submissions from people with an @xyz.com email address. Learn how the conditionals in Caldera Forms work here.
- Click ‘Save Form’.
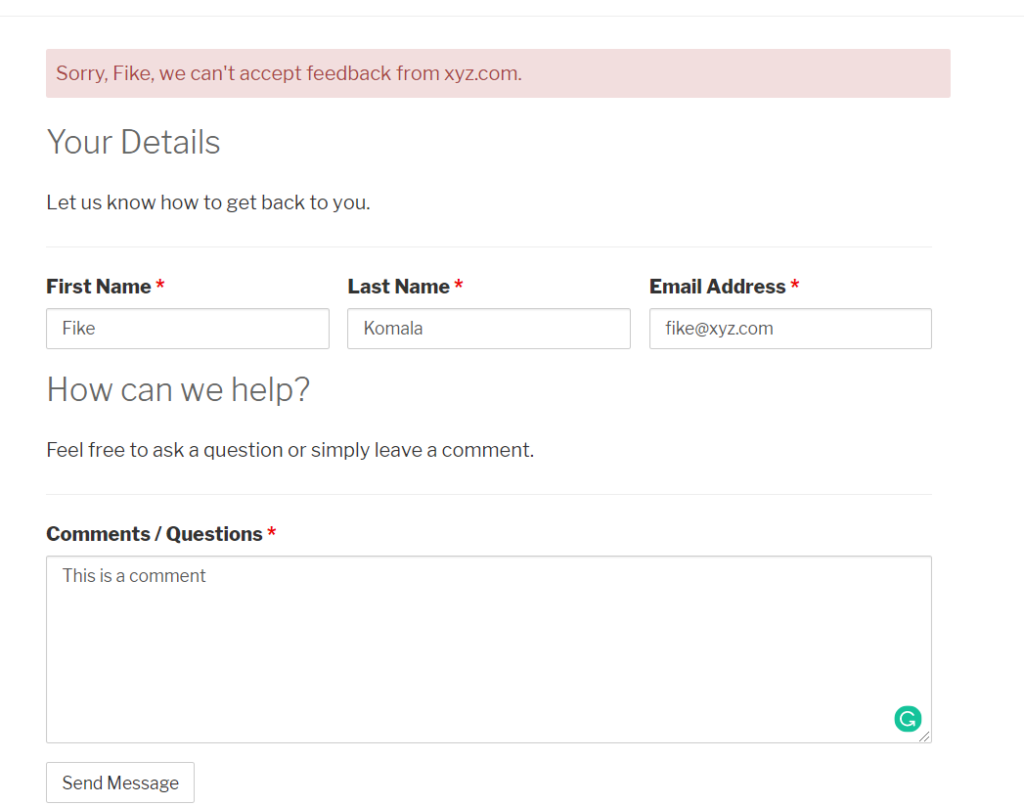
- If the conditions that are stated here are met, the submission will fail.

With the conditions above (not accepting @xyz.com email address), this is how the fail message would look like.
The submission would fail and the form would show the fail message.
Disabling And Removing The Processor
In the processor settings, you have the option to disable and remove the processor. Disabling the processor will make the processor inactive, you can enable it again later. Removing the processor will delete the processor permanently.
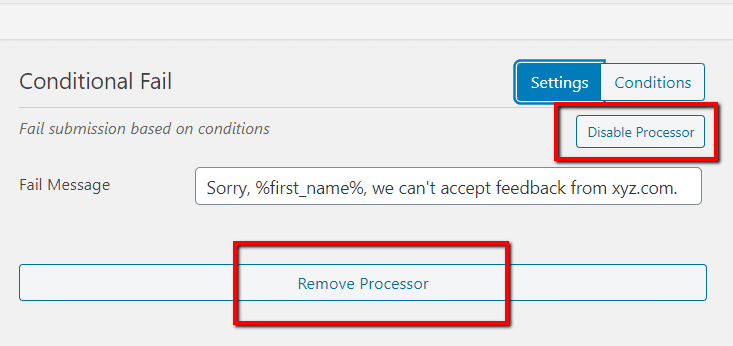
You can find the ‘Disable Processor’ button at the top of the settings, and the ‘Remove Processor’ button at the bottom.