UPDATE: February 27, 2015: In the last section I added information about how to include AJAX add to cart buttons in the search results
Using an eCommerce plugin like WooCommerce makes it easy to get an online store set up on your WordPress site. Getting all of your products into the site and configure a shopping cart and payment gateways.
The more products you have, the harder it is for customers to get to the product they want. An intuitive search gets them there.
I recently posted a screencast showing how to extend WooCommerce’s custom post type “product” using Pods, and then create a product search form using Caldera Easy Pods and Caldera Forms. The video is about 7 minutes. I cheated and set up the Pods Template for results ahead of time, and didn’t have to deal with custom CSS, but I think this shows you how quickly you can create an intuitive and responsive search form on your site.
In addition to the screencast, you can also follow these step by step instructions below to create your product search, and get some idea on how to take this further.
Setting Up The Search Form
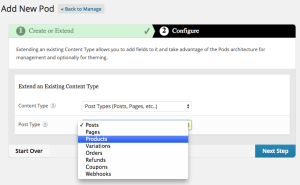 The first step, once WooCommerce, Pods, Caldera Forms and Caldera Easy Pods are installed, is to extend WooCommerce’s “product” custom post type with Pods. To do this, you simply go to the Pods Menu and select “Add New”. On the next screen you select “Extend Existing,” and then on the screen that takes you to, from the dropdown for post types, select “products”.
At this point you do not need to do anything else to the new Products Pod, but you can. If you want to customize WooCommerce further with custom fields the Pods editor makes this easy for you.
For example, if you were a fashion site, you could add a drop-down select field for departments. Even cooler for a fashion site would be to create a bi-directional field related to a post type for collections or designers. Then you could show all of the products in a collection or by a designer on their page, and add that as an option in your search form.
In this simple example, our Easy Pod uses the custom taxonomies added by WooCommerce are what we will use, but you should let your creativity take you to some fun places. Before creating the Easy Pod, you will need to create a Caldera Form and a Pods Template. In the next section I will cover how to create the form.
Creating Pods templates is covered pretty exhaustively in the Pods Tutorials. Make sure to create one for showing your results.
Creating The Search Form
The form I showed in the video is very simple. It only has three elements. You can download an export of the form I created if you want to import it. Otherwise go to the Caldera Forms admin and click the “Add New” button at the top.
The first element is a text search. For this field, use a single line text element.
The second element is a drop-down select field. I like to split a row in the Caldera Forms editor so on large screens the two fields will be next to each other, but stacked on mobile.
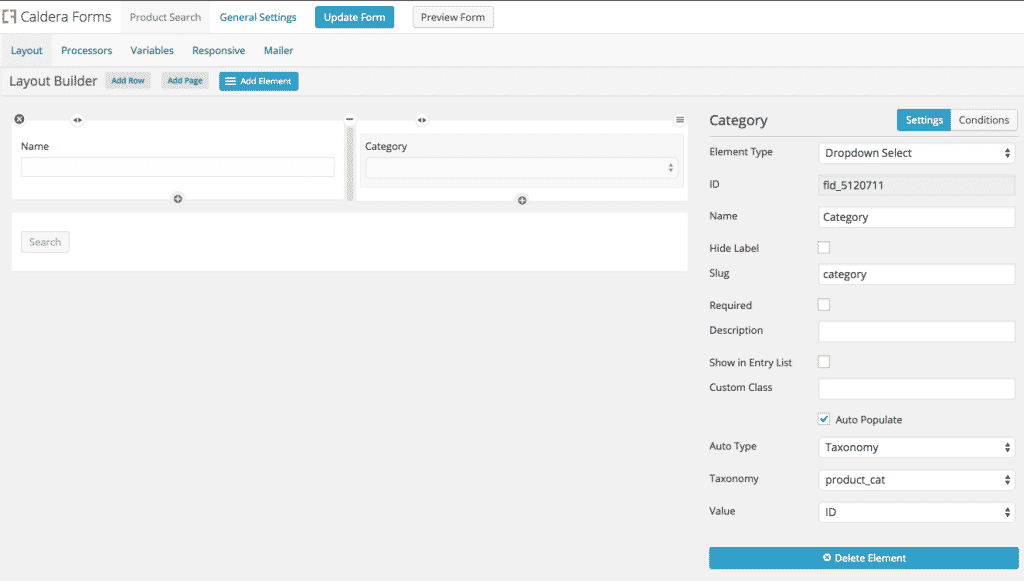
For this field the auto-populate option is great. That way we do not have to worry about updating its options. It becomes a “set it and forget it” option. To automatically include all terms in the product category taxonomy, click the “Auto-Populate” option, then for “Auto Type” select “Taxonomy” and for “Taxonomy” select “product_cat.”
The last option you need to set for the auto-populate is for value. This does not affect the label that is seen in the list, but what value is passed back to Easy Pods. For maximum efficiency, select ID.
In this screenshot you can see the form layout and the options for the category select field:
The last element we need is a button. Add a new row and put in a button element. Call it “search” and save your form.
That’s all you need. I would recommend that you disable the mailer for this form and tracking of entries.
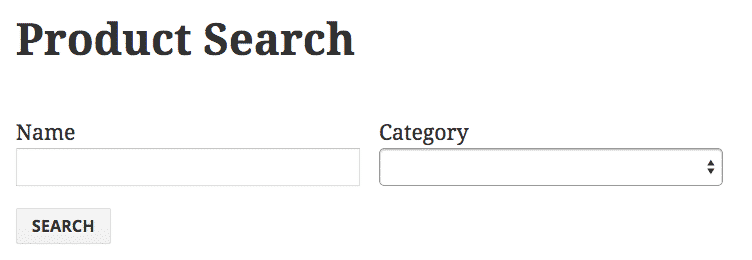
You can use the “Preview” button at the top to see how your form will look. It’s not going to work yet, as we need to setup a new Easy Pod. With the Twenty Fifteen theme, this is what the form should look like:
Setting Up An Easy Pod For Search
The last part of the process is creating the Easy Pod itself. This part is fairly simple, as it just involves connecting all of the pieces we already created into one system.
First, click on Easy Pods from the WordPress dashboard menu. This takes you to the Easy Pods admin screen. At the top, click “Add New”. In the modal that pops out, give your Easy Pod a descriptive name. I called mine “Product Search.” Make sure to select “Product” as your Pod.
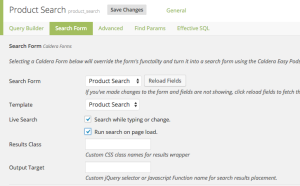 Before building your query, go to the “Search From” tab. From there select the Caldera Form you created. Then select the Pods Template you created to show results. I recommend checking the next two boxes. The first will allow a live search, so there is no need to click the submit button, results will update as your site’s visitors change the search parameters. The second will show all results if no search parameters are entered.
Once you have setup the search form settings, switch back to the query editor. In there you will need to set two parts to the query. These will both go in the same filter group.
For the first part of the query use “product_cat.term_id”, use an equals comparison and then for value, let the autocomplete fill the search result for the categories field. We are using “term_id” here since the Caldera Form’s auto populate options were set to use ID for the value.
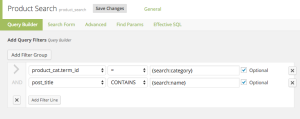 Then click the “Add Filter Line” button to add a second statement. For this one use the “post_title” field, a “CONTAINS” comparison, and the search field for name. Using the CONTAINS comparison as opposed to “=” will allow your users to see partial matches.
Be sure to check the “Optional” box next to the filter line. This will enable Caldera Easy Pods to skip parts of the query that have no user input.
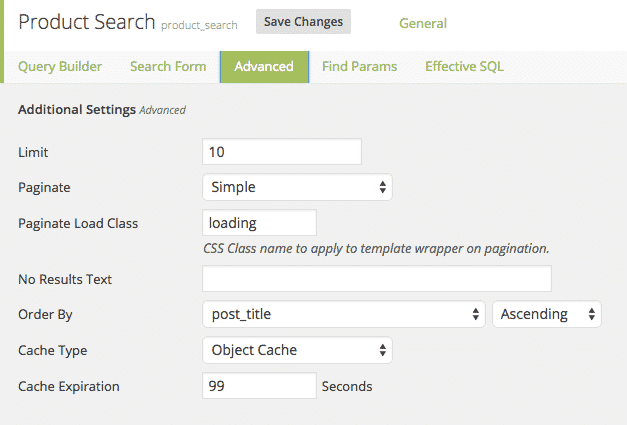
It’s optional, but at this point you should probably go to the “Advanced Tab” and set up pagination options for your result, and select which field to use for ordering.
Outputting The Search Form
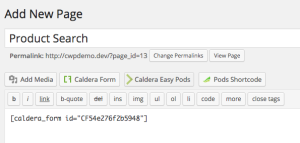 Now that your Easy Pod is ready, you just need to output it. Create a new page, and in its editor click the Easy Pods button. That will give you a list of your Easy Pods. Select the “Product Search” Easy Pod. That will insert a Caldera Forms shortcode into your post.
That’s it you’re done!
Taking It Further
Add An AJAX Add To Cart Button To Search Results
Part of the point of doing this is creating the shortest distance from customer to checkout. Adding an AJAX add to cart button to the search results is one way to shorten that path.
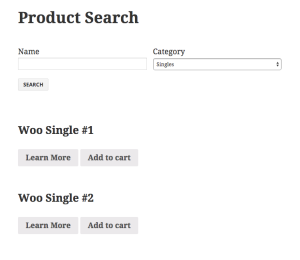
In the screenshot on the right, you can see a modified version of what I created in this tutorial, where results now have a “Learn More” and “Add To Cart” button. The Add To Cart uses the built-in JavaScript form WooCommerce to add the items to the cart without a page refresh.
The code for the template can be found in this gist. Note that I am wrapping each result in a container with the class “woocommerce” so that way the button picks up Woo’s button style. If you do this on a WooCommerce page, that class will already be on the body. Therefore that extra bit of markup will not be needed.
What Else?
While that is all you need to do, you can take this a lot further. You can add custom CSS to make the form and your results match your site’s branding further. If you add custom fields with Pods to WooCommerce, you can easily incorporate those fields into your site.
Remember the goal is to get your users to the products they need, as seamlessly as possible. So, add options, but not too many!
