
The Caldera Forms ActiveCampaign add-on allows you to add leads to your ActiveCampaign lists using WordPress forms created with Caldera Forms.
Requirements
The Caldera Forms ActiveCampaign add-on needs to be installed and activated to use the features mentioned in this this documentation.
You must also have an ActiveCampaign account.
Installation
After you have downloaded the Caldera Forms for ActiveCampaign plugin, install the plugin via WordPress’s plugin installer. Once installed, be sure to activate the plugin.
Adding an ActiveCampaign Processor to Your Form
A processor is a Caldera Forms convention that allows for a variety of useful functionality for your forms.
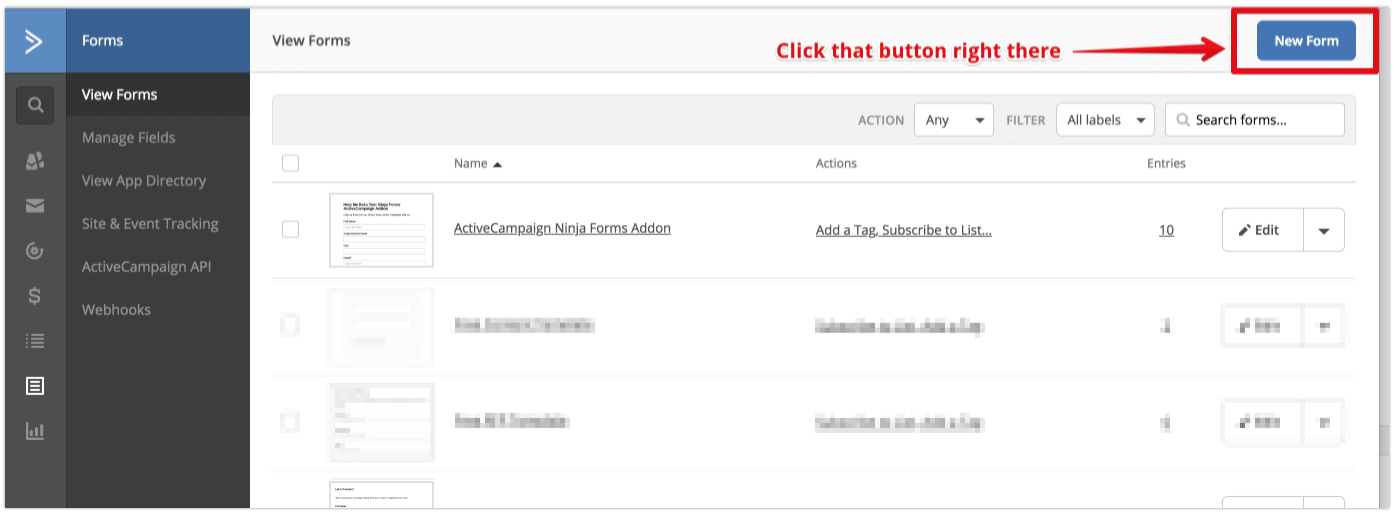
Under Caldera Forms, click New Form to create a new form — or if you already have a form you can click on Forms from the Caldera Forms Menu and from there click _edit_ on the form you wish to integrate with ActiveCampaign.
- Once you’re inside of editor for your form, click Processors from the top.
- Click the Add Processor button on the left.
- In order to successfully use Caldera Forms for ActiveCampaign plugin, you need to authenticate with ActiveCampaign using your ActiveCampaign url and API Key. See the following steps below.
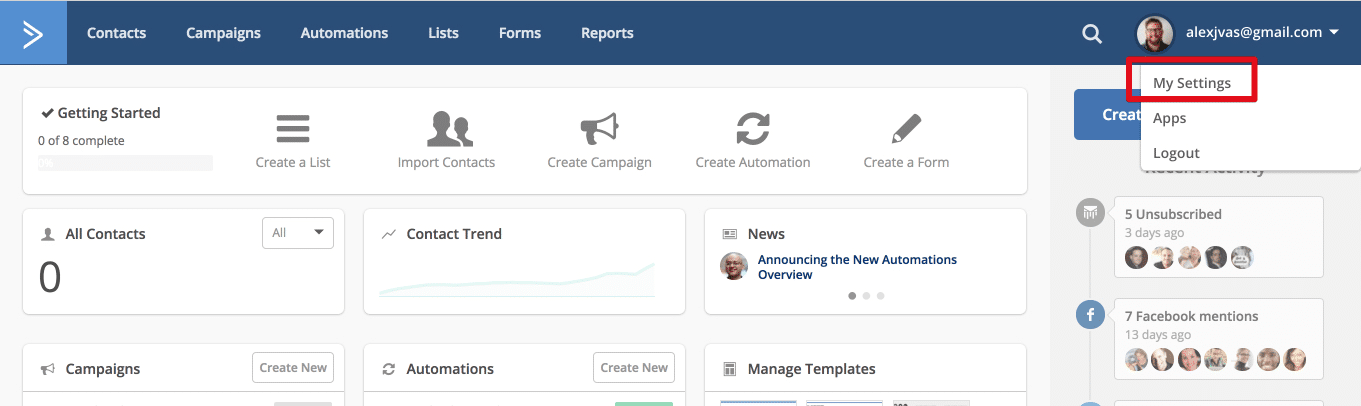
- Login to your ActiveCampaign account dashboard
- Visit the settings page of your ActiveCampaign account. You will see your account username in the upper-right-hand corner of your account dashboard. Click on it and then click settings.
- ActiveCampaign Settings
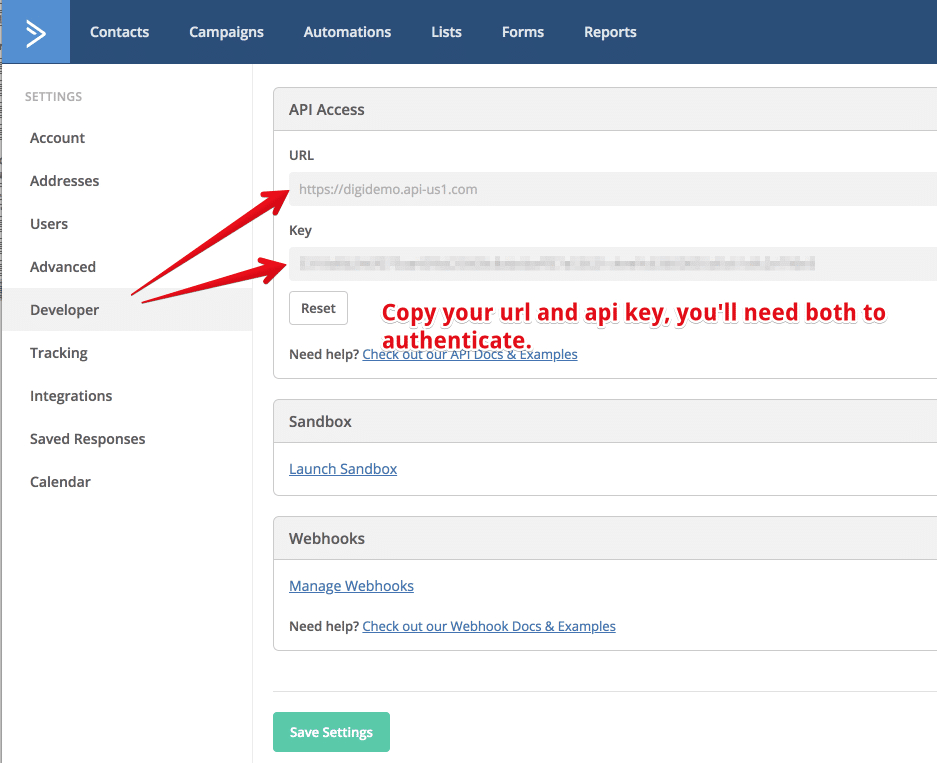
- Once in the settings area, click on Developer tab from the left. Note and copy the URL and Key values within the API Access area. You’ll need them for the next step.
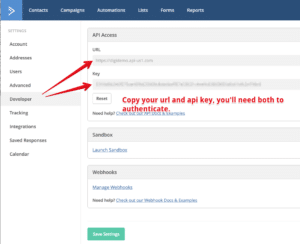
- ActiveCampaign Developer Settings and API Fields
- Go back to your WordPress with the Caldera Forms ActiveCampaign plugin installed.
- Once you have your ActiveCampaign API Key and URL and enter them into the appropriate fields — click the _Refresh Lists_ button, you’ll then see all of the lists from your ActiveCampaign account! Select the appropriate list. You may only select one list per processor.
- After you have selected your list, it’s time to assign your Caldera Form fields to your ActiveCampaign List’s fields. Simply click on any of the fields and then select the appropriate Calder Forms field to associate with it. The fields that show here are from your ActiveCampaign account, these include both AC’s built-in fields and any custom fields you define.
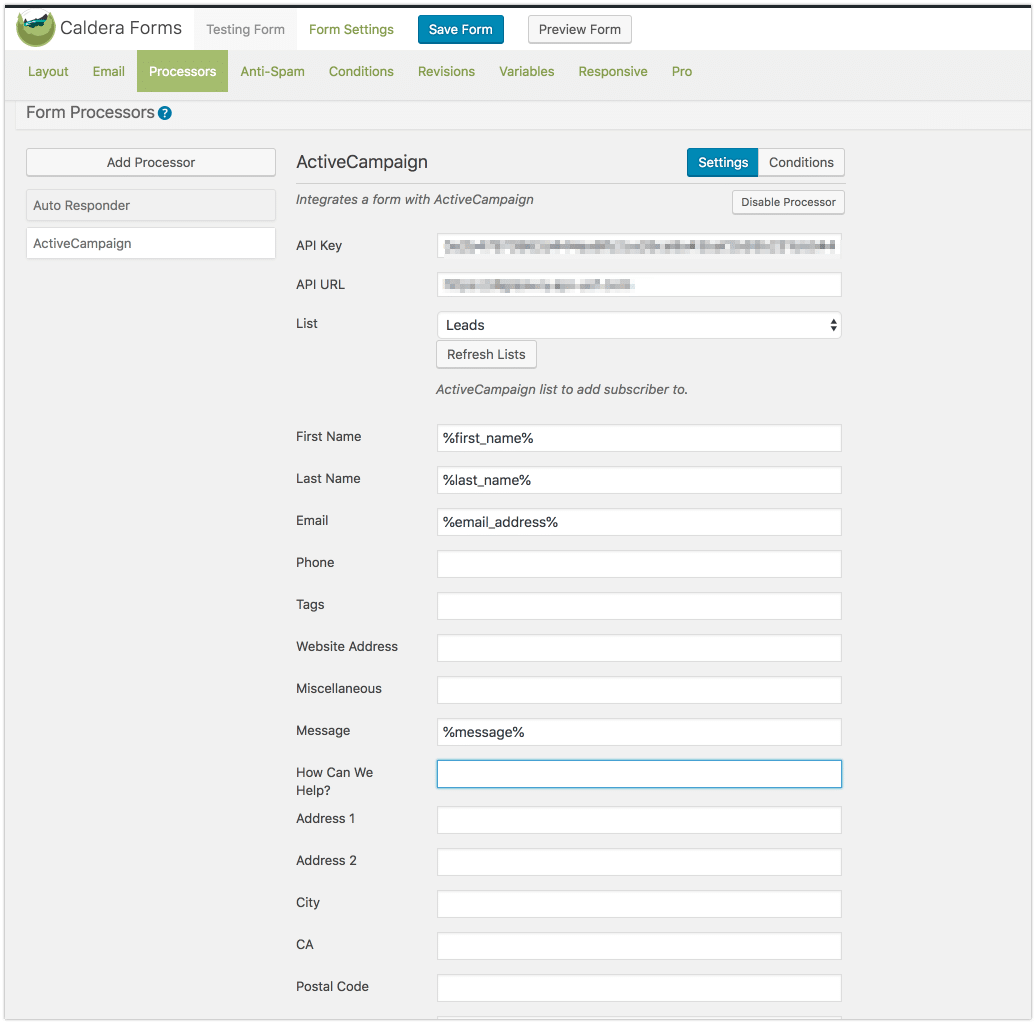
- Caldera Forms Processor Settings
Note, your users who fill out the form will be subscribed to the chosen list)
- This integration also allows you to assign tags to your Caldera Form that will be assigned to contacts who submit a form. You may assign multiple tags to a form in comma separated format.
Enabling Double Opt-in Functionality (Optional)
By default, ActiveCampaign will accept your new subscribers and enroll them to the appropriate list based on what you selected in your Caldera Forms actions. Generally, that works just fine! Depending on your needs, you may require that new subscribers confirm that they did, in fact, sign up for your list. ActiveCampaign has a double opt-in feature that you can utilize for this use case. They an interesting (read: not great) way of implementing double opt-in functionality.
- You’ll need to create a form in your ActiveCampaign account, or use an existing form from that account.
- Login to your ActiveCampaign account and then go to Forms.
- You may select an existing form or create a new form.
- Note: Make sure that your form has an action to subscribe to list and that you have a list selected.
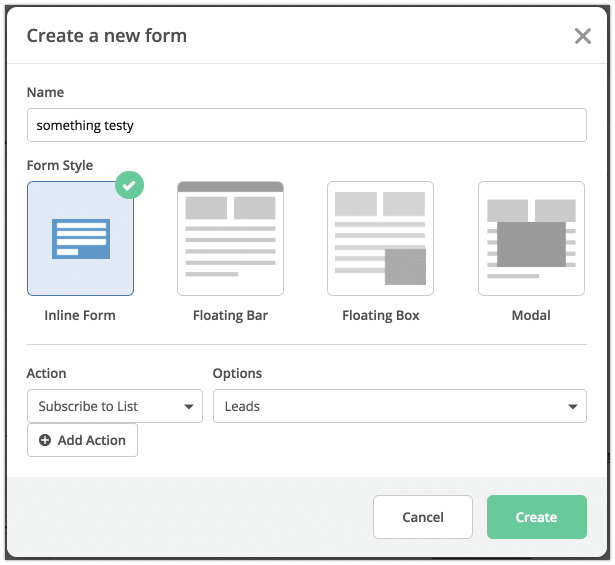
- New forms
- While in the forms screen, click the New Form button.
- Enter the title of your form
- Make sure to add at least one action Subscribe to List and assign a list to the action. This adds users to that list once they have confirmed their subscription.
- Create New ActiveCampaign Form
And then click Create
- On the next screen, you’ll be able to edit your form. Click the Options tab on the right and then simply click the gear next to the Subscribe to List action.
ActiveCampaign Form
- Existing forms
- While in the forms screen, click the Edit button next to form that you wish to configure double opt-in for.
- On the next screen, you’ll be able to edit your form. Click the Options tab on the right and then simply click the gear next to the Subscribe to List action.
- The next screen is the Edit Form Action configuration. Be sure that Opt-in Confirmation is set to on.
- Edit your opt-in email and actions as needed. And be sure to enter your business address.
- Back in your Caldera Forms Processor, scroll to the bottom and select a form from the Double Opt-in Form dropdown list.
- You will only see forms associated with the selected list.
- If you just added a new form, you will need to hit the ‘refresh list’ button again or possibly reload the screen (make sure to save your work!).
- It should go without saying, but if a user will not be added to your list if they haven’t clicked the ‘confirm my subscription’ button in the email they receive to confirm their subscription.
Kaboom! That’s it, you’re done!! When a user submits a form their data will be sent to your ActiveCampaign account and their contact will be added to the appropriate list and tagged appropriately.