Want to customize how your Caldera Forms email looks? With the Mail Templates add-on, you can do that! Add your logo, change the color of your footer, and much more. Then, use the template for any email you’re sending from Caldera Forms. Read on to learn how you can use the add-on.
First, make sure you already have the add-on. Download it here.
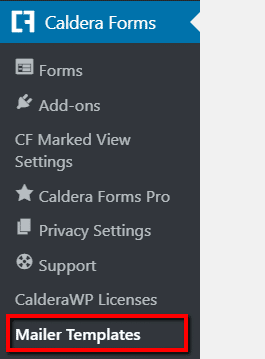
If it’s installed properly and activated, you’ll find the “Mailer Templates” submenu in your Caldera Forms menu.
Creating A New Template
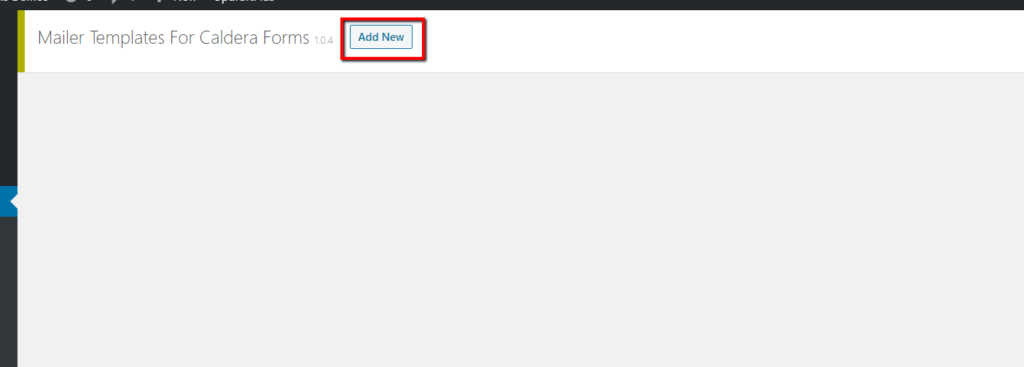
- Go to the “Mailer Templates” submenu of the Caldera Forms.
- Click the “Add New” button to create a new mail template.
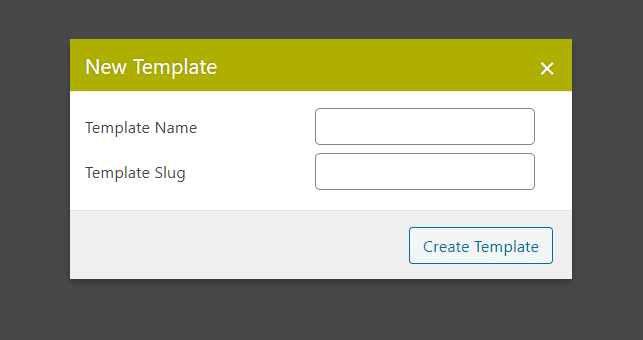
- Name your template. The name you type will be copied for the slug, but you can also change the slug without changing the name.
- Click the “Create Template” button, you’ll get your template settings with 4 tabs explained in detail below: General, Header, Body, and Footer.
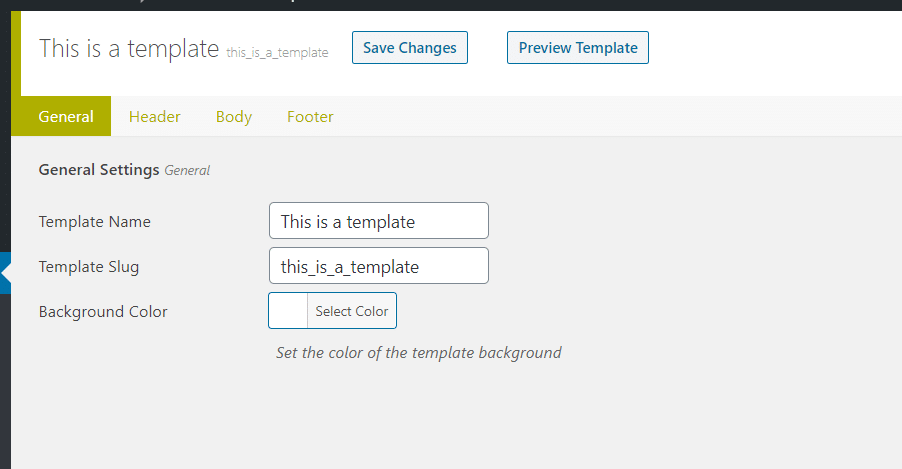
General Settings
In the first tab, General Settings, you’ll see three settings:
- Template Name – The name you set up when creating the template.
- Template Slug – The slug you set up when creating the template.
- Background Color – The background color of your email. You can choose this by inputting the color hex code or using the color picker.
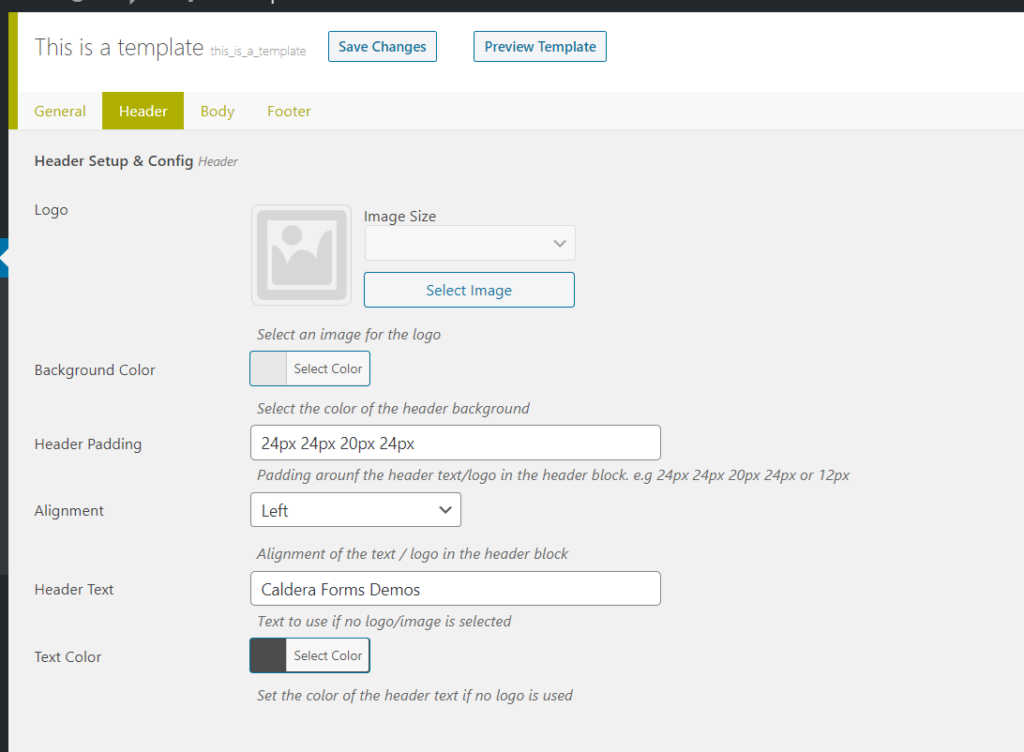
Header Settings
For the header of your email, you have many options to customize it. It can be filled with either a logo/image or a text.
- Logo – Just like adding an image to a WordPress post, you can upload your logo or choose from the Media Library of your website. You can also choose the size you want to be displayed in the email.
- Background Color – The color of the header background.
- Header Padding – Padding around the header text or logo in the header block in pixels (top, right, bottom, left).
- Alignment – The alignment of the text/logo in the header block.
- Header Text – If you don’t select an image or a logo, this text will be used in your header instead.
- Text Color – The color of your header text.
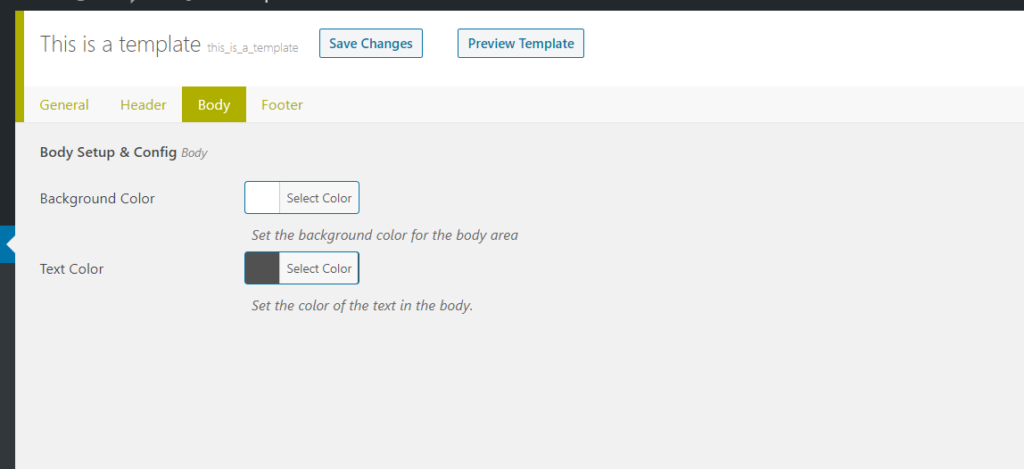
Body Settings
In the Body tab, you’ll see the options for Background Color and Text Color. Both can be picked with a hex code or the color picker.
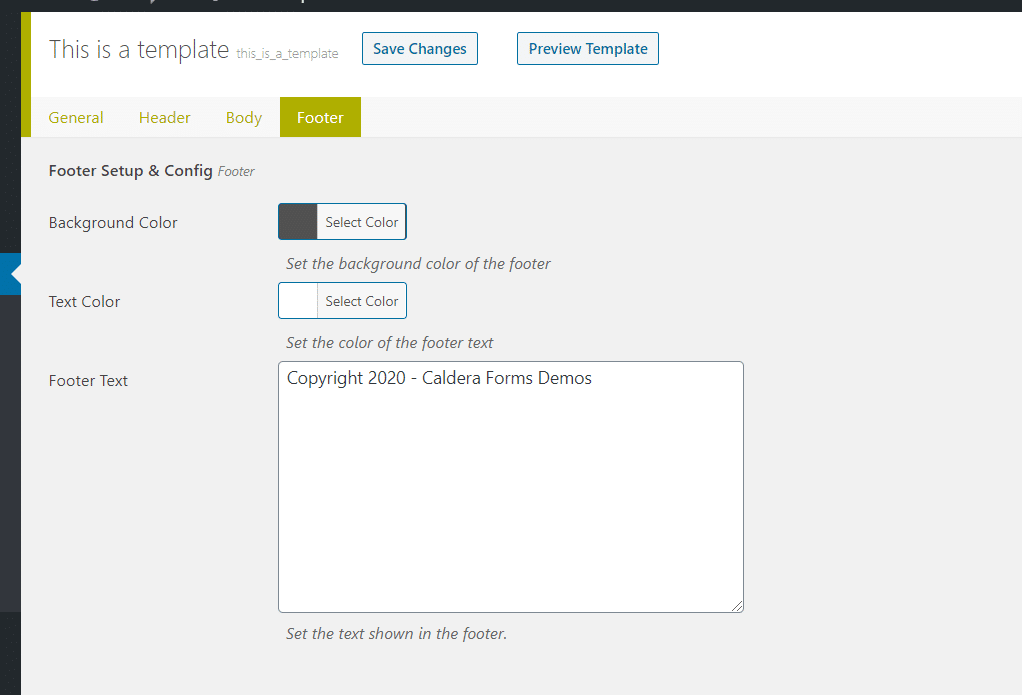
Footer Settings
In the Footer settings, you can pick the Background Color, Text Color, and modify the Footer Text.
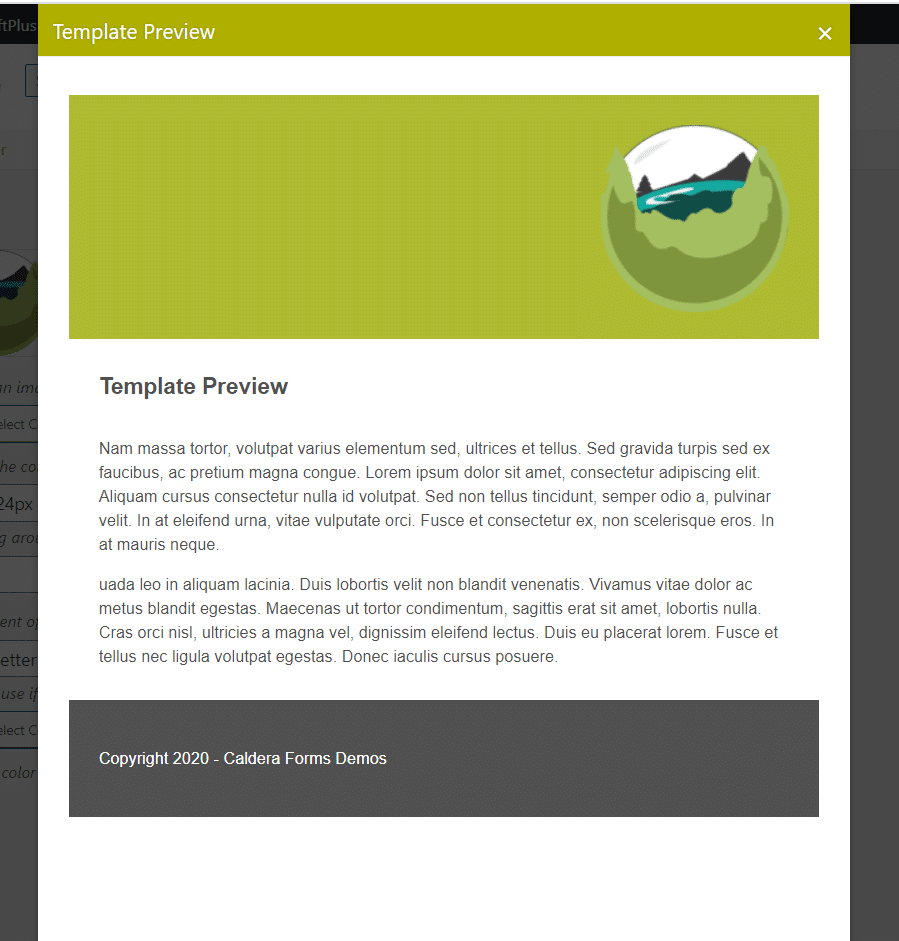
Previewing The Template
After you’ve configured all of the settings above, just click the ‘Preview Template’ button at the top. You’ll be able to see how your email would look like with the settings that you’ve chosen.
If you’re satisfied with the settings, just click ‘Save Template’. The template is now saved and can be used from your form settings.
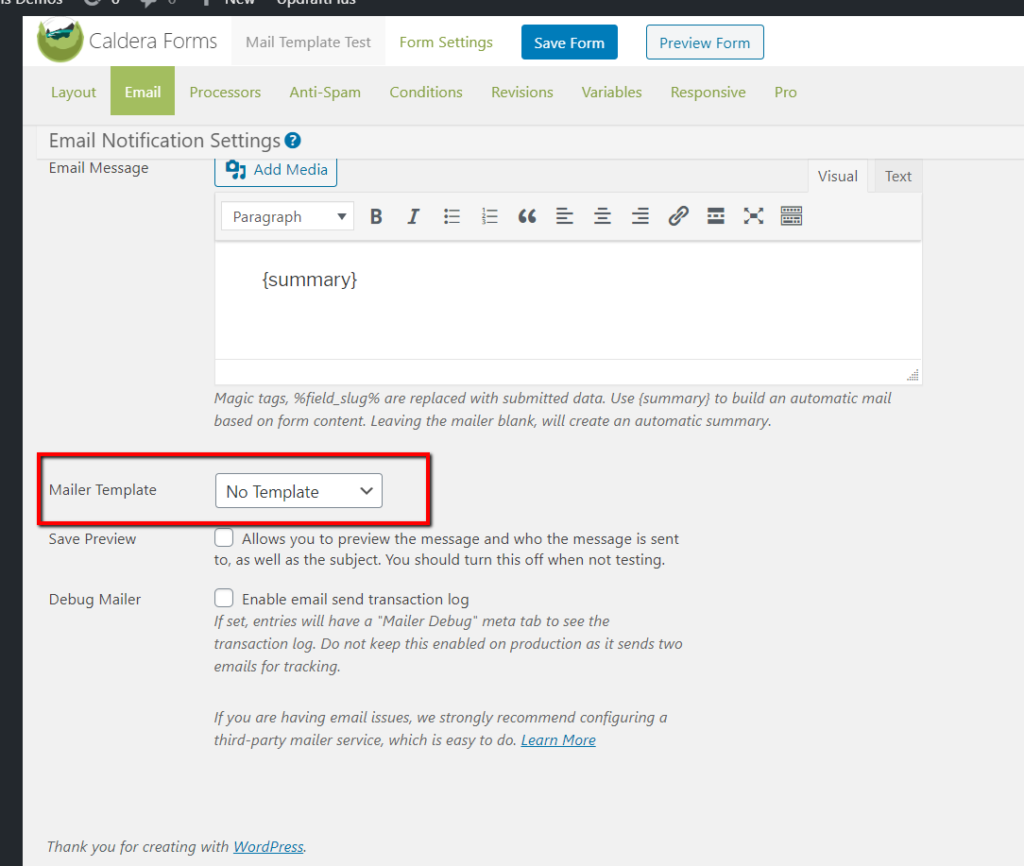
Using The Template
After you have at least one mail template created in the add-on, you’ll now be able to use it in the Email settings in your Caldera Forms.
In your form (create one if you haven’t), go to the Email tab, and scroll to the bottom of the settings page. You’ll find the ‘Mailer Template’ setting, and pick the name of the template you’ve created. Now, your email notification sent from the form will be using that template.