
Installation and Requirements
Caldera Forms Style Customizer for Divi & Extra requires the Caldera Forms plugin and Divi or Extra themes by Elegant Themes.
Install & activate the plugin through the “Plugins” menu in WordPress.
How to Use
The Customizer
 Once the plugin is installed and activated, go to the page you inserted the form you built with Caldera Forms.
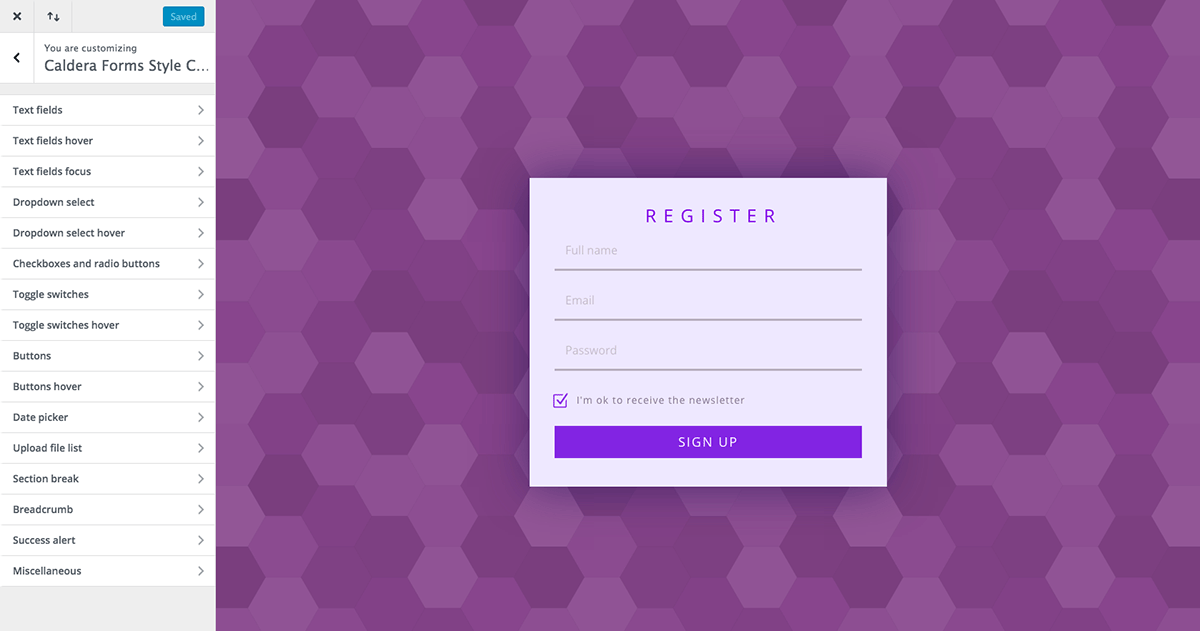
In the Toolbar at the top of the screen, click on the name of your theme (or child-theme), and then, in the dropdown, choose “Theme Customizer” or “Module Customizer” (both work). Click on “Caldera Forms Style Customizer”.
Make the changes you wish and click on the “Save & publish” button to apply your settings.
Notes
- Following fields are only customizable through the Caldera Forms layout builder: “Autocomplete” (dropdown), “Range Slider” and “Star Rating”.
- “File” field is not customizable: choose “Advanced File Uploader” instead
- Customized styles apply to all Caldera forms on the website
Tips
- To customize the “Upload File List”, click on the “Add File” button and choose at least one file to display the “Upload File List”
- To customize “Fields in error”:
- you have to marked at least one field as “Required”
- do not fill in any fields and click on the “Send” button to force errors to appear
- To customize “Success Alert”:
- fill in at least the required fields
- click on the “Send” button to validate the form and to display the success alert
Styles
CSS generated by Caldera Forms Style Customizer are not inline styles displayed in the HTML, but written on a “style.css” file located in “/wp-content/upload/CFSC-css/”.
The import / export Feature
In the WordPress admin area, navigate to Caldera Forms menu. Choose the “Styles – Import / Export”.
The “Export” button allows you to generate and download on your computer a .json file containing the settings you created when you customized your form. You’ll can use this file for a backup or to style a Caldera form on another website.
The “Import” button allows you to upload a .json file generated through Caldera Forms Style Customizer to customize your Caldera form.
- Once the file is uploaded, go to the “Caldera Forms Style Customizer” section in the WordPress customizer
- Change any value (eg: move the color picker in the “text field background color” section) to force the “Save & publish” button to display. Then, you can click on the “default” button to reset the value, before to click the “Save & publish” button to apply your imported custom styles