One of Caldera Forms’s most popular features is its free conditional logic forms. The product allows for a drag-and-drop interface to set up conditional logic. Read below to learn about the basics of conditional logic. There is also a detailed tutorial from our friends at OSTraining on Caldera Forms conditional logic that we recommend.
Also learn about complex uses of conditional logic such as complex autoresponders, calculation fields, custom animations, and customize your recipients based on user input.
Introduction To Conditional Logic
When creating a form, you want to make sure to only show and only require the necessary information. Forms with fields that are not always needed can be confusing. Conditional groups, applied to fields allow your forms to adapt to user input, as it is entered.
This screencast will show you how Caldera Forms makes creating a WordPress registration form or other type of form with lots of conditional fields simple to create. You can download an export of the form created in this screencast here.
Conditional groups are a new feature added in Caldera Forms 1.3. Conditional field logic from forms created with older versions of Caldera Forms will be automatically converted to the new system.
Using Caldera Forms Conditional Logic With Calculation Fields
Next, you will learn how to use Caldera Forms to create powerful WordPress registration forms, order forms and more. Taking advantage of the powerful conditional logic system, you can create a form that requests exactly the information you need, without cluttering up the screen with unneeded fields. Conditionals work very well with conditional logic and <a href=”https://calderaforms.com/doc/calculation-fields/”>calculation fields</a> to create customizable checkout forms.
Setting Up An Autoresponder Based On Conditional Logic
Additionally, auto responders are a powerful part of Caldera Forms. This allows you to send an automated message to a user that has submitted one of your forms. In this example, you will learn how to send an automated message to a specific recipient or multiple recipients according to user’s input.
Auto responders are automated messages that are sent once a form has been submitted successfully. You may use auto-responders to be sent to multiple users including to yourself or anyone else you’d need to send messages to.
Creating The Contact Form
In this example, we will be creating a generic contact form with the ability to CC a friend in on the message. Using conditional logic for the auto-responder will allow the user’s friend to receive an update from the contact form.
- Inside your WordPress dashboard, navigate to Caldera Forms. The Caldera Forms settings page will open, select the New Form button which is highlighted blue near the top of the screen.
- A window will popup and you may select a predesigned template. In this case we will use the Contact Form template that is provided by Caldera Forms.
- Once the form editor has loaded, we will need to add 3 additional fields –
- A radio box with the options yes or no
- An email field for a second email address
- A single line text field for the person’s full name
-

Caldera Form Conditional logic to show fields Once these three fields are added, you will need to create a condition to show these fields if the user selects yes in the radio field we’ve created. If you are uncertain how to use conditions in Caldera Forms, here is a great article that I recommend for getting started.
- Save your form.
Creating The Auto Responder Using Conditions
Once we have our form setup with conditional logic to show a second set of contact details for a user to be added to an auto responder. We then can create the second auto responder. A great use case for this feature would be to email multiple users that have purchased event tickets for a group of friends individually.
- Inside the Caldera Form editor, click the Processors tab. You will see a list of existing processors that your current form uses. Click the Add Processor button to add a new processor.
- Select the Auto Responder processor. (You may add multiple auto responders depending on the number of recipients you’d like to send it to)
-

Conditional logic for auto responder Create a condition by clicking on the Conditions toggle button and select Add Condition.
- Select Use and click on Add Conditional Group. This will create a new logic set for your condition.
- Select the radio button field that we created earlier and set the value to is yes.
- Save your form.
Now if a user fills out the form and decides to send it to a friend, an individual email will be sent to both the user and their friend.
This example is great for sites that are used for event tickets/details or if you need to CC users into the communication loop of your forms.
Using Conditional Logic To Indicate Custom Animations
Caldera Forms conditional logic allows you to hide and show fields dynamically based on user input. Using JavaScript you can bind to the events triggered by the Caldera Forms conditional logic system to create custom animations or otherwise manipulate the fields that being added or removed.
When a conditional is met and it causes fields to be shown, the “cf.add” event is triggered. When fields are hidden, the “cf.remove” event is triggered. When fields are enabled, the “cf.enable” event is triggered.
Here is an example that uses the cf.add event to cause the showing of fields to fade in slowly using <a href=”http://api.jquery.com/fadein/”>jQuery’s fadeIn() method</a>.
In this example <code>$( e.target ).find(‘.form-group’ )</code> is used to target the container wrapping the inputs and labels being shown. jQuery’s <code>hide()</code> method is being used so the elements are added to the DOM hidden and then are before being slowly faded in.
Using Conditional Logic To Indicate Recipients Based On Form Input
This processor was added in Caldera Forms 1.5
The conditional recipient processor is included in Caldera Forms. It allows you to use Caldera Forms’ conditional logic system to add recipients to the email sent by the main email notification. You can add as many of these processors as you want to a form.
Setting Up The Processor
This processor can be added to your form by going to the processors tab of the Caldera Forms editor, and clicking the Add Processor. In the processors popup, choose Conditional Recipient.
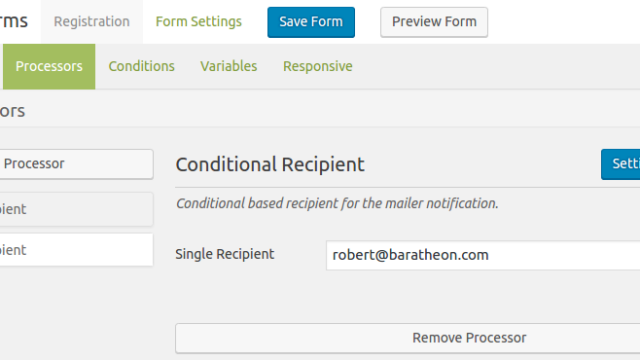
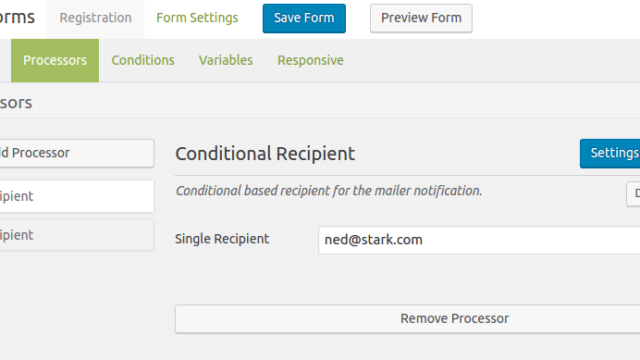
The conditional recipients processor has one setting: Single Recipient. In this setting you can put an email address or use a magic tag for a field. If you were to stop now, this would just add that email address to the recipients of the email.
The real power comes in the conditionals tab. In the conditionals tab, you can set this email address to be used, or not used, based on the values of one or more fields.
An Example
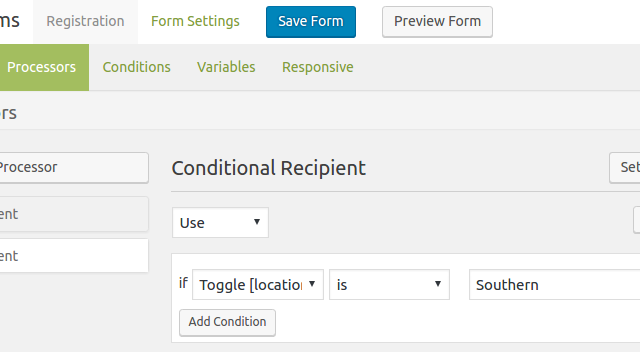
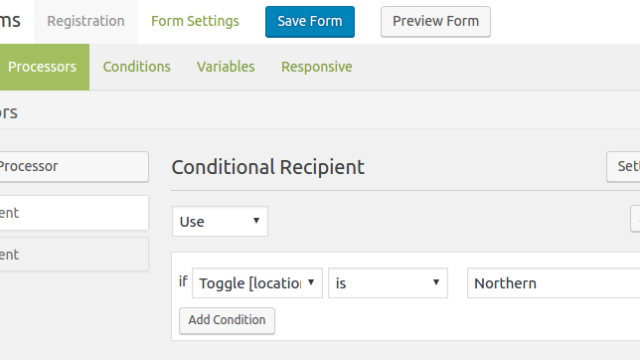
Imagine you were creating a registration form that allowed the customer to chose one of two locations in the form, and wanted to send the their details only to the location they chose. This is a perfect use for this processor.
To accomplish this, you would add two conditional recipient processors to the form. The first one, you would set the first one to run if your select field for choosing location had the first option, and then make the opposite selection in the second processor.
Conclusion
One of the reasons users love Caldera Forms is that Caldera Forms includes powerful, flexible and accessible conditional logic – with the free plugin. This and Caldera Forms’s suite of 25+ add-ons make Caldera Forms a powerful, different solution for building on WordPress.


