Important: As of version 2.0 it is required that your form is loaded via HTTPS, which requires an SSL certificate. Also, you must have a valid Google Maps API key. See this document to learn how to get the correct API key.
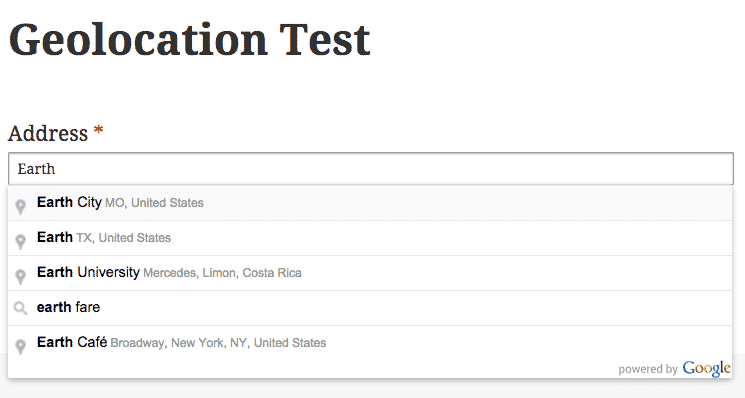
The Geolocation Field for Caldera Forms provides an easy way to turn any text field into a geolocation auto-complete field. This tutorial shows you how easy it is to set up the field and a few ways to use that data.
Setting Up The Form
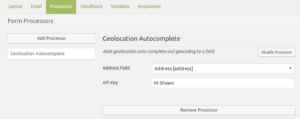
 Start by adding a text field to your form called “address.” Then click on the processors field and click the “Add Processor” button on the left side of the screen. If the Geolocation Field for Caldera Forms plugin is installed, you will be able to select it as a processor.
Once you have added the processor, you will see its settings only have one field. In this field set your address field. That’s it just add a submit button to your form and you are ready to go.
Make sure, in version 2.0 or later to add your API key in the settings.
Saving The Geolocation Data
If you are saving entries from your form in the database, the longitude, latitude, name and formatted address for the location will be saved in the entry. No additional steps are required from you to make this happen.
If you would like to use the geolocation data eleswhere, you can use the supplied magic tags for the geolocation data, or the “cf_geo_autocomplete_data” hook.
Using Magic Tags
When using this add-on, you have several new magic tags:
- {lng}
- {lat}
- {name}
- {formatted_address}
- {formatted_phone_number}
- {international_phone_number}
- {name}
- {rating}
- {url}
- {website}
- {vicinity}
- {price_level}
The first 4, lng, lat, name and formatted address should always be saved. The others are dependent on Google’s API having that data available.
These magic tags can be used to set field values, variable values, or can be used in the mailer settings.
Save As Postmeta
Combined with the Caldera Custom Fields add-on, you can add geolocation data to posts. Simply add both processors to your form, with the geo-location processor running first. Then you can create hidden fields, named for the fields you want to save latitude and longitude in, and set their values using the {lat} and {lng} shortcodes.
For example, to use Caldera Forms as a front-end submission interface for Map Builder Pro, you would create hidden fields called _gmb_lat and _gmb_lng. Click here to download an export file with this configured.
Using A Hook
Whenever someone enters data into this field, as long as you are tracking entries in your form, the data will be saved in the form entry. If you would like it to be saved elsewhere, you can use the cf_geo_autocomplete_data hook. This hook exposes both the geolocation data, and the form, as well as all POST data from form submission (sanitized) and the form as well as the field’s configuration.
The first parameter of the hook is the geolocation data. It provides the longitude and latitude of the address. In addition it provides a formatted and unformatted address.
This first example shows how to save the geolocation data into a post meta :
add_action( 'cf_geo_autocomplete_data', function( $data, $post_data, $form, $config ) {
    global $post;
    if ( is_object( $post ) ) {
        $maybe_saved_data = get_post_meta( $post->ID, 'geolocation_data' );
        if ( is_array( $maybe_saved_data ) && ! empty( $maybe_saved_data ) ) {
            $maybe_saved_data[] = $data;
            $data = $maybe_saved_data;
        }

        update_post_meta( $post->ID, 'geolocation_data', $data );
    }

}, 10, 4 );
Note that this will only work if used in post content.
The second example shows how to save geolocation data as user meta data:
add_action( 'cf_geo_autocomplete_data', function( $data, $post_data, $form, $config ) {
    $user = get_current_user_id();
    if ( 0 < ( $user ) ) {
        update_user_meta( $user, 'geolocation_data', $data );
    }

}, 10, 4 );
