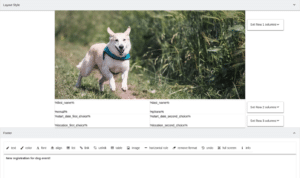
Since Caldera Forms Pro’s mission is to make emails and notifications more awesome a key component is making them more customizable and more beautiful. The Caldera Forms Layout Builder is the tool for customizing your email and PDF layouts, this doc will show you how.
Before you begin, make sure you have a Caldera Forms Pro account and have read through the getting started guide.
Creating A New Layout
Login to Caldera Forms Pro and from the left sidebar menu select the Layouts menu item. On the right side is a small form called Create New Layout. In the Layout Name setting, give this layout a meaningful name, and then click the Create button.
You will see a spinner for a second and then the new layout will be added to the list on the left side of the page. Click the Edit button under the new layout.
Using The Layout Editor
You will now see an empty layout editor. Caldera Forms Layouts are 3 rows, with up to 3 columns in each row. The layout editor is divided into column settings and global settings.
Working With Rows And Columns
Each column can be one of three types:
- Text Area – These columns let you enter static content using a WYSIWYG editor, that will be the same for every message sent.
- You can use field magic tags here, see below.
- Message Content – These columns will be dynamically filled with the message from the Caldera Forms mailer or auto-responder.
- Image – These columns will contain an image
Choosing Your Row Layout
Each of the rows can have up to three columns. In the Row Controls section you can change the layout of the row. You can choose one full width column, to have three equal-sized column layouts, or three variations on two columns.
Global Settings For The Layout
In the Layout Settings section you can make changes to the layout as a whole.
- Preview Text – This setting controls the short text that most email clients will show in their message list view after the subject. It has two options:
- Message Subject – This will use the messages subject
- Text Area – This will let you enter text to be used with all messages
- Width – This is the maximum width of the layout. Layouts are responsive, so they may show at a smaller width.
- Background Color – This is the color that will be used outside of the layout area.
Working With Columns
Each column has a Edit Column button. Click that to enter the column editor. In the column editor, there are three tabs:
- Column Content – For text area content columns, this is a WYSIWYG editor. — you can use field magic tags, see below. For image columns this is a selector for your saved images (use the Manage Images menu item to upload, delete and edit images,) and has no controls if you are using a message content type column. You can use field magic tags in text area t
- Column Style – This column lets you set column specific style for the column
- Column Type – This is where you select or change the column type.
Using Caldera Forms Magic Tags For Dynamic Content In Messages
 Email message content is crafted in one of two ways. You can use the message settings in Caldera Forms email tab or auto-responder, along with Caldera Forms magic tags the same way you always have. You can also set your subject and recipients dynamically using magic tags from inside of Caldera Forms.
If you use a message content column type, the message content sent form your site will be used there.
In text area columns, you can use field magic tags. For example, if you use a form that has a field with the slug “first_name” then, in a text area column, you can use “%first_name% for that value. Be careful, since layouts can be used with multiple forms or multiple sites. If a field is not present in the current form, the magic tag will be replaced with an empty space.
