Have you ever wanted to style your Caldera Forms but you’re just not quite sure how? Are you tired of having the same ol’ run-of-the-mill contact form on your website? Well in this tutorial, and in a few others on our blog, we’ll be sharing some code snippets that will hopefully empower you to do just that. This form will have an opaque colored background for a great customized look, and the best thing is this code can be used for your Caldera Forms regardless of what WordPress theme or framework you are using. We are using Caldera Forms’ own classes so they are independent of your theme and specific to Caldera Forms.
In this tutorial I’ll be using the Starter Contact Form that is included in Caldera Forms. What I like about this form is that it comes with sections for regular body text, most form builder plugins don’t have that feature. In most cases you need to add paragraph text separately above or to the side of the form, which is fine, but it means you can’t as easily style the entire page content in the same container like you can here.
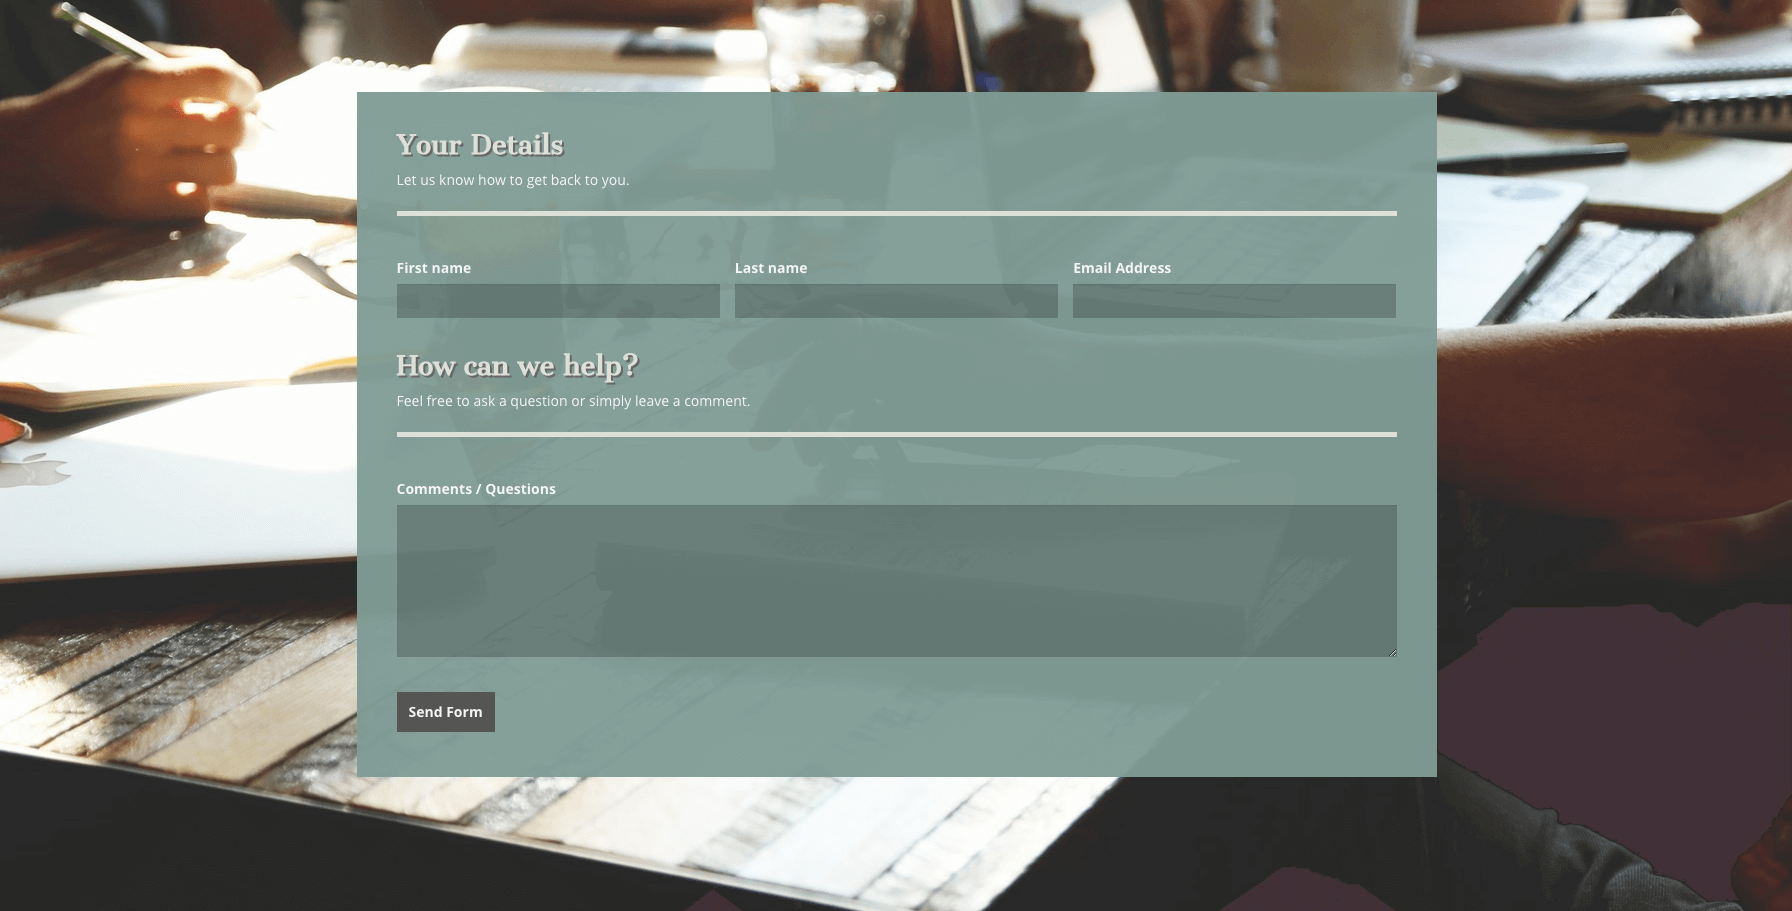
What Your Form Will Look Like
We’re going to style our form with a really nice opaque colored background. The color will make the form more unique and the high opacity will ensure good readability. We will also be changing up the headers and form fields and a couple other little areas to give it a more custom look. Because everything is sort of “housed” together we almost end up with a landing page look, or at least that’s what it makes me think of, and that’s pretty cool and different than a standard contact page.
You will notice there is a background image in this section. This is easily achievable with most WordPress themes out there, some easier than others, so you may need to figure out exactly how to get that set up on your site. If you google “your-theme-name background image section” or “your-theme-name background image page” you should hopefully find some results that can steer you in the right direction.

Getting Started – Where the heck does my CSS go?
First you need to know where this code is going to go to make it work on your site.
First option
Ideally any additional CSS should go in your child theme’s stylesheet. If you know what a child stylesheet is then most likely you know how to get to it and that’s where you can put the CSS from this post.
If you don’t know what a child stylesheet is and are not sure if you have one, don’t worry! There are other places this code can go.
Second option
The next best spot would be your theme’s Custom CSS box. Not every theme will have one of these but a lot will. For instance in the Divi theme by Elegant Themes there is a separate Custom CSS box in their theme options general settings. Here’s what it looks like:

Third option
If your theme doesn’t come with something like this STILL don’t worry!
 Head to your Customizer > Additional CSS > Custom CSS box. Remove that code that’s already there OR paste below it. Just don’t paste anything in between the /* and */ because that will basically deactivate whatever is inside.
Now for the CSS Code
Copy and paste everything into the spot you’ve chosen for your additional CSS. Notice that I’ve added comments to let you know what snippet is doing what in case you would like to edit any of the code to suit your site better.
In closing
We hope you have found this tutorial helpful and can make good use of it on your website. We plan to bring more great Caldera Forms resources your way to help you customize your forms as much as possible.