Using the Caldera Forms Mailchimp Add-on
Note: Please make sure you are on the most recent version of the Mailchimp add-on. As of v2.0, the Mailchimp processor has been significantly upgraded over prior versions.
The add-on is a Form Processor. This means you can add it to any form via the Processors tab in the form builder.
NOTE: The “Conditionals” step is optional. It can be used to set it only if the user checks a box. Not setting a conditional, the processor will be used on every submission.
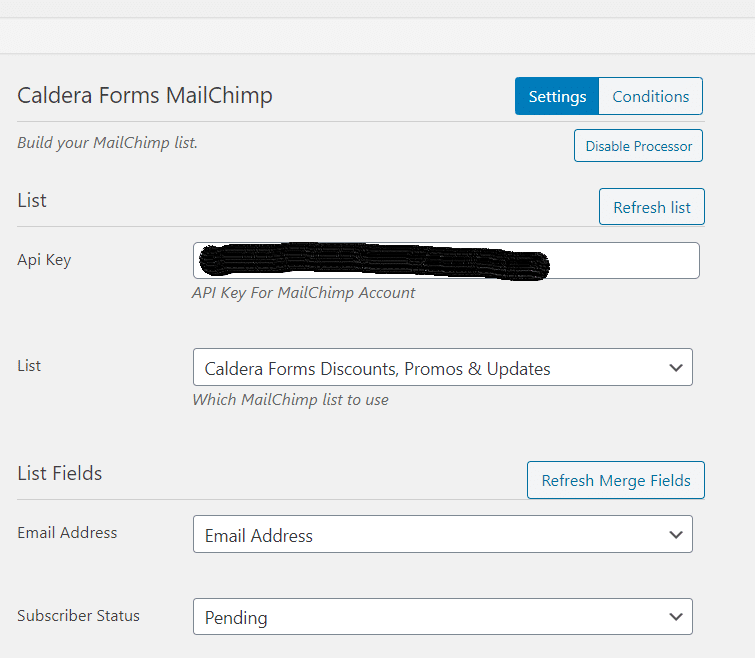
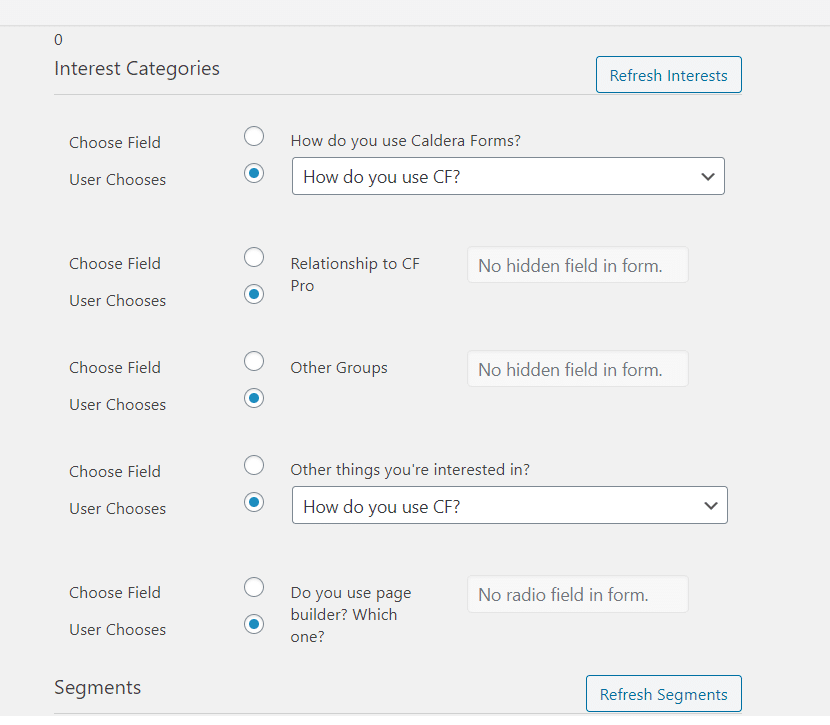
You will begin by entering your Mailchimp API key. Once you provide a valid key, Caldera Forms will find each of your lists. Once you select a list, you will see the basic and custom fields (if set) for the list. Scrolling down, you’ll also see settings for Interest Groups and Tags. Learn how to use the Interest Groups here and the Tags here.
At a minimum, you must set the email setting and the first name setting. The email setting can only be mapped to an email field or the user email magic tag. Be careful of using the current user email magic tag as it will cause the form to fail when no user is logged in.
Using Custom Mailchimp Fields
If you have added custom fields to your list in Mailchimp, when you select the list, settings for those fields will appear in the processor settings. If you have custom fields in your list, you can set their values from your Caldera Form. Please keep the following in mind:
- You can only map Caldera Forms fields to Mailchimp fields of the same type.
- If you have a dropdown field in your list, the values (not labels) of the Caldera Forms field mapped to the Mailchimp field must be exactly the same as the values (not labels) of the Mailchimp field or you will encounter errors.
Setting Subscriber Status
 Mailchimp provides for a “Double Opt-In” process. When you use this process, the subscriber is added to your list as “pending” and is sent a confirmation email with a link they must click before being subscribed to the list. The Subscriber Status setting in the Caldera Forms Mailchimp processor can be used to use or bypass double opt-in.
This field has three settings:
- Subscribed – This will add subscribers to the list. This will bypass the Mailchimp double opt-in process.
- Pending – This will make the subscriber a “pending” member of the list. They will have to complete the double opt-in process.
- Unsubscribed – This will remove the subscriber from the list. Use this for creating Mailchimp list unsubscribe forms.
Further Reading
You can also Tag users subscribing to your MailChimp account and segment them into different Interest Groups. Find out how below.


One thought on “Mailchimp – Getting Started”