First time using Caldera Forms? We’re super excited about that and want to help you get up and running with Caldera Forms as fast as possible. This is a super-abridged version of our Getting Started guide.
Before You Begin
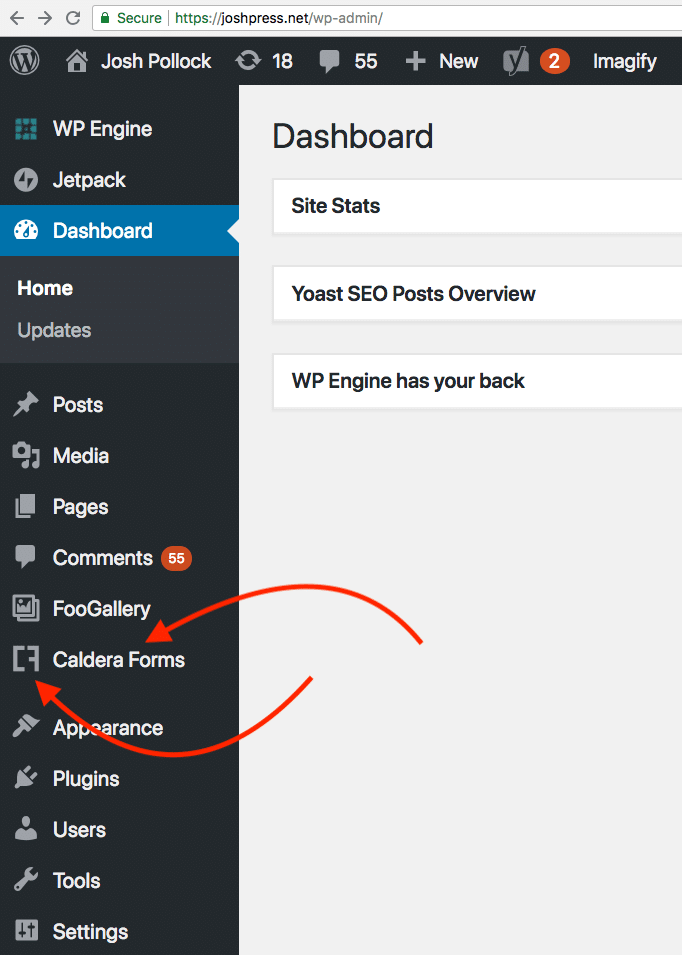
If you have Caldera Forms installed and activated already, you should see a menu item in your WordPress dashboard:
Before you can create a form with Caldera Forms, you need a WordPress site with Caldera Forms installed.
Don’t have a host yet or looking for a better one? We have some tips to help choose a quality managed host for WordPress.
Once you’re logged into your WordPress site, on the left side of the screen, you should see a menu item called “Caldera Forms”. If not, you likely do not have Caldera Forms installed.
Installing Caldera Forms From WordPress.org
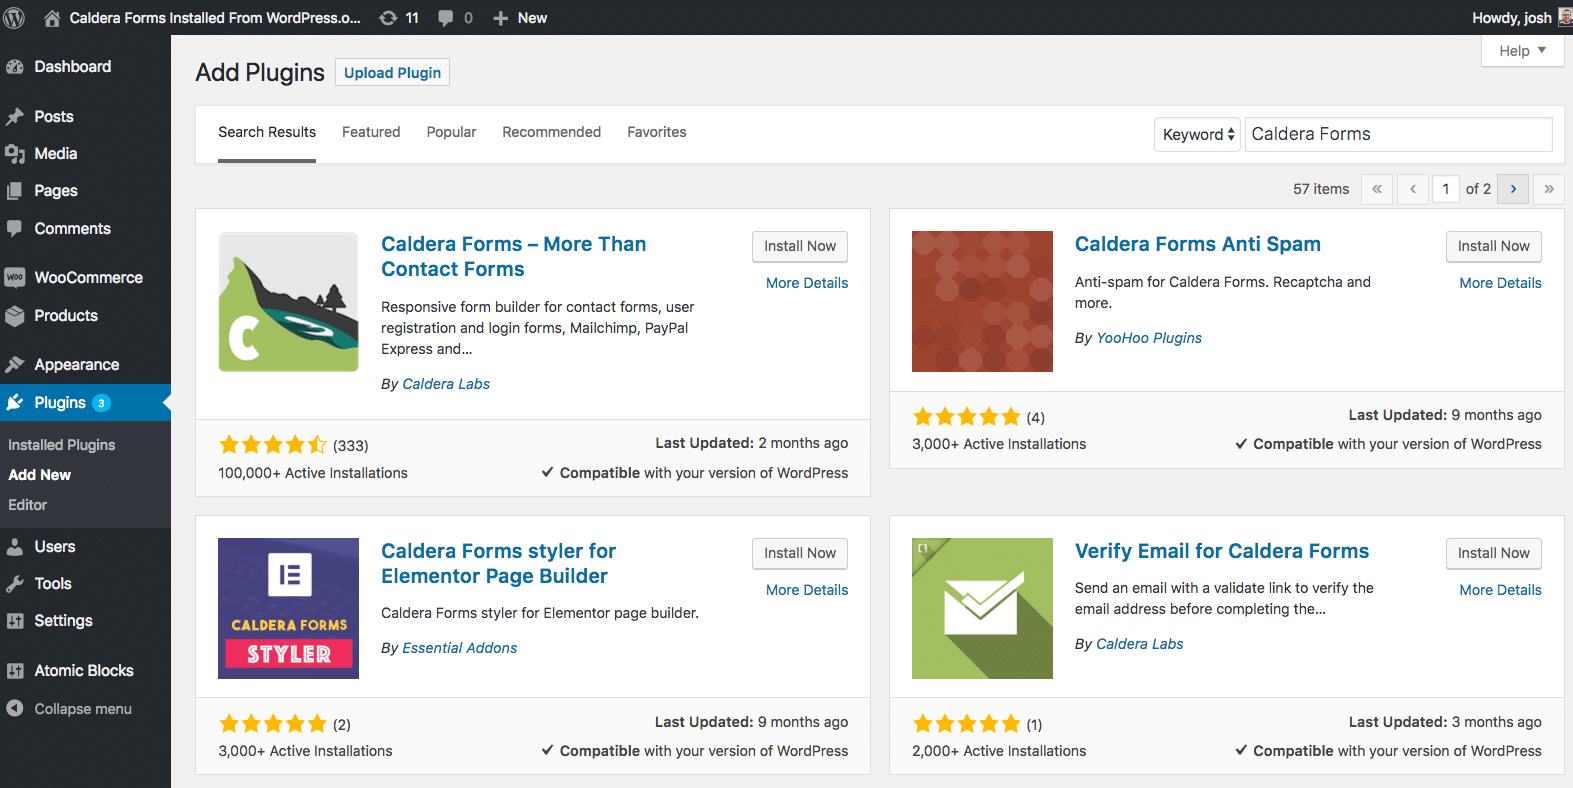 The simplest way to install Caldera Forms is to go to the menu item Plugins. Then you hover over that or click on it, you will be shown the submenu item Add New. Click that and search for “Caldera Forms”. When you find Caldera Forms, click Install and once it’s installed, the button should change to Activate. Click that.
If you have purchased a Caldera Forms Pro plan that includes add-ons and you would like to use those add-ons, you must install them as WordPress plugins. You can not install any of these paid add-ons directly through WordPress. Instead, you must download and install them manually. Learn more here.
Creating Your First Form
- On the left side of the screen, you will see a menu item called Caldera Forms.
- When you hover over that or click on it, you will be shown the submenu. Click on Forms
- When you click on Forms it will bring you to the main Caldera Forms admin screen.
- At the top of this page is a button that says New Form.
- Clicking New Form will bring up the templates that you can use to create a form.
- Select Contact Form.
- Give your form a name.
- Click the Create Form Button
This creates a basic contact form. When someone fills out this form, the site administrator will receive all of the information from the submission in an email. The person who filled out the form will get a thank you email.
If you need to customize any of that, we’ve got plenty of documentation to help:
- Choosing Which Notifications To Use With Your Caldera Form
- Caldera Forms Email Notification Settings
- Auto-Responder Processor
Showing Your Forms On Your WordPress Site
Now you have a shiny new contact form. You can click the Preview button near the top of the page to see what the form looks like on a page of your site. That’s a totally functional form, go ahead and test it out.
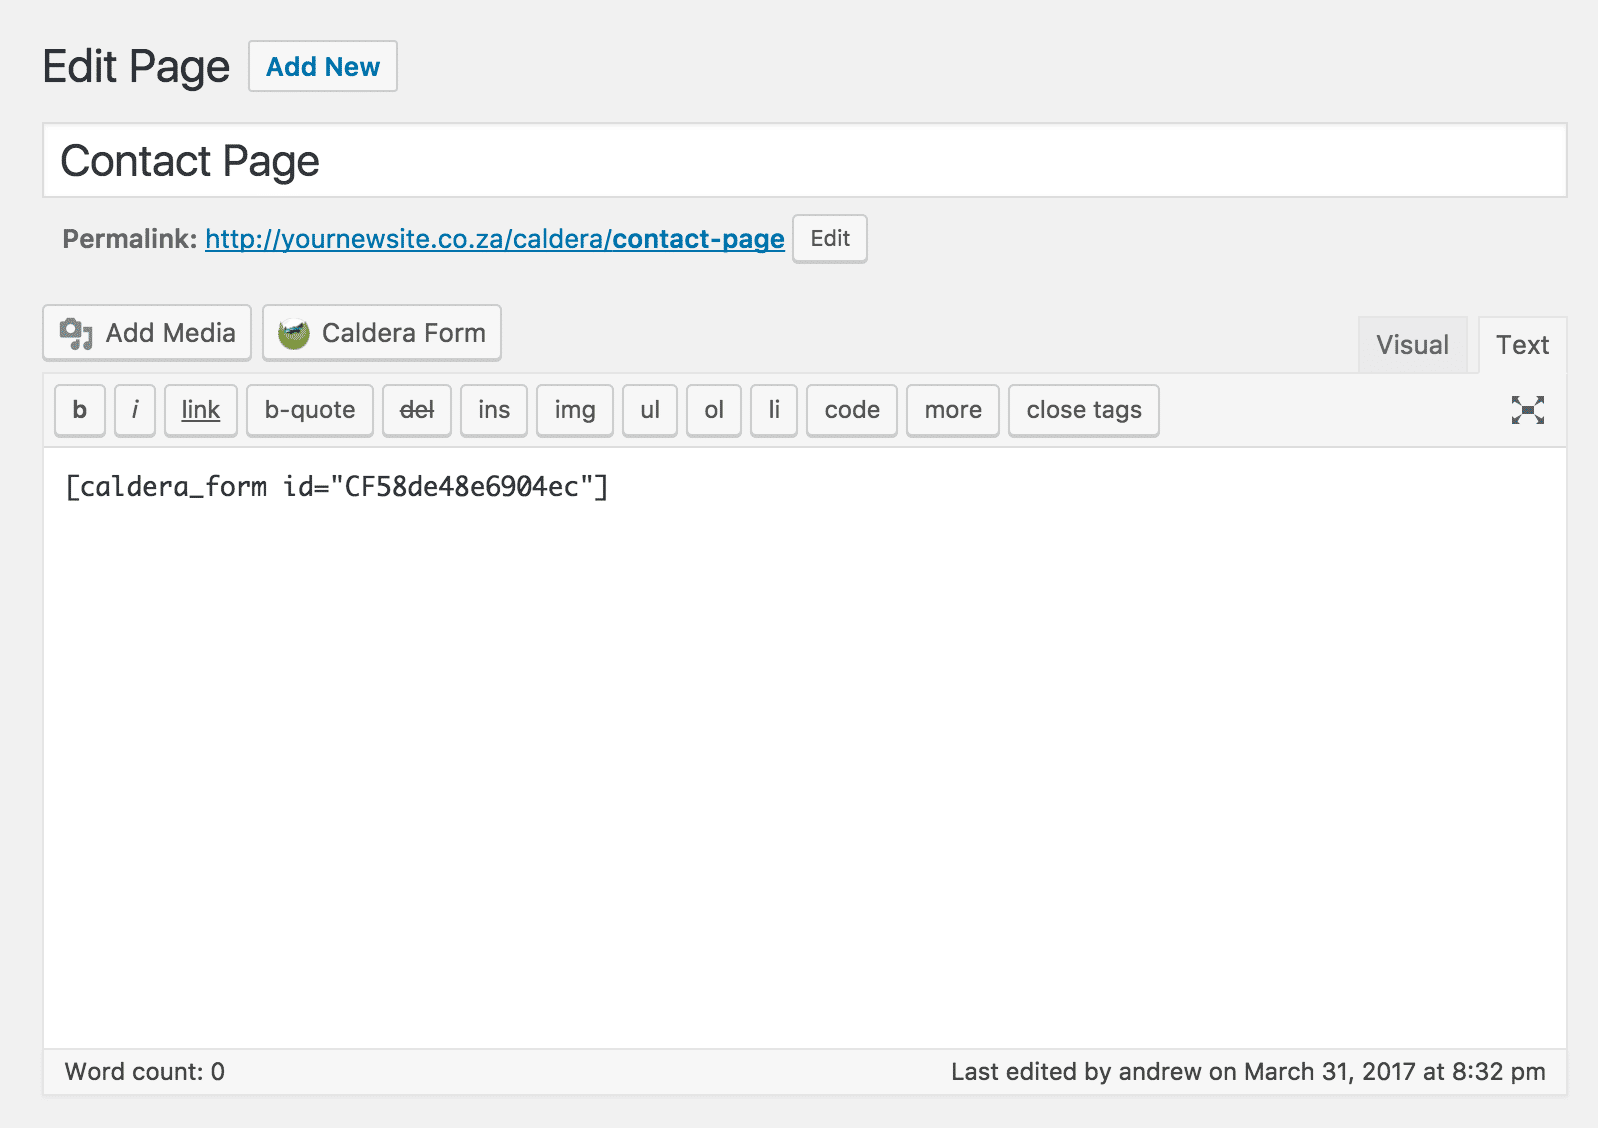
This is a preview for administrative users of your site only. You still need to put the Caldera Forms shortcode on a page or in a post. You can get the shortcode one of three ways:
- In the post editor, using the Caldera Forms button.
- In the Form Settings tab of the form editor.
- In the form list of the main Caldera Forms admin screen, using the Get Shortcode button.
Using the Caldera Forms button in the post editor, or the Gutenberg block is the simplest option. Some page builder plugins or other customizations to your WordPress site might make the button unavailable. To avoid conflicts with WooCommerce, the Caldera Forms button does not appear on any WooCommerce related pages.